
Kale Gardening Tips: Unlock the secrets to a thriving, leafy green paradise right in your backyard! Have you ever dreamt of stepping outside and harvesting fresh, vibrant kale for your salads, smoothies, or even a crispy batch of kale chips? I know I have! But maybe you’ve been intimidated, thinking it’s too difficult or time-consuming. Well, fear not, fellow gardening enthusiasts! This article is your ultimate guide to mastering the art of kale cultivation, packed with simple DIY tricks and hacks that will transform your garden into a kale-producing powerhouse.
Kale, a nutritional powerhouse, boasts a rich history dating back to ancient Greece and Rome, where it was a staple food. Over centuries, it has spread across the globe, becoming a beloved ingredient in countless cuisines. But beyond its culinary appeal, growing your own kale offers a unique connection to nature and a sense of accomplishment.
In today’s world, where access to fresh, healthy produce can be a challenge, learning effective kale gardening tips is more important than ever. Imagine bypassing the grocery store lines and enjoying organic, pesticide-free kale grown with your own two hands. Not only will you save money, but you’ll also gain a deeper understanding of where your food comes from and the satisfaction of nurturing something from seed to table. So, let’s dive in and discover the easy-to-implement DIY tricks that will have you harvesting a bountiful kale crop in no time!
DIY: Growing a Thriving Kale Garden – From Seed to Salad!
Okay, kale lovers, let’s get our hands dirty! I’m going to walk you through everything you need to know to grow a bountiful kale garden, even if you’re a complete beginner. We’ll cover starting from seed, transplanting, caring for your plants, and even dealing with those pesky pests. Get ready for some seriously delicious and nutritious homegrown kale!
Choosing Your Kale Variety
First things first, let’s talk kale varieties. There’s more to kale than just the curly stuff you see at the grocery store! Each variety has a slightly different flavor, texture, and appearance. Here are a few of my favorites:
* Curly Kale (aka Scots Kale): This is your classic kale, with tightly curled leaves. It’s hardy and holds up well in cooking.
* Lacinato Kale (aka Dinosaur Kale, Tuscan Kale, Cavolo Nero): This variety has long, dark green, almost black leaves with a slightly bumpy texture. It’s a bit milder in flavor than curly kale and great for salads or roasting.
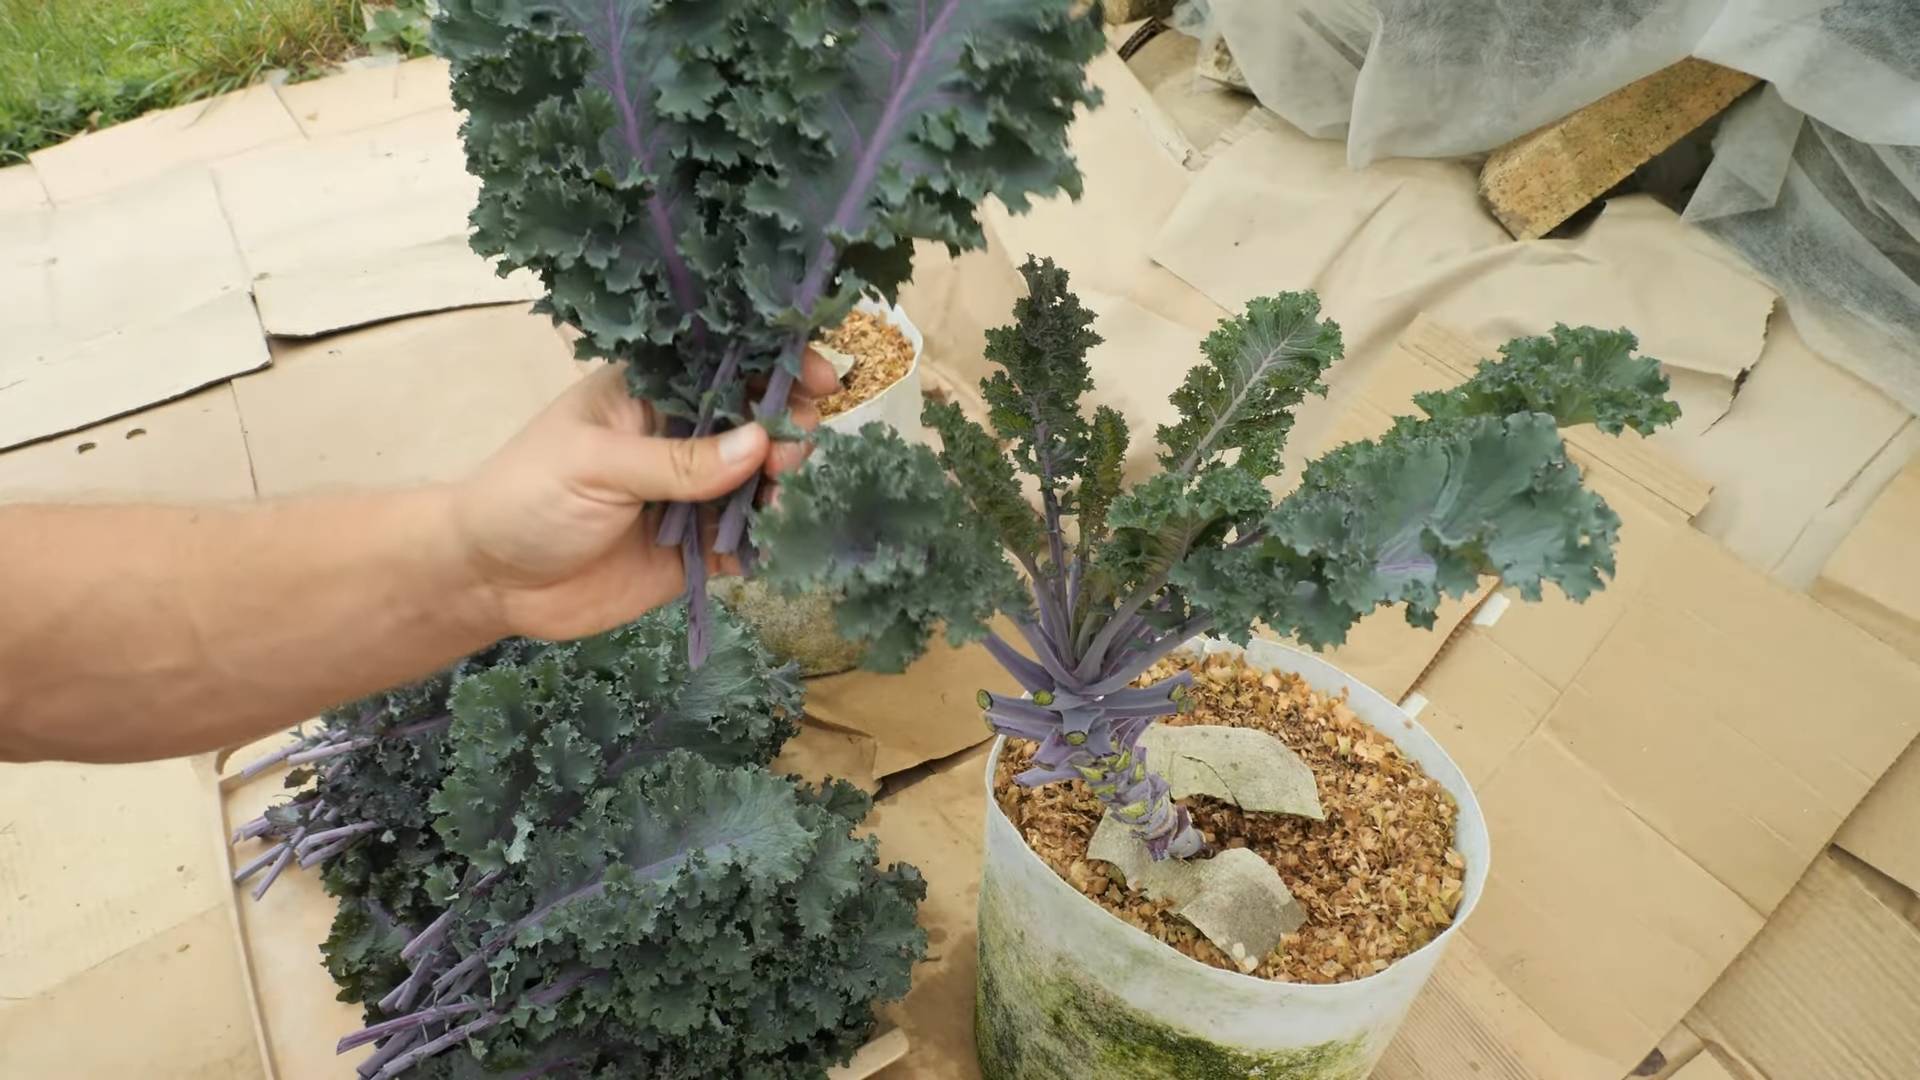
* Red Russian Kale: This kale has flat, fringed leaves with purple stems. It’s sweeter and more tender than curly kale, especially when young.
* Redbor Kale: This is a beautiful ornamental kale with deeply ruffled, purple-red leaves. It’s also edible and adds a pop of color to your garden.
* Chinese Kale (aka Gai Lan): This variety has thicker stems and broader leaves than other kales. It’s often used in Asian cuisine.
Consider your taste preferences and climate when choosing your kale varieties. Some varieties are more cold-hardy than others.
Starting Kale from Seed
Starting kale from seed is a budget-friendly way to grow a large kale patch. I usually start my seeds indoors about 4-6 weeks before the last expected frost.
* Materials You’ll Need:
* Kale seeds
* Seed starting trays or small pots
* Seed starting mix
* Spray bottle
* Grow lights (optional, but highly recommended)
* Heat mat (optional, but helpful)
Step-by-Step Instructions:
1. Prepare Your Seed Starting Trays: Fill your seed starting trays or pots with seed starting mix. Gently moisten the mix with a spray bottle. You want it damp, not soggy.
2. Sow the Seeds: Sow 2-3 kale seeds per cell or pot, about 1/4 inch deep.
3. Cover the Seeds: Lightly cover the seeds with more seed starting mix.
4. Water Gently: Water the seeds gently with a spray bottle to avoid disturbing them.
5. Provide Warmth and Light: Place the trays on a heat mat (if using) and under grow lights. If you don’t have grow lights, place them in a sunny window, but be aware that they may not get enough light and can become leggy.
6. Keep the Soil Moist: Keep the soil consistently moist, but not waterlogged. Check the soil daily and water as needed.
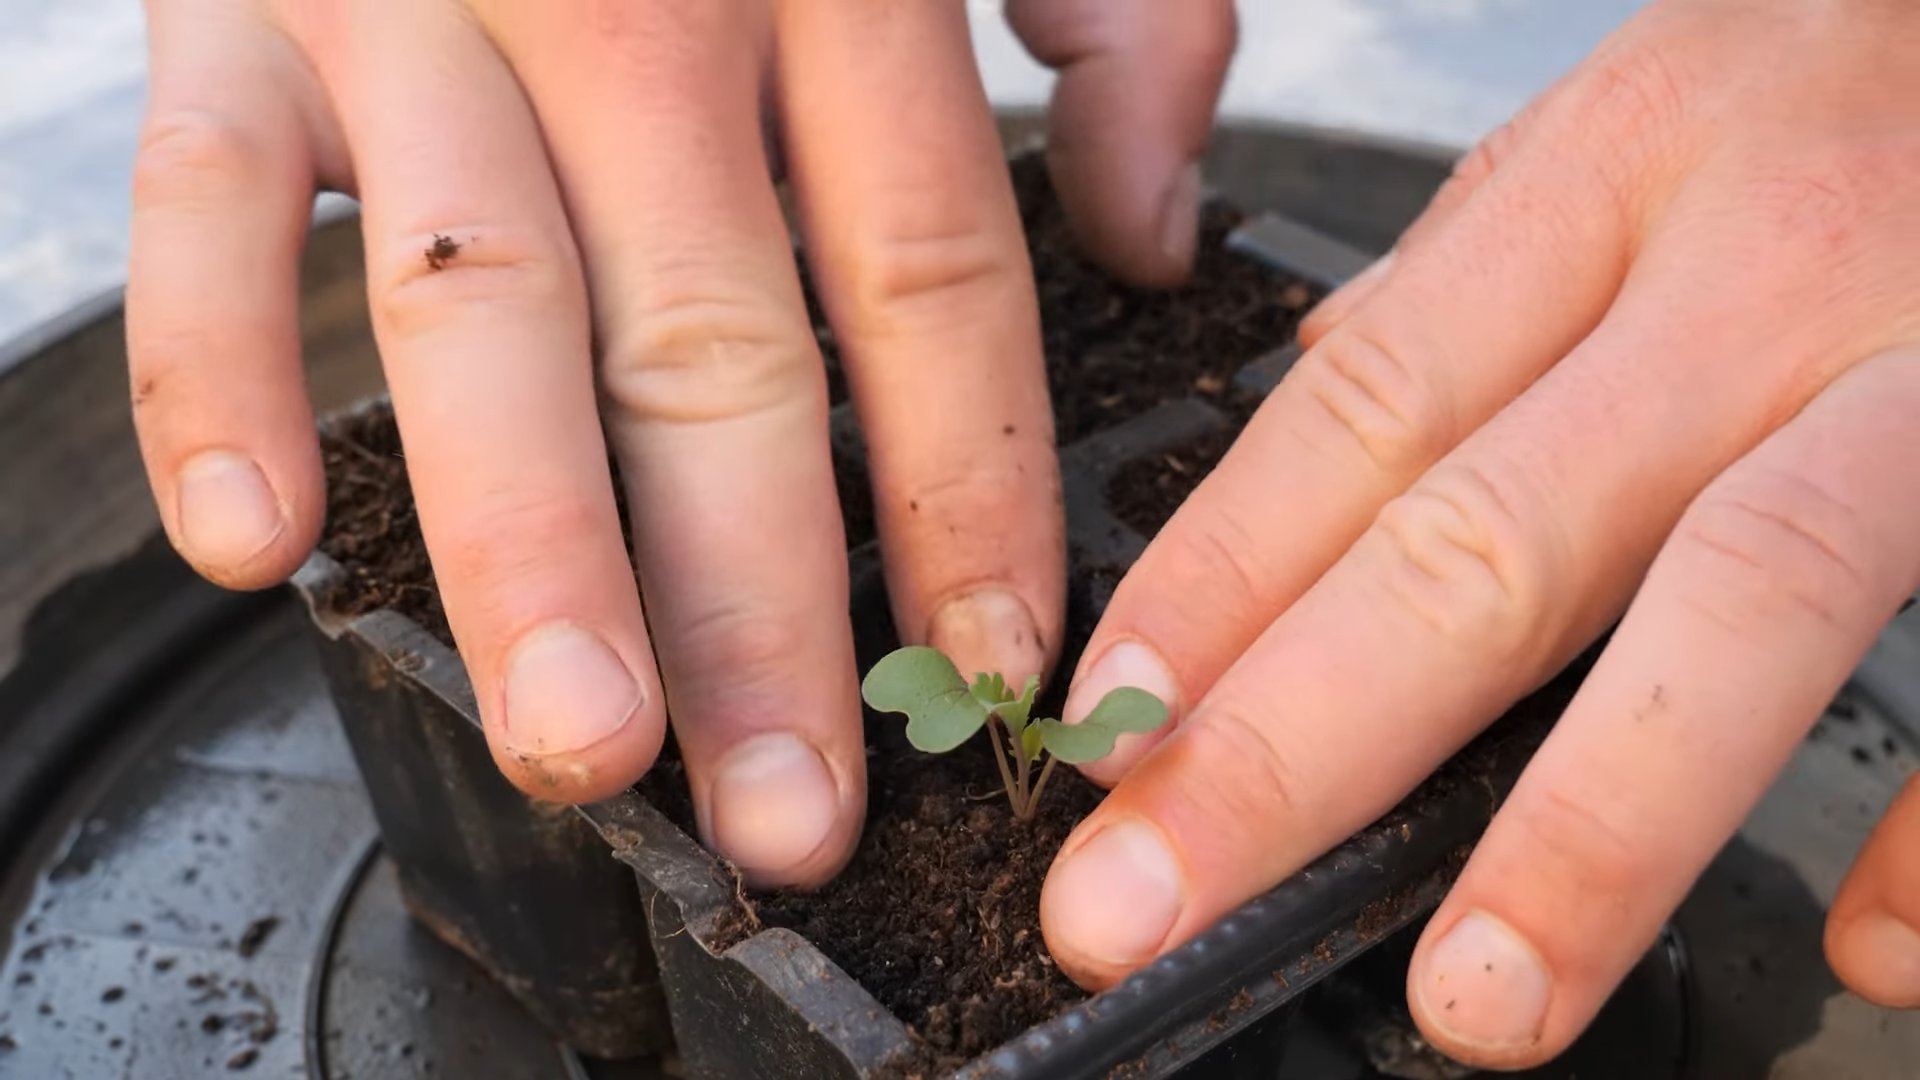
7. Thin the Seedlings: Once the seedlings have emerged and have their first true leaves (the second set of leaves), thin them to one seedling per cell or pot. Choose the strongest seedling and snip off the others at the soil line.
Transplanting Your Kale Seedlings
Once your kale seedlings have developed several sets of true leaves and the weather has warmed up, it’s time to transplant them into your garden.
* When to Transplant: Transplant your kale seedlings after the last expected frost, when the soil has warmed up to at least 50°F (10°C).
* Choosing a Location: Kale prefers full sun (6-8 hours of sunlight per day), but it can tolerate partial shade. Choose a location with well-drained soil.
* Preparing the Soil: Amend the soil with compost or other organic matter to improve drainage and fertility. Kale is a heavy feeder, so it needs nutrient-rich soil.
* Spacing: Space your kale plants 12-18 inches apart, depending on the variety. Larger varieties will need more space.
Step-by-Step Instructions:
1. Harden Off the Seedlings: Before transplanting, you need to harden off your seedlings. This means gradually exposing them to outdoor conditions to acclimate them to the sun, wind, and temperature changes. Start by placing the trays outdoors in a sheltered location for a few hours each day, gradually increasing the amount of time they spend outdoors over the course of a week.
2. Dig the Holes: Dig holes that are slightly larger than the root balls of your seedlings.
3. Remove the Seedlings from the Trays: Gently remove the seedlings from the trays or pots, being careful not to damage the roots.
4. Plant the Seedlings: Place the seedlings in the holes and backfill with soil. Gently firm the soil around the base of the plants.
5. Water Thoroughly: Water the seedlings thoroughly after planting.
6. Mulch: Apply a layer of mulch around the plants to help retain moisture, suppress weeds, and regulate soil temperature. I like to use straw or shredded leaves.
Caring for Your Kale Plants
Once your kale plants are in the ground, they’ll need regular care to thrive.
* Watering: Water your kale plants regularly, especially during dry periods. Kale needs consistent moisture to produce tender leaves. Aim for about 1 inch of water per week.
* Fertilizing: Fertilize your kale plants every 4-6 weeks with a balanced fertilizer or compost tea. Kale is a heavy feeder and needs plenty of nutrients to grow well.
* Weeding: Keep the area around your kale plants free of weeds. Weeds compete with kale for water and nutrients.
* Pruning: Prune your kale plants regularly to encourage new growth. Remove any yellowing or damaged leaves. You can also pinch off the growing tips to encourage bushier growth.
Dealing with Pests and Diseases
Kale is generally a hardy plant, but it can be susceptible to certain pests and diseases.
* Common Pests:
* Aphids: These small, sap-sucking insects can infest kale plants and cause them to become stunted and deformed. You can control aphids by spraying them with a strong stream of water, insecticidal soap, or neem oil.
* Cabbage Worms: These green caterpillars can devour kale leaves. You can control cabbage worms by handpicking them off the plants, using Bacillus thuringiensis (Bt), or covering the plants with row covers.
* Flea Beetles: These small, jumping beetles can create small holes in kale leaves. You can control flea beetles by using row covers, diatomaceous earth, or insecticidal soap.
* Cabbage Root Maggots: These maggots feed on the roots of kale plants, causing them to wilt and die. You can prevent cabbage root maggots by using row covers or applying beneficial nematodes to the soil.
* Common Diseases:
* Downy Mildew: This fungal disease can cause yellow spots on kale leaves. You can prevent downy mildew by providing good air circulation, avoiding overhead watering, and applying a fungicide if necessary.
* Clubroot: This soilborne disease can cause swollen, distorted roots. You can prevent clubroot by rotating your crops, amending the soil with lime, and using disease-resistant varieties.
My Pest Control Arsenal:
I’m a big believer in organic pest control. Here are a few of my go-to methods:
1. Handpicking: For larger pests like cabbage worms, I simply pick them off the plants and drop them into a bucket of soapy water. It’s a bit tedious, but it’s effective!
2. Insecticidal Soap: This is a great all-purpose insecticide that’s safe for use on edible plants. I spray it on aphids, flea beetles, and other soft-bodied insects.
3. Neem Oil: Neem oil is another effective organic insecticide and fungicide. It can be used to control a wide range of pests and diseases.
4. Diatomaceous Earth (DE): This is a natural powder made from fossilized diatoms. It’s effective against crawling insects like flea beetles and slugs. Just sprinkle it around the base of your plants.
5. Row Covers: These lightweight fabric covers can be used to protect your kale plants from pests like cabbage worms and flea beetles.
Harvesting Your Kale
You can start harvesting kale leaves as soon as they are large enough to eat. I usually start harvesting when the leaves are about 4-6 inches long.
* How to Harvest: Harvest kale leaves by cutting them off at the base of the plant. You can harvest individual leaves or cut off the entire plant.
* Harvesting Technique
Conclusion
So, there you have it! Mastering the art of growing your own kale isn’t just about planting seeds and hoping for the best; it’s about understanding the plant’s needs and employing simple, effective DIY tricks to maximize your yield and enjoy the freshest, most nutritious greens imaginable. We’ve explored how to create nutrient-rich soil amendments from kitchen scraps, build protective barriers against pests using readily available materials, and even propagate new kale plants from existing ones, all without breaking the bank.
Why is this DIY approach a must-try? Because it empowers you to take control of your food source, reduce your reliance on store-bought produce (which can often be laden with pesticides), and connect with nature in a deeply satisfying way. Plus, the taste of homegrown kale, nurtured with your own hands, is simply unparalleled. It’s sweeter, more tender, and bursting with flavor that you just can’t find in commercially grown varieties.
But the benefits extend beyond just taste and cost savings. By embracing these DIY kale gardening tips, you’re also contributing to a more sustainable lifestyle. You’re reducing waste by composting kitchen scraps, minimizing your carbon footprint by growing your own food locally, and creating a healthier environment for yourself and your community.
Ready to take your kale gardening to the next level? Consider experimenting with different varieties of kale, such as Lacinato (dinosaur kale), Red Russian, or Curly kale, to discover your favorites. You can also try companion planting, pairing your kale with herbs like rosemary or thyme to deter pests naturally. Another variation is to explore different growing methods. While we’ve focused on traditional garden beds, kale also thrives in raised beds, containers, and even hydroponic systems. Don’t be afraid to get creative and adapt these techniques to suit your specific space and resources.
And remember, gardening is a journey, not a destination. There will be successes and setbacks along the way, but each experience is an opportunity to learn and grow. So, embrace the challenge, get your hands dirty, and enjoy the fruits (or rather, the greens!) of your labor.
We’re confident that these DIY kale gardening tips will transform your gardening experience and help you cultivate a thriving kale patch. Now, it’s your turn! We encourage you to try these techniques in your own garden and share your results with us. Post photos of your bountiful kale harvests on social media using #DIYKaleGardening and tell us about your successes, challenges, and any variations you’ve discovered. We can’t wait to see what you create!
Frequently Asked Questions (FAQ)
Q: What is the best time of year to plant kale?
A: Kale is a cool-season crop, which means it thrives in cooler temperatures. The best time to plant kale depends on your climate. In areas with mild winters, you can plant kale in the fall for a winter harvest. In colder climates, plant kale in early spring, a few weeks before the last expected frost. You can also start kale seeds indoors 6-8 weeks before the last frost and transplant them outdoors once the weather warms up. For a continuous harvest, consider succession planting, sowing new seeds every few weeks.
Q: How much sunlight does kale need?
A: Kale needs at least 6 hours of sunlight per day to thrive. While it can tolerate some shade, especially in hotter climates, insufficient sunlight can result in leggy, less productive plants. Choose a sunny location in your garden for your kale patch. If you’re growing kale indoors, use grow lights to supplement natural sunlight.
Q: What kind of soil is best for growing kale?
A: Kale prefers well-drained soil that is rich in organic matter. The ideal soil pH for kale is between 6.0 and 7.5. Before planting, amend your soil with compost, aged manure, or other organic materials to improve its fertility and drainage. You can also add lime to raise the pH of acidic soils. Regularly test your soil to ensure it has the proper nutrient balance for optimal kale growth.
Q: How often should I water kale?
A: Kale needs consistent moisture to thrive, especially during hot, dry weather. Water your kale plants deeply whenever the top inch of soil feels dry to the touch. Avoid overwatering, as this can lead to root rot. Mulching around your kale plants can help retain moisture and suppress weeds. Drip irrigation is an efficient way to water kale, as it delivers water directly to the roots.
Q: What are some common pests and diseases that affect kale?
A: Common pests that affect kale include aphids, cabbage worms, flea beetles, and slugs. Diseases that can affect kale include black rot, clubroot, and downy mildew. To prevent pest and disease problems, practice good garden hygiene, such as removing plant debris and weeds. Use row covers to protect your kale plants from pests. If you encounter pest or disease problems, treat them promptly with organic pesticides or fungicides. Crop rotation can also help prevent soilborne diseases.
Q: How do I harvest kale?
A: You can start harvesting kale leaves once they reach a usable size, typically about 4-6 inches long. Harvest the outer leaves first, leaving the inner leaves to continue growing. You can harvest kale leaves continuously throughout the growing season. To harvest, simply cut or snap off the leaves near the base of the plant. Avoid damaging the central bud, as this will allow the plant to continue producing new leaves.
Q: Can I grow kale in containers?
A: Yes, kale can be grown successfully in containers. Choose a container that is at least 12 inches deep and wide to provide enough room for the roots to grow. Use a well-draining potting mix and water regularly. Place the container in a sunny location. You may need to fertilize your container-grown kale more frequently than kale grown in the ground.
Q: How do I store kale after harvesting?
A: To store kale after harvesting, wash the leaves thoroughly and dry them completely. Wrap the kale leaves in a paper towel and store them in a plastic bag in the refrigerator. Kale can be stored in the refrigerator for up to a week. You can also freeze kale for longer storage. To freeze kale, blanch the leaves in boiling water for 2 minutes, then plunge them into ice water. Drain the kale and squeeze out any excess water. Place the kale in freezer bags and store them in the freezer for up to a year.
Q: Is kale a good source of nutrients?
A: Yes, kale is an excellent source of nutrients. It is rich in vitamins A, C, and K, as well as minerals like calcium, potassium, and iron. Kale is also a good source of fiber and antioxidants. Eating kale regularly can help improve your overall health and well-being.
Q: Can I eat the stems of kale?
A: Yes, you can eat the stems of kale, but they can be tough and fibrous. To make them more palatable, remove the leaves from the stems and chop the stems into small pieces. You can then sauté, steam, or roast the stems along with other vegetables. Alternatively, you can add the kale stems to soups or stews.
Leave a Comment