
Growing Purple Bush Beans can seem like a magical feat, transforming your garden into a vibrant tapestry of color and flavor! Have you ever dreamt of plucking deep purple beans straight from your backyard, ready to be tossed into a fresh salad or steamed to perfection? Well, dream no more! This DIY guide is your key to unlocking the secrets of cultivating these beautiful and nutritious legumes right at home.
Beans, in general, have a rich history, dating back thousands of years and playing a vital role in diets across the globe. From ancient civilizations in the Americas to traditional European cuisines, beans have been a staple food source. But growing purple bush beans adds a unique twist to this historical narrative, offering not only sustenance but also a delightful visual appeal.
In today’s world, where we’re increasingly conscious of where our food comes from, and the desire to eat healthier, knowing how to grow your own food is becoming more and more important. Plus, who doesn’t love a little DIY project? This guide will provide you with simple, easy-to-follow steps, ensuring even beginner gardeners can successfully cultivate a thriving crop of purple bush beans. Imagine the satisfaction of serving a meal featuring ingredients you nurtured from seed to table! Let’s get started and transform your garden into a purple paradise!
Growing Purple Bush Beans: A DIY Guide from Seed to Table
Hey there, fellow gardeners! I’m so excited to share my experience growing purple bush beans. They’re not only delicious but also add a vibrant splash of color to your garden. This guide will walk you through every step, from choosing the right seeds to harvesting your beautiful, edible treasures. Let’s get started!
Choosing Your Seeds and Preparing the Soil
Before we even think about planting, let’s talk about the foundation of any successful garden: the seeds and the soil.
* Seed Selection: Look for reputable seed companies that offer purple bush bean varieties. Some popular choices include ‘Royal Burgundy,’ ‘Purple Queen,’ and ‘Amethyst.’ I personally love ‘Royal Burgundy’ because they’re super productive and the color is just stunning. Make sure the seeds are relatively fresh for the best germination rates.
* Soil Preparation: Bush beans thrive in well-drained soil that’s rich in organic matter. Before planting, I always amend my soil with compost. This not only improves drainage but also provides essential nutrients.
* Sunlight: Purple bush beans need at least 6-8 hours of sunlight per day. Choose a sunny spot in your garden where they’ll get plenty of light.
* Soil pH: Aim for a soil pH between 6.0 and 7.0. You can test your soil using a home testing kit or send a sample to your local agricultural extension office. If your soil is too acidic, you can add lime to raise the pH. If it’s too alkaline, you can add sulfur to lower it.
Planting Your Purple Bush Beans
Now for the fun part 鈥?getting those seeds in the ground!
1. Timing is Key: Purple bush beans are warm-season crops, so wait until the danger of frost has passed before planting. Soil temperature should be at least 60掳F (15掳C). I usually plant mine a couple of weeks after the last expected frost.
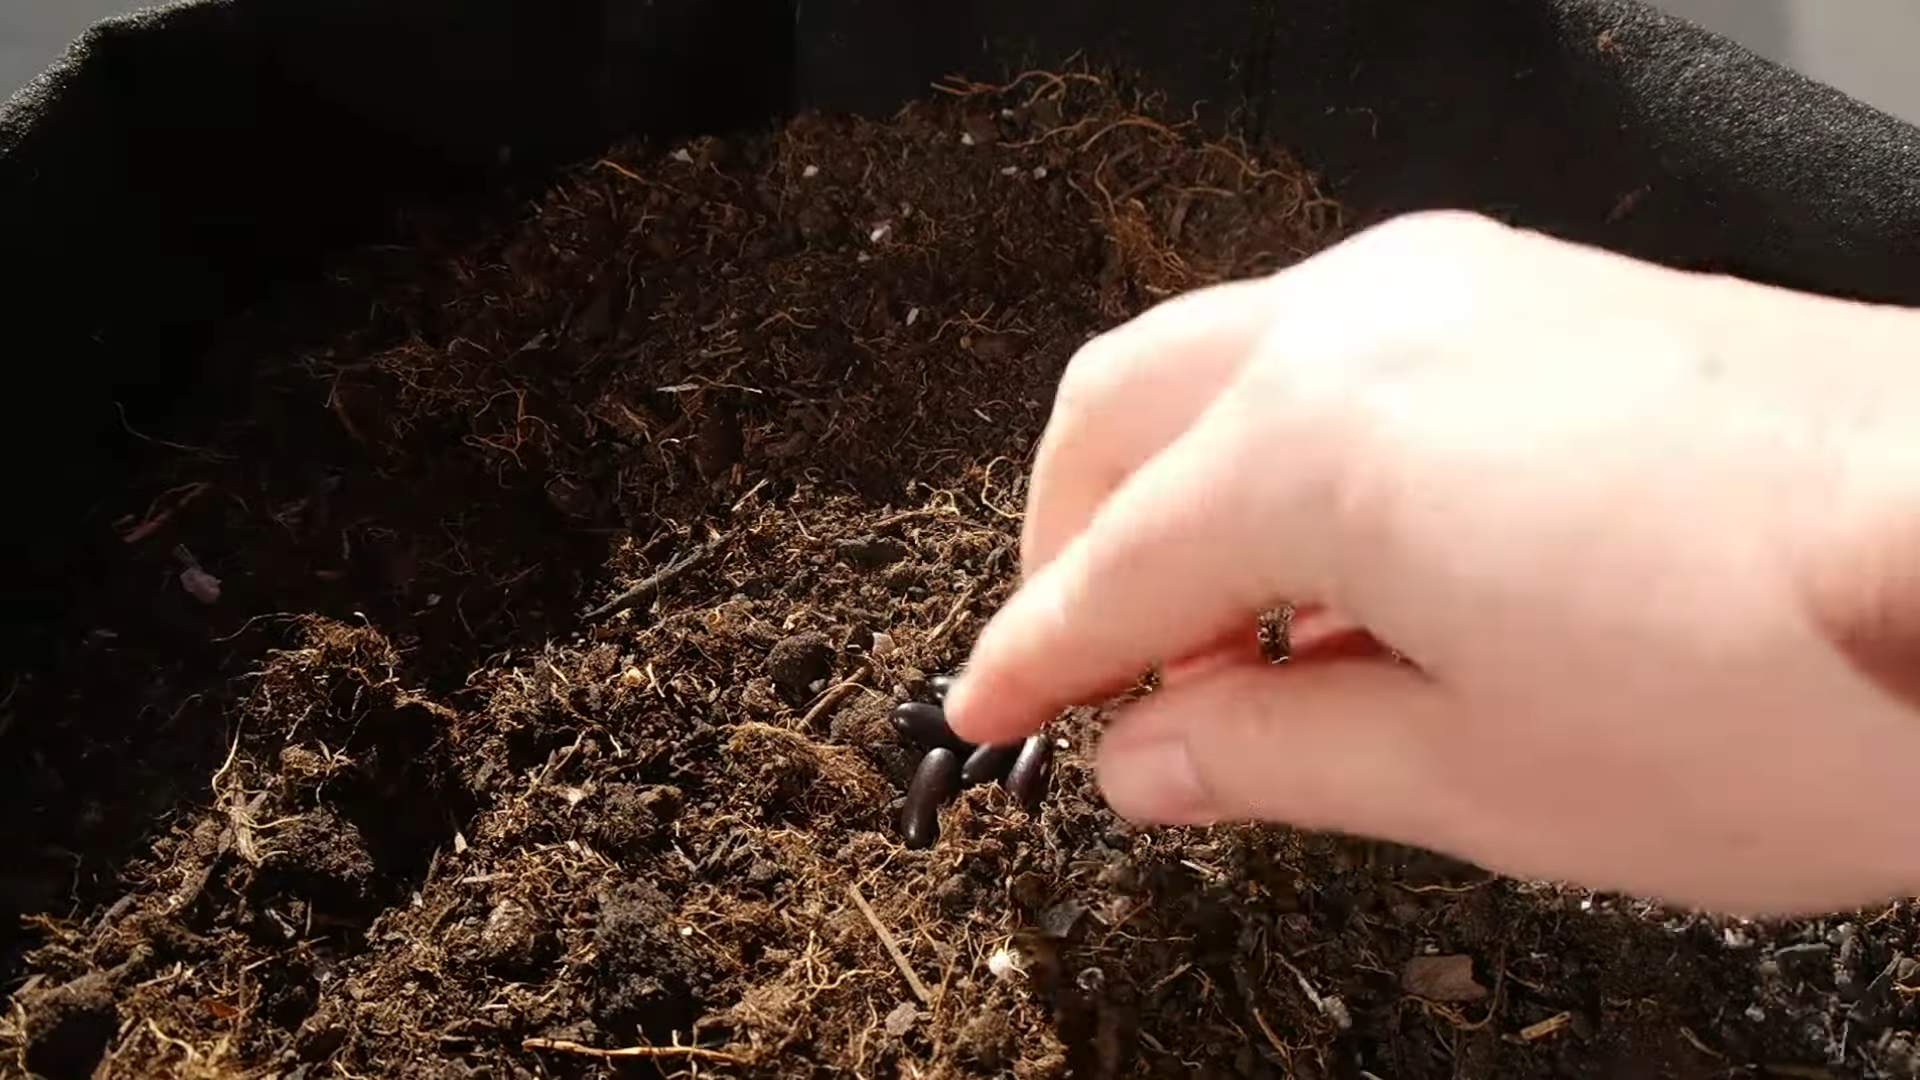
2. Direct Sowing: Bush beans are best direct-sown, meaning you plant the seeds directly into the garden soil. They don’t transplant well, so starting them indoors is generally not recommended.
3. Spacing: Sow seeds about 1 inch deep and 2-3 inches apart in rows that are 18-24 inches apart. I like to use a garden trowel to create small furrows for the seeds.
4. Watering: After planting, gently water the soil to ensure good seed-to-soil contact. Keep the soil consistently moist but not waterlogged until the seeds germinate.
5. Germination: You should see seedlings emerge in about 7-10 days, depending on soil temperature and moisture levels.
Caring for Your Purple Bush Beans
Once your seedlings have emerged, it’s time to provide them with the care they need to thrive.
1. Watering: Water regularly, especially during dry spells. Bush beans need consistent moisture to produce well. I usually water deeply once or twice a week, depending on the weather. Avoid overhead watering, as this can promote fungal diseases. Soaker hoses or drip irrigation are great options.
2. Weeding: Keep the area around your bean plants free of weeds. Weeds compete with the beans for water, nutrients, and sunlight. I like to hand-pull weeds regularly or use a hoe to cultivate the soil.
3. Fertilizing: Bush beans are relatively light feeders, but they can benefit from a side-dressing of compost or a balanced organic fertilizer a few weeks after germination. Avoid over-fertilizing, as this can lead to excessive foliage growth at the expense of bean production.
4. Pest Control: Keep an eye out for common bean pests, such as aphids, bean beetles, and spider mites. I prefer to use organic pest control methods, such as insecticidal soap or neem oil. You can also attract beneficial insects to your garden by planting flowers that provide nectar and pollen.
5. Disease Prevention: To prevent fungal diseases, ensure good air circulation around your bean plants. Avoid overcrowding and prune any yellowing or diseased leaves. Crop rotation can also help prevent soilborne diseases.
Harvesting Your Purple Bush Beans
The moment we’ve all been waiting for 鈥?harvesting those beautiful purple beans!
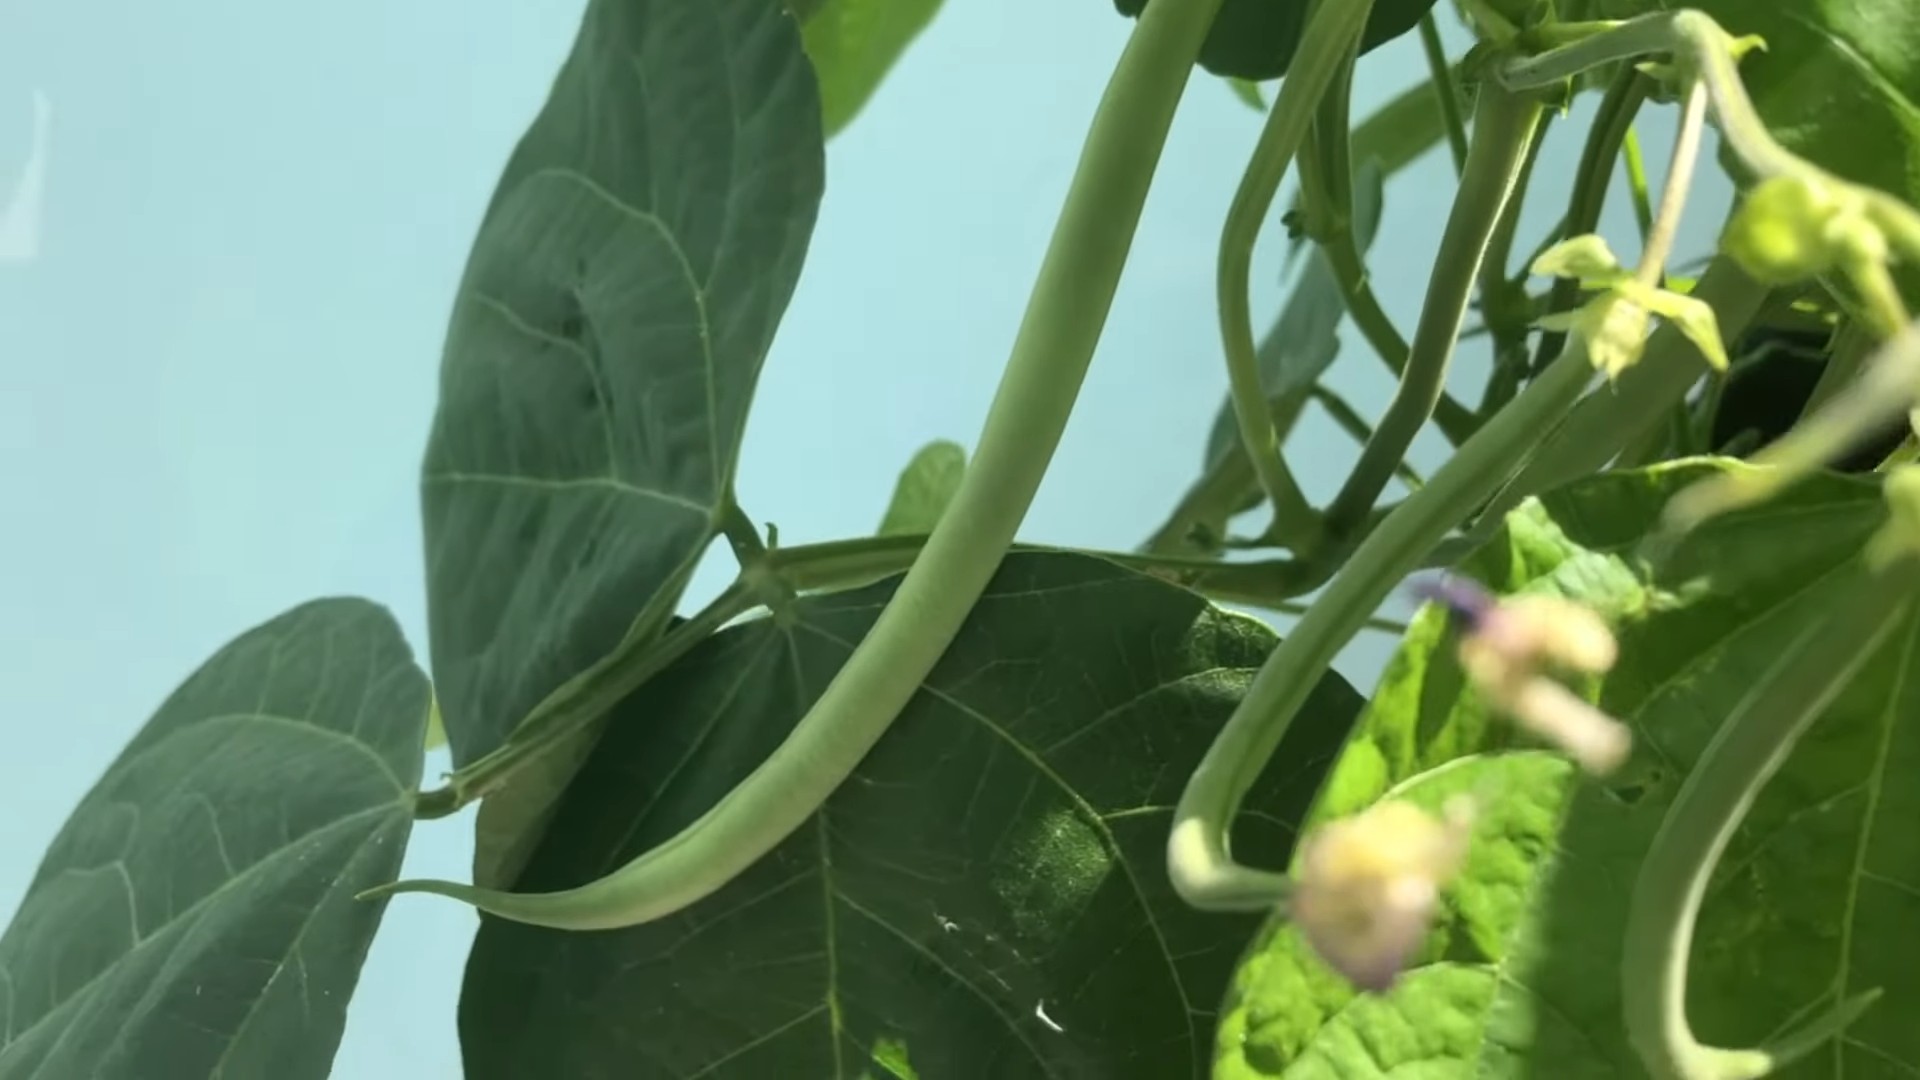
1. Timing: Purple bush beans are typically ready to harvest about 50-60 days after planting. The pods should be firm, plump, and about 4-6 inches long.
2. Harvesting Technique: Gently snap the beans off the plant, being careful not to damage the stems or leaves. I like to use two hands 鈥?one to hold the stem and the other to pull the bean.
3. Regular Harvesting: Harvest your beans regularly, every few days, to encourage continued production. If you allow the beans to mature on the plant, it will signal to the plant to stop producing new beans.
4. Color Change: Don’t be alarmed if your purple beans turn green when cooked. This is perfectly normal and doesn’t affect the flavor. The purple color is due to anthocyanins, which are heat-sensitive pigments.
5. Storage: Freshly harvested purple bush beans can be stored in the refrigerator for up to a week. For longer storage, you can blanch and freeze them.
Troubleshooting Common Problems
Even with the best care, you might encounter some challenges along the way. Here are a few common problems and how to address them:
* Poor Germination: If your seeds aren’t germinating, make sure the soil is warm enough and consistently moist. You can also try soaking the seeds in water for a few hours before planting to improve germination rates.
* Yellowing Leaves: Yellowing leaves can be a sign of nutrient deficiency, overwatering, or disease. Check your soil pH and nutrient levels, and adjust your watering schedule accordingly.
* Pest Infestations: If you notice pests on your bean plants, take action immediately. Insecticidal soap, neem oil, and hand-picking are all effective organic pest control methods.
* Disease Outbreaks: To prevent disease outbreaks, ensure good air circulation, avoid overhead watering, and practice crop rotation. If you notice signs of disease, remove and destroy the affected plants.
Enjoying Your Harvest
Now that you’ve harvested your beautiful purple bush beans, it’s time to enjoy the fruits (or rather, vegetables) of your labor!
* Fresh Eating: Purple bush beans are delicious eaten fresh, steamed, saut茅ed, or roasted. I love to add them to salads, stir-fries, and side dishes.
Hey there, fellow gardeners! I’m so excited to share my experience growing purple bush beans. They’re not only delicious but also add a vibrant splash of color to your garden. This guide will walk you through every step, from choosing the right seeds to harvesting your beautiful, edible treasures. Let’s get started!
Choosing Your Seeds and Preparing the Soil
Before we even think about planting, let’s talk about the foundation of any successful garden: the seeds and the soil.
* Seed Selection: Look for reputable seed companies that offer purple bush bean varieties. Some popular choices include ‘Royal Burgundy,’ ‘Purple Queen,’ and ‘Amethyst.’ I personally love ‘Royal Burgundy’ because they’re super productive and the color is just stunning. Make sure the seeds are relatively fresh for the best germination rates.
* Soil Preparation: Bush beans thrive in well-drained soil that’s rich in organic matter. Before planting, I always amend my soil with compost. This not only improves drainage but also provides essential nutrients.
* Sunlight: Purple bush beans need at least 6-8 hours of sunlight per day. Choose a sunny spot in your garden where they’ll get plenty of light.
* Soil pH: Aim for a soil pH between 6.0 and 7.0. You can test your soil using a home testing kit or send a sample to your local agricultural extension office. If your soil is too acidic, you can add lime to raise the pH. If it’s too alkaline, you can add sulfur to lower it.
Planting Your Purple Bush Beans
Now for the fun part 鈥?getting those seeds in the ground!
1. Timing is Key: Purple bush beans are warm-season crops, so wait until the danger of frost has passed before planting. Soil temperature should be at least 60掳F (15掳C). I usually plant mine a couple of weeks after the last expected frost.
2. Direct Sowing: Bush beans are best direct-sown, meaning you plant the seeds directly into the garden soil. They don’t transplant well, so starting them indoors is generally not recommended.
3. Spacing: Sow seeds about 1 inch deep and 2-3 inches apart in rows that are 18-24 inches apart. I like to use a garden trowel to create small furrows for the seeds.
4. Watering: After planting, gently water the soil to ensure good seed-to-soil contact. Keep the soil consistently moist but not waterlogged until the seeds germinate.
5. Germination: You should see seedlings emerge in about 7-10 days, depending on soil temperature and moisture levels.
Caring for Your Purple Bush Beans
Once your seedlings have emerged, it’s time to provide them with the care they need to thrive.
1. Watering: Water regularly, especially during dry spells. Bush beans need consistent moisture to produce well. I usually water deeply once or twice a week, depending on the weather. Avoid overhead watering, as this can promote fungal diseases. Soaker hoses or drip irrigation are great options.
2. Weeding: Keep the area around your bean plants free of weeds. Weeds compete with the beans for water, nutrients, and sunlight. I like to hand-pull weeds regularly or use a hoe to cultivate the soil.
3. Fertilizing: Bush beans are relatively light feeders, but they can benefit from a side-dressing of compost or a balanced organic fertilizer a few weeks after germination. Avoid over-fertilizing, as this can lead to excessive foliage growth at the expense of bean production.
4. Pest Control: Keep an eye out for common bean pests, such as aphids, bean beetles, and spider mites. I prefer to use organic pest control methods, such as insecticidal soap or neem oil. You can also attract beneficial insects to your garden by planting flowers that provide nectar and pollen.
5. Disease Prevention: To prevent fungal diseases, ensure good air circulation around your bean plants. Avoid overcrowding and prune any yellowing or diseased leaves. Crop rotation can also help prevent soilborne diseases.
Harvesting Your Purple Bush Beans
The moment we’ve all been waiting for 鈥?harvesting those beautiful purple beans!
1. Timing: Purple bush beans are typically ready to harvest about 50-60 days after planting. The pods should be firm, plump, and about 4-6 inches long.
2. Harvesting Technique: Gently snap the beans off the plant, being careful not to damage the stems or leaves. I like to use two hands 鈥?one to hold the stem and the other to pull the bean.
3. Regular Harvesting: Harvest your beans regularly, every few days, to encourage continued production. If you allow the beans to mature on the plant, it will signal to the plant to stop producing new beans.
4. Color Change: Don’t be alarmed if your purple beans turn green when cooked. This is perfectly normal and doesn’t affect the flavor. The purple color is due to anthocyanins, which are heat-sensitive pigments.
5. Storage: Freshly harvested purple bush beans can be stored in the refrigerator for up to a week. For longer storage, you can blanch and freeze them.
Troubleshooting Common Problems
Even with the best care, you might encounter some challenges along the way. Here are a few common problems and how to address them:
* Poor Germination: If your seeds aren’t germinating, make sure the soil is warm enough and consistently moist. You can also try soaking the seeds in water for a few hours before planting to improve germination rates.
* Yellowing Leaves: Yellowing leaves can be a sign of nutrient deficiency, overwatering, or disease. Check your soil pH and nutrient levels, and adjust your watering schedule accordingly.
* Pest Infestations: If you notice pests on your bean plants, take action immediately. Insecticidal soap, neem oil, and hand-picking are all effective organic pest control methods.
* Disease Outbreaks: To prevent disease outbreaks, ensure good air circulation, avoid overhead watering, and practice crop rotation. If you notice signs of disease, remove and destroy the affected plants.
Enjoying Your Harvest
Now that you’ve harvested your beautiful purple bush beans, it’s time to enjoy the fruits (or rather, vegetables) of your labor!
* Fresh Eating: Purple bush beans are delicious eaten fresh, steamed, saut茅ed, or roasted. I love to add them to salads, stir-fries, and side dishes.
* Freezing: To preserve your harvest for later, blanch the beans in boiling water for 2-3 minutes, then plunge them into ice water to stop the cooking process. Drain well and freeze in airtight containers.
* Canning: You can also can your purple bush beans for long-term storage. Follow proper canning procedures to ensure food safety.
* Seed Saving: If you want to save seeds from your purple bush beans for next year, allow a few pods to mature completely on the plant. Once the pods are dry and brittle, shell the seeds and store them in a cool, dry place.
Adding a Trellis (Optional)
While purple bush beans are, well, *bush* beans, sometimes they can get a little unruly, especially if they’re loaded with beans. Adding a small trellis or support system can help keep them upright and prevent them from sprawling on the ground.
1. Choose Your Trellis: You can use a variety of materials for your trellis, such as bamboo stakes, tomato cages, or even just some sturdy branches. I’ve even used old ladders before!
2. Install the Trellis: Place the trellis behind the bean plants, making sure it’s securely anchored in the ground.
3. Guide the Plants: As the bean plants grow, gently guide them up the trellis, tying them loosely with twine or plant ties if needed.
Companion Planting
Companion planting is the practice of planting different crops together to benefit each other. Some good companion plants for purple bush beans include:
* Marigolds: Marigolds repel many common bean pests, such as nematodes and bean beetles.
* Nasturtiums: Nasturtiums attract aphids away from your bean plants.
* Summer Savory: Summer savory is said to improve the flavor of beans and repel bean beetles.
* Carrots: Carrots can help deter bean flies.
* Cucumbers: Cucumbers and beans are mutually beneficial, with cucumbers providing shade for the beans and beans fixing nitrogen in the soil.
Avoid planting beans near onions or garlic, as these can inhibit bean growth.
Why Grow Purple Bush Beans?
Besides their beautiful color and delicious flavor, there are many other reasons to grow purple bush beans:
* Nutritious: Purple bush beans are a good source of vitamins, minerals, and fiber.
* Easy to Grow: They’re relatively easy to grow, even
Conclusion
So, there you have it! Growing your own purple bush beans isn’t just a fun gardening project; it’s a gateway to incredibly fresh, flavorful, and visually stunning meals. Forget those bland, store-bought beans that lack character. With a little effort and these simple tips, you can cultivate a vibrant harvest of purple bush beans right in your backyard, on your balcony, or even in a container on your patio.
Why is this DIY trick a must-try? Because it empowers you to control the quality and freshness of your food. You know exactly what goes into your beans 鈥?no pesticides, no preservatives, just pure, natural goodness. Plus, the satisfaction of harvesting something you’ve nurtured from seed to table is unparalleled. The vibrant purple color also adds a touch of elegance to any dish, making even the simplest meals feel special. Imagine serving a salad with these beauties 鈥?your guests will be amazed!
But the benefits don’t stop there. Growing purple bush beans is also an excellent way to introduce children to the wonders of gardening and healthy eating. They’ll love watching the seeds sprout, the plants grow, and the beans turn that captivating shade of purple. It’s a hands-on learning experience that fosters a lifelong appreciation for nature and wholesome food.
Ready to take your bean game to the next level? Consider these variations and suggestions:
* Succession Planting: Plant new seeds every two to three weeks for a continuous harvest throughout the growing season. This ensures you always have a fresh supply of purple bush beans ready to pick.
* Companion Planting: Plant your purple bush beans alongside beneficial companions like carrots, cucumbers, or rosemary. These plants can help deter pests and improve the overall health of your bean plants.
* Vertical Gardening: If you’re short on space, try growing your purple bush beans in a vertical garden. This is a great way to maximize your yield in a small area.
* Seed Saving: Once your plants have matured, save some of the seeds for next year’s crop. This is a sustainable way to ensure you always have a supply of your favorite purple bush beans.
* Culinary Creativity: Experiment with different ways to use your homegrown purple bush beans. Try them in salads, stir-fries, soups, or as a simple side dish. Their unique flavor and color will elevate any meal. You can even pickle them for a tangy treat!
We’re confident that once you experience the joy of growing your own purple bush beans, you’ll never go back to store-bought again. The taste, the color, the satisfaction 鈥?it’s all worth it. So, grab some seeds, follow our guide, and get ready to enjoy a bountiful harvest of these delightful legumes.
Don’t just take our word for it 鈥?try it yourself! We encourage you to embark on this rewarding gardening adventure and share your experiences with us. Post photos of your purple bush bean plants, share your favorite recipes, and let us know what you’ve learned along the way. Together, we can create a community of passionate gardeners who appreciate the beauty and flavor of homegrown food. Happy growing!
FAQ
Frequently Asked Questions About Growing Purple Bush Beans
Q: How long does it take for purple bush beans to mature?
A: Purple bush beans typically mature in 50-60 days from planting. However, this can vary depending on the specific variety, climate, and growing conditions. Keep an eye on your plants and harvest the beans when they are firm and plump, but before the seeds inside become too large. Regular harvesting encourages continued production.
Q: What kind of soil is best for growing purple bush beans?
A: Purple bush beans thrive in well-drained soil that is rich in organic matter. Amend your soil with compost or aged manure before planting to improve its fertility and drainage. A slightly acidic to neutral soil pH (around 6.0 to 7.0) is ideal. Avoid heavy clay soils, as they can become waterlogged and hinder root development.
Q: How often should I water my purple bush bean plants?
A: Water your purple bush bean plants regularly, especially during dry periods. Aim to keep the soil consistently moist, but not waterlogged. Water deeply at the base of the plants, avoiding wetting the foliage, which can increase the risk of fungal diseases. Mulching around the plants can help retain moisture and suppress weeds.
Q: Do purple bush beans need full sun?
A: Yes, purple bush beans require at least 6-8 hours of direct sunlight per day to thrive. Choose a sunny location in your garden or on your balcony for planting. Insufficient sunlight can result in leggy plants with reduced yields.
Q: Are purple bush beans susceptible to any pests or diseases?
A: Like all plants, purple bush beans can be susceptible to certain pests and diseases. Common pests include aphids, bean beetles, and spider mites. Diseases can include powdery mildew, bean rust, and anthracnose. Regularly inspect your plants for signs of infestation or disease and take appropriate action, such as using organic pest control methods or applying a fungicide. Good air circulation and proper watering practices can help prevent many diseases.
Q: Can I grow purple bush beans in containers?
A: Absolutely! Purple bush beans are well-suited for container gardening. Choose a container that is at least 12 inches deep and wide to provide adequate space for root growth. Use a high-quality potting mix and ensure the container has drainage holes. Water regularly and fertilize as needed.
Q: Do I need to fertilize my purple bush bean plants?
A: While purple bush beans are relatively low-maintenance, they can benefit from occasional fertilization. Apply a balanced fertilizer or a fertilizer specifically formulated for beans a few weeks after planting and again when the plants begin to flower. Avoid over-fertilizing, as this can lead to excessive foliage growth at the expense of bean production.
Q: Why are my purple bush beans turning green when cooked?
A: The purple color in purple bush beans is due to anthocyanins, which are water-soluble pigments. When cooked, these pigments can leach out, causing the beans to turn green. To minimize color loss, avoid overcooking the beans and consider steaming or stir-frying them instead of boiling. Adding a touch of vinegar or lemon juice to the cooking water can also help preserve the purple color.
Q: How do I know when my purple bush beans are ready to harvest?
A: Purple bush beans are typically ready to harvest when they are firm, plump, and about 4-6 inches long. The pods should be smooth and free of blemishes. Gently snap the beans off the plant, being careful not to damage the stems. Regular harvesting encourages continued production.
Q: Can I save seeds from my purple bush beans for next year?
A: Yes, you can save seeds from your purple bush beans for next year’s crop. Allow some of the pods to mature fully on the plant until they are dry and brown. Remove the seeds from the pods and allow them to dry completely before storing them in an airtight container in a cool, dark, and dry place. Be aware that if you are growing multiple varieties of beans, cross-pollination can occur, which may result in seeds that produce plants with different characteristics than the parent plant.

Leave a Comment