
Red dragon fruit pot – just the sound of it conjures up images of vibrant, exotic beauty right in your own backyard, doesn’t it? Forget those bland, store-bought fruits; imagine plucking your own ruby-red dragon fruit, bursting with flavor, from a plant you nurtured yourself! For centuries, dragon fruit, originating from Central America, has been revered not only for its unique taste but also for its stunning visual appeal. It’s a symbol of prosperity and good fortune in many cultures, and now, you can bring that same positive energy and deliciousness into your home.
But let’s be honest, the idea of growing exotic fruits can seem daunting. Where do you even begin? That’s where this DIY guide comes in! I’m here to show you that creating your own red dragon fruit pot is not only achievable but also incredibly rewarding. We’ll break down the process into easy-to-follow steps, using simple materials and clever hacks that will have you harvesting your own dragon fruit in no time.
Why do you need this DIY trick? Because fresh, homegrown produce tastes infinitely better, and because gardening is a fantastic way to de-stress, connect with nature, and add a touch of the extraordinary to your everyday life. Plus, imagine the bragging rights! So, grab your gardening gloves, and let’s embark on this exciting journey together. Get ready to transform your space into a tropical paradise, one pot at a time!

DIY Red Dragon Fruit Pot: From Seed to Stunning Display
Hey there, fellow plant enthusiasts! Ever dreamed of growing your own vibrant red dragon fruit? It’s totally achievable, even if you don’t have a sprawling garden. I’m going to walk you through creating a fantastic dragon fruit pot that will not only house your plant but also become a beautiful focal point in your space. Get ready to get your hands dirty!
Choosing the Right Pot and Soil
Before we even think about seeds, let’s talk about the foundation of our project: the pot and the soil. This is crucial for healthy dragon fruit growth.
* Pot Size Matters: Dragon fruit needs room to grow, especially its root system. I recommend a pot that’s at least 24 inches in diameter and 18 inches deep. A larger pot is always better, as it provides more space for the roots to spread and supports the plant’s eventual size. Think big!
* Drainage is Key: Dragon fruit hates sitting in soggy soil. Make sure your pot has plenty of drainage holes. If it doesn’t, you can drill some yourself. Trust me, this is a non-negotiable step.
* Soil Composition: Dragon fruit thrives in well-draining, slightly acidic soil. A mix of cactus potting mix, perlite, and compost is ideal. I usually go for a ratio of 1:1:1. The cactus mix provides the drainage, the perlite enhances aeration, and the compost adds essential nutrients.
* Consider the Material: Clay pots are great because they allow the soil to breathe, but they can dry out quickly. Plastic pots retain moisture better but can overheat in direct sunlight. Choose what works best for your climate and watering habits. I personally prefer terracotta pots for their aesthetic appeal and breathability.
Germinating Dragon Fruit Seeds
Okay, let’s get to the fun part: sprouting those tiny seeds! You can either buy dragon fruit seeds online or, even better, extract them from a ripe dragon fruit you bought at the store. I always prefer the latter – it feels more rewarding!
1. Extracting the Seeds: Cut open a ripe red dragon fruit. Scoop out the pulp and place it in a bowl. Add some water and gently mash the pulp to separate the seeds.
2. Cleaning the Seeds: Pour the mixture through a fine-mesh sieve. Rinse the seeds thoroughly under running water until all the pulp is gone. This is important to prevent mold growth later on.
3. Drying the Seeds: Spread the cleaned seeds on a paper towel and let them dry completely for a few days. Make sure they’re in a well-ventilated area.
4. Sowing the Seeds: Fill a small container (like a seedling tray or small pots) with a seed-starting mix. Moisten the soil. Sprinkle the dragon fruit seeds evenly over the surface. Don’t bury them too deep; just gently press them into the soil.
5. Creating a Humid Environment: Cover the container with a plastic wrap or a clear plastic lid to create a humid environment. This helps the seeds germinate.
6. Finding the Right Spot: Place the container in a warm, bright location, but avoid direct sunlight. Dragon fruit seeds need warmth to germinate.
7. Patience is a Virtue: Keep the soil consistently moist (but not soggy) and wait. Dragon fruit seeds can take anywhere from 1 to 3 weeks to germinate. Be patient!
Transplanting Seedlings into the Pot
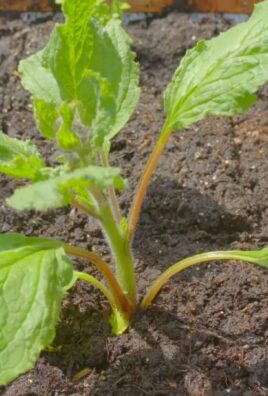
Once your seedlings have grown a few inches tall and have developed several true leaves, it’s time to transplant them into their permanent home: your beautiful dragon fruit pot!
1. Preparing the Pot: Fill your chosen pot with the soil mixture we discussed earlier (cactus mix, perlite, and compost). Leave a few inches of space at the top.
2. Carefully Removing Seedlings: Gently remove the seedlings from their container. Be careful not to damage the delicate roots. I like to use a small spoon or fork to help lift them out.
3. Planting the Seedlings: Dig small holes in the soil, spacing them several inches apart. Plant each seedling in a hole, making sure the top of the root ball is level with the soil surface.
4. Watering After Transplanting: Water the newly transplanted seedlings thoroughly. This helps settle the soil around the roots.
5. Providing Support: Dragon fruit is a climbing cactus, so it needs support to grow. You can use a trellis, a stake, or even a sturdy tomato cage. Insert the support into the pot near the seedlings. I prefer a trellis for a more decorative look.
6. Mulching (Optional): Add a layer of mulch around the base of the plants to help retain moisture and suppress weeds. I use wood chips or shredded bark.
Caring for Your Dragon Fruit Plant
Now that your dragon fruit plant is happily settled in its pot, it’s time to learn how to keep it thriving.
* Watering: Water your dragon fruit plant regularly, especially during the growing season (spring and summer). Let the soil dry out slightly between waterings. Overwatering can lead to root rot. In the winter, reduce watering frequency.
* Sunlight: Dragon fruit loves sunlight! Place your pot in a location that receives at least 6 hours of direct sunlight per day. If you live in a very hot climate, provide some afternoon shade to prevent sunburn.
* Fertilizing: Feed your dragon fruit plant with a balanced fertilizer every month during the growing season. I use a fertilizer specifically formulated for cacti and succulents.
* Pruning: Prune your dragon fruit plant regularly to encourage branching and fruit production. Remove any dead or damaged stems.
* Pest Control: Keep an eye out for pests like aphids and mealybugs. If you spot any, treat them with insecticidal soap or neem oil.
* Repotting: As your dragon fruit plant grows, it will eventually need to be repotted into a larger container. Repot it every 2-3 years, or when you notice the roots circling the bottom of the pot.
Building a Sturdy Support Structure
Dragon fruit plants can get quite heavy, especially when they start producing fruit. A robust support structure is essential to prevent the plant from collapsing.
1. Choosing the Right Support: As mentioned earlier, you can use a trellis, a stake, or a tomato cage. I’m going to focus on building a simple but effective trellis.
2. Materials Needed: You’ll need wooden posts (at least 4 feet tall), wire mesh or sturdy wire, and some screws or nails.
3. Constructing the Trellis: Drive the wooden posts into the soil around the perimeter of the pot, ensuring they are securely anchored.
4. Attaching the Wire Mesh: Attach the wire mesh to the wooden posts using screws or nails. Make sure the mesh is taut and can support the weight of the plant.
5. Training the Plant: As your dragon fruit plant grows, gently train its stems to climb the trellis. You can use plant ties to secure them in place.
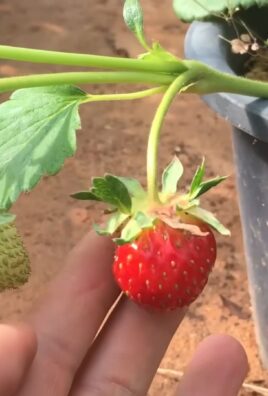
Encouraging Fruit Production
Getting your dragon fruit plant to produce fruit can be a bit of a challenge, but it’s definitely worth the effort!
* Pollination: Dragon fruit flowers are nocturnal and are typically pollinated by bats or moths. If you don’t have these pollinators in your area, you may need to hand-pollinate the flowers. Use a small paintbrush to transfer pollen from one flower to another.
* Adequate Sunlight: Dragon fruit needs plenty of sunlight to produce fruit. Make sure your plant is getting at least 6 hours of direct sunlight per day.
* Proper Fertilization: Use a fertilizer that is high in phosphorus and potassium to encourage flowering and fruit production.
* Watering: Avoid overwatering during the flowering and fruiting stages.
* Patience: It can take several years for a dragon fruit plant to start producing fruit. Don’t get discouraged if you don’t see any fruit right away.
Troubleshooting Common Problems
Even with the best care, you might encounter some problems along the way. Here are a few common issues and how to address them:
* Yellowing Leaves: This could be a sign of overwatering, underwatering, or nutrient deficiency. Check the soil moisture and adjust your watering accordingly. Fertilize your plant if necessary.
* Root Rot: This is caused by overwatering and poor drainage. Make sure your pot has plenty of drainage holes and allow the soil to dry out between waterings. If the root rot is severe, you may need to repot the plant with fresh soil.
* Sunburn: This can happen if your plant is exposed to too much direct sunlight, especially during the hottest part of the day. Provide some afternoon shade to protect the plant.
* Pests: Keep an eye out for pests like aphids, mealybugs, and scale. Treat them with insecticidal soap or neem oil.
Adding Decorative Tou

Conclusion
So, there you have it! Transforming a simple pot into a vibrant, eye-catching red dragon fruit pot is not only incredibly easy but also a fantastic way to add a touch of the exotic to your home or garden. We’ve walked you through the steps, highlighting the simplicity and affordability of this DIY project. But why is this a must-try?
Firstly, it’s a budget-friendly way to revamp existing pots. Instead of shelling out money for new, expensive planters, you can breathe new life into those old, forgotten terracotta pots lurking in your shed. Secondly, it’s a personalized touch. You’re not just buying something off the shelf; you’re creating something unique that reflects your own style and creativity. The vibrant red dragon fruit inspired design is a conversation starter, a piece of art that also serves a practical purpose.
Beyond the aesthetic appeal, this DIY project is also incredibly therapeutic. The process of painting, blending colors, and adding details can be a relaxing and rewarding experience. It’s a chance to disconnect from the digital world and reconnect with your creative side. Plus, you get the satisfaction of knowing you made something beautiful with your own two hands.
But the fun doesn’t stop there! Feel free to experiment with variations. Instead of the classic red dragon fruit skin, why not try a yellow dragon fruit inspired design? Use different shades of yellow and orange for a sunny, tropical vibe. Or, get even more creative and incorporate other fruits into your design. Imagine a pot painted to resemble a watermelon, a pineapple, or even a kiwi! The possibilities are endless.
You can also play around with the texture. Add a layer of textured paint or sand to the pot before painting to create a more tactile and rustic look. Or, use stencils to add intricate patterns and designs. Consider adding a sealant after painting to protect your masterpiece from the elements and ensure its longevity, especially if you plan to keep it outdoors.
Don’t be afraid to get the kids involved! This is a great project to do with children, teaching them about colors, patterns, and the joy of creating. Just make sure to supervise them closely and use non-toxic paints.
We truly believe that this DIY red dragon fruit pot project is a winner. It’s easy, affordable, customizable, and adds a unique touch to any space. It’s a fantastic way to express your creativity and bring a little bit of the tropics into your home.
So, what are you waiting for? Gather your supplies, unleash your inner artist, and give this DIY trick a try! We’re confident that you’ll love the results. And most importantly, we want to hear about your experience! Share your photos and stories with us on social media using #DragonFruitPotDIY. We can’t wait to see your creations and be inspired by your unique interpretations of this fun and easy project. Let’s spread the dragon fruit love, one pot at a time! We are sure you will love your new **red dragon fruit pot**.
Frequently Asked Questions (FAQ)
What kind of paint should I use for my red dragon fruit pot?
We recommend using acrylic paints for this project. Acrylics are durable, water-resistant (once dry), and come in a wide range of colors. They also adhere well to terracotta and other common pot materials. Look for acrylic paints specifically designed for outdoor use if you plan to keep your pot outside, as these will be more resistant to fading and weathering. Alternatively, you can use regular acrylics and apply a sealant afterwards.
Do I need to prime the pot before painting?
Priming is generally a good idea, especially if you’re working with a porous material like terracotta. A primer helps to create a smooth, even surface for the paint to adhere to, resulting in a more professional-looking finish. It also helps to prevent the paint from being absorbed into the pot, which can save you paint and ensure a more vibrant color. Use an acrylic-based primer and let it dry completely before applying your base coat.
How do I create the speckled effect on the red dragon fruit skin?
The speckled effect is achieved by using a technique called “splattering” or “flicking.” Dip an old toothbrush or a stiff-bristled brush into black or dark brown paint, then flick the bristles towards the pot. Practice on a piece of paper first to get the hang of it and control the size and density of the speckles. You can also use a sponge to dab on the speckles for a different effect. Remember to protect your work surface and wear old clothes, as this technique can be messy!
How can I protect my painted pot from the weather?
To protect your painted pot from the elements, especially if you plan to keep it outdoors, apply a sealant after the paint has completely dried. Look for a clear, waterproof sealant specifically designed for outdoor use. You can find these at most hardware or craft stores. Apply several thin coats of sealant, allowing each coat to dry completely before applying the next. This will help to prevent the paint from fading, chipping, or peeling.
Can I use this technique on other types of pots besides terracotta?
Yes, you can use this technique on other types of pots, such as plastic, ceramic, or even metal. However, you may need to adjust your preparation and paint choices accordingly. For plastic pots, make sure to clean the surface thoroughly with soap and water before painting. You may also need to use a primer specifically designed for plastic. For metal pots, you may need to sand the surface lightly to create a better grip for the paint. Always check the manufacturer’s instructions for your chosen paint and primer to ensure compatibility with the pot material.
What if I don’t have all the exact colors mentioned in the instructions?
Don’t worry if you don’t have the exact colors mentioned in the instructions. The beauty of this project is that you can customize it to your own preferences and available materials. You can mix and match different colors to create your own unique shades. For example, if you don’t have a specific shade of pink, you can mix red and white to create your own. Experiment with different color combinations until you find something you like. Remember, there are no rules when it comes to art!
How long will it take for the paint to dry?
The drying time for acrylic paint can vary depending on the thickness of the paint, the humidity, and the temperature. Generally, acrylic paint will be dry to the touch within 20-30 minutes, but it may take several hours for it to be completely dry. It’s best to allow the paint to dry completely before applying a sealant or handling the pot extensively. You can speed up the drying process by using a fan or a hairdryer on a low setting.
Can I use this technique to paint other things besides pots?
Absolutely! This technique can be used to paint a variety of other items, such as planters, garden gnomes, birdhouses, or even furniture. The possibilities are endless! Just make sure to choose the appropriate paints and primers for the surface you’re painting and follow the manufacturer’s instructions.
How do I clean my paintbrushes after using acrylic paint?
Clean your paintbrushes immediately after using acrylic paint to prevent the paint from drying and hardening. Rinse the brushes thoroughly with warm water until all traces of paint are gone. You can also use a mild soap to help remove any stubborn paint. Reshape the bristles of the brush and allow it to air dry completely before storing it.
What if I make a mistake while painting?
Don’t worry if you make a mistake while painting. Acrylic paint is relatively easy to correct. If the paint is still wet, you can simply wipe it off with a damp cloth. If the paint has already dried, you can sand it down lightly and repaint the area. You can also use a small brush to touch up any mistakes. Remember, mistakes are part of the creative process!
Leave a Comment