
Balcony Bean Growing Hack: Imagine stepping onto your balcony and being greeted by a lush, green wall of bean vines, laden with fresh, crisp beans ready for your dinner table. Sounds like a dream, right? Well, it doesn’t have to be! For centuries, humans have cultivated beans, from the ancient civilizations of the Americas to the bustling markets of modern-day Europe. Beans have always been a staple, a symbol of sustenance and resourcefulness.
But what if you don’t have a sprawling garden? That’s where this DIY article comes in! I’m going to share a simple, yet incredibly effective, balcony bean growing hack that will transform your small outdoor space into a thriving mini-farm. Many people struggle with growing beans on balconies due to limited space, poor soil, or lack of sunlight. This hack addresses all those challenges, offering a practical and affordable solution.
This isn’t just about growing beans; it’s about connecting with nature, enjoying fresh, homegrown produce, and adding a touch of beauty to your urban oasis. So, grab your gardening gloves, and let’s get started on this exciting journey of balcony bean cultivation! I promise, you’ll be amazed at how easy and rewarding it can be.
Balcony Bean Growing Bonanza: A DIY Vertical Garden Hack!
Hey there, fellow balcony gardeners! Are you dreaming of fresh, homegrown beans but short on space? I’ve got the perfect solution for you: a DIY vertical bean garden that’s both space-saving and super productive. I’m going to walk you through how to build this awesome setup, step-by-step. Get ready to harvest a bounty of beans right from your balcony!
What You’ll Need: The Supply List
Before we dive in, let’s gather our supplies. This project is relatively inexpensive and uses materials you might already have lying around.
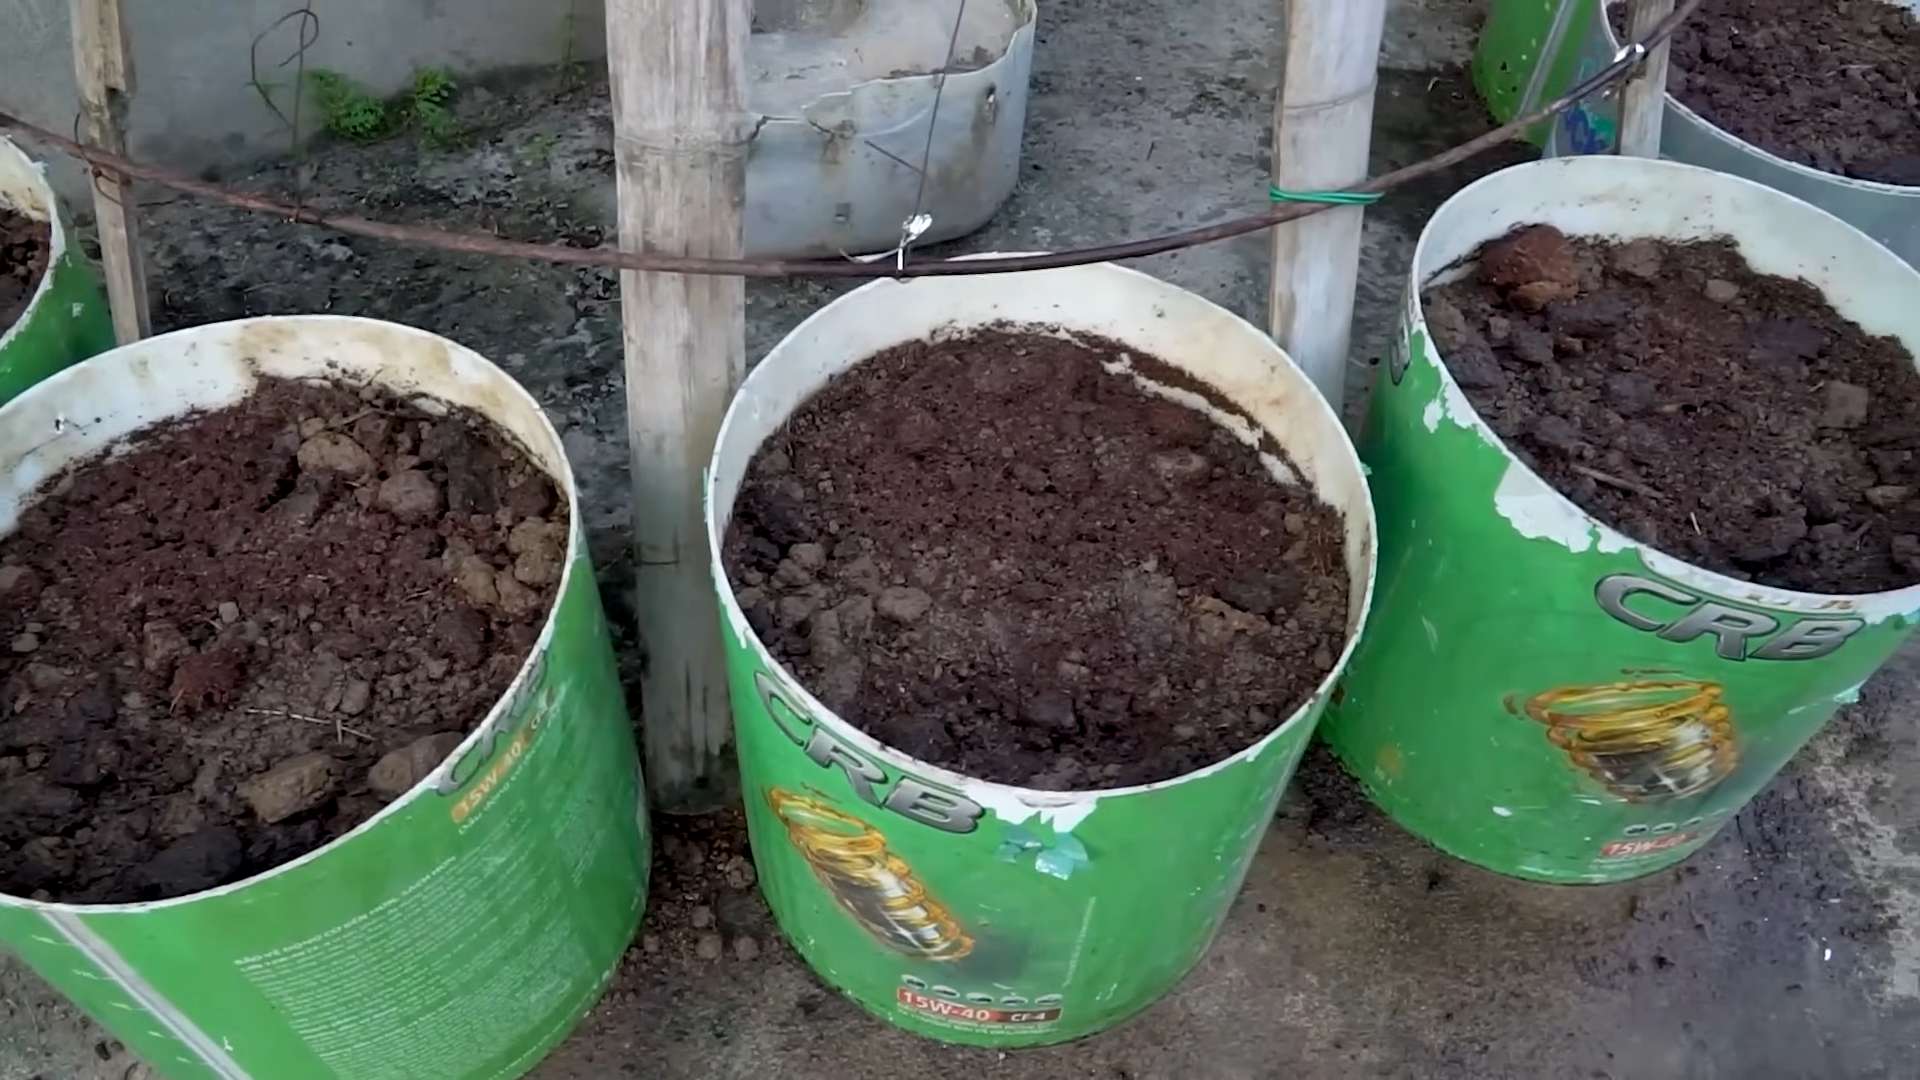
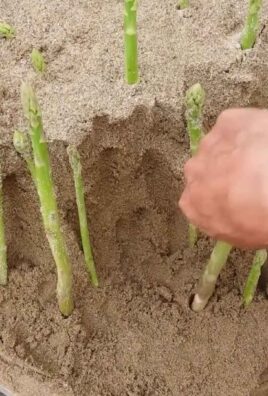
* Large Plastic Buckets or Containers (at least 5 gallons each): The number of buckets depends on how many bean plants you want to grow. I recommend starting with at least three. Make sure they are food-grade if possible.
* Drill with Various Sized Drill Bits: We’ll need this for drainage and creating holes for our climbing structure.
* Heavy-Duty Landscape Fabric or Burlap: This will line the buckets and help retain moisture.
* Potting Mix: Choose a high-quality potting mix specifically formulated for vegetables.
* Bean Seeds: Select a bush bean or pole bean variety that suits your climate and taste. I personally love Kentucky Wonder pole beans for their flavor and prolific growth.
* Bamboo Poles or Wooden Dowels: These will form the vertical support structure for your beans to climb. The length will depend on the height of your balcony.
* Twine or Garden Ties: For securing the bean plants to the support structure.
* Measuring Tape or Ruler: For accurate measurements when drilling holes.
* Gloves: To protect your hands while working with soil and materials.
* Safety Glasses: Always a good idea when using power tools.
* Watering Can or Hose: For watering your bean plants.
* Optional: Slow-Release Fertilizer: To provide your beans with a steady supply of nutrients.
* Optional: Decorative Paint or Stencils: To personalize your buckets.
Preparing the Buckets: The Foundation of Your Garden
This is a crucial step, so let’s take our time and do it right. Proper drainage is essential for healthy bean plants.
1. Drill Drainage Holes: Using a large drill bit (around 1/2 inch), drill several drainage holes in the bottom of each bucket. I usually aim for at least 5-6 holes, evenly spaced. This will prevent waterlogging and root rot.
2. Line the Buckets: Cut pieces of landscape fabric or burlap slightly larger than the inside of the buckets. This will help retain moisture and prevent soil from washing out through the drainage holes. Place the fabric inside each bucket, pressing it against the sides and bottom.
3. Trim Excess Fabric: Trim any excess fabric that extends beyond the rim of the bucket. You want a clean and tidy look.
Creating the Climbing Structure: Upward and Onward!
This is where the magic happens! We’re going to build a simple yet effective trellis system for our beans to climb.
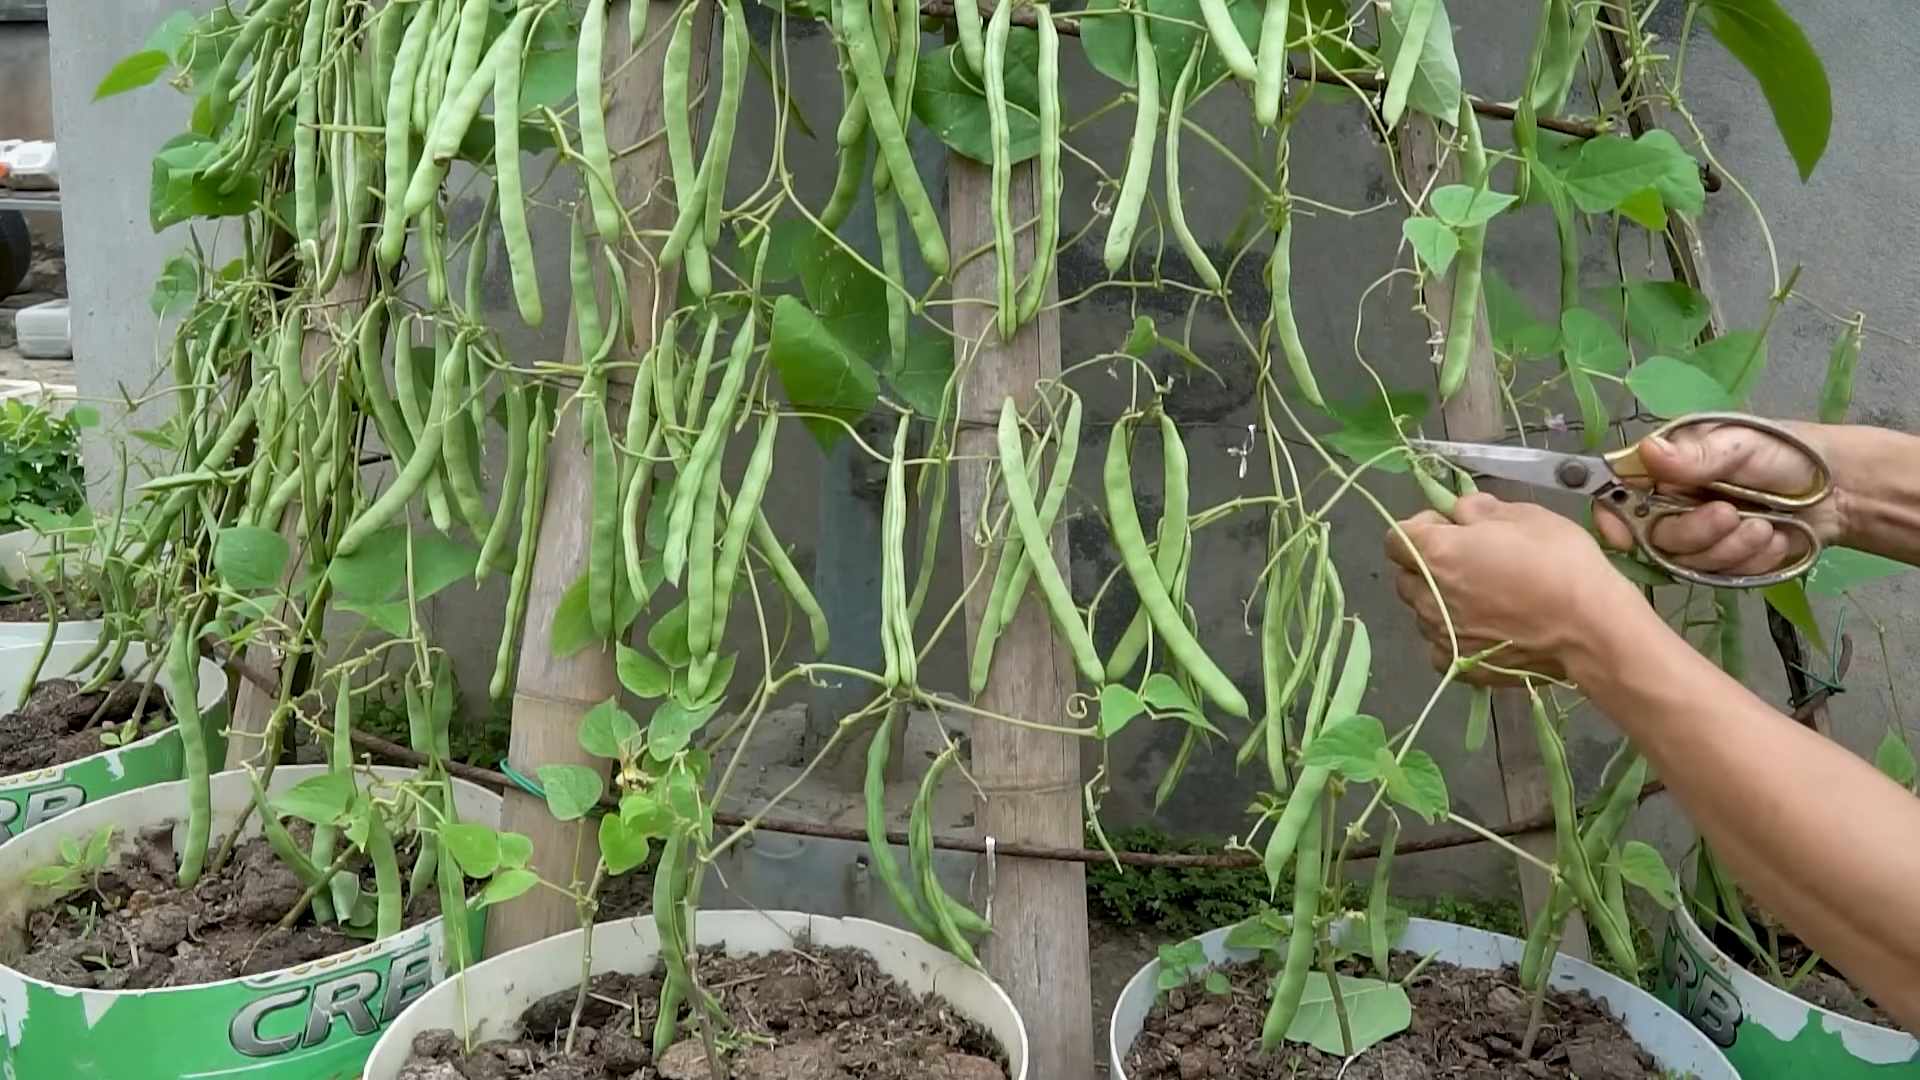
1. Determine Pole Placement: Decide how you want to arrange your bamboo poles or wooden dowels. I prefer a teepee-style arrangement, where the poles converge at the top. This provides ample support and looks visually appealing.
2. Drill Pole Holes: Using a drill bit slightly larger than the diameter of your poles, drill holes around the perimeter of each bucket. The number of holes will depend on how many poles you’re using. For a teepee arrangement, I usually drill 3-4 holes.
3. Insert the Poles: Insert the bamboo poles or wooden dowels into the drilled holes. Angle them inwards so they converge at the top.
4. Secure the Poles: Use twine or garden ties to secure the poles together at the top. This will create a stable and sturdy climbing structure. Make sure the knot is tight and secure.
5. Reinforce if Needed: If you feel the structure is wobbly, you can add additional twine or ties to reinforce it. You can also use small stakes to anchor the base of the poles to the ground (or the balcony floor).
Planting the Beans: Seeds of Success
Now for the fun part: planting our bean seeds!
1. Fill the Buckets with Potting Mix: Fill each bucket with high-quality potting mix, leaving about an inch or two of space at the top. Gently pat down the soil to remove any air pockets.
2. Sow the Seeds: Follow the instructions on your seed packet for spacing and depth. Generally, I plant bean seeds about 1 inch deep and 2-3 inches apart. For pole beans, plant them closer to the base of the poles.
3. Water Thoroughly: After planting, water the soil thoroughly until water drains out of the drainage holes. This will help the seeds germinate and establish strong roots.
4. Add Slow-Release Fertilizer (Optional): If you’re using slow-release fertilizer, sprinkle it on top of the soil according to the package instructions. This will provide your beans with a steady supply of nutrients throughout the growing season.
Caring for Your Bean Plants: Nurturing Your Garden
Consistent care is key to a bountiful bean harvest.
1. Water Regularly: Bean plants need consistent moisture, especially during hot weather. Water deeply whenever the top inch of soil feels dry to the touch. Avoid overwatering, as this can lead to root rot.
2. Provide Support: As your bean plants grow, gently guide their tendrils towards the bamboo poles or wooden dowels. Use twine or garden ties to secure them if needed. This will encourage them to climb and maximize your vertical space.
3. Fertilize as Needed: If you’re not using slow-release fertilizer, you may need to fertilize your bean plants every few weeks with a balanced liquid fertilizer. Follow the instructions on the fertilizer package.
4. Pest Control: Keep an eye out for common bean pests, such as aphids, bean beetles, and spider mites. If you spot any pests, treat them promptly with an organic insecticide or insecticidal soap.
5. Sunlight: Ensure your bean plants receive at least 6-8 hours of sunlight per day. If your balcony is shaded, you may need to supplement with grow lights.
6. Pruning: While not always necessary, pruning can help improve air circulation and prevent disease. Remove any yellowing or dead leaves.
Harvesting Your Beans: The Fruits (or Vegetables!) of Your Labor
The moment you’ve been waiting for! Harvesting your homegrown beans is incredibly rewarding.
1. Harvest at the Right Time: Harvest your beans when they are young and tender. The pods should be firm and snap easily when bent. Overripe beans will be tough and stringy.
2. Pick Regularly: Harvest your beans regularly to encourage continued production. The more you pick, the more beans your plants will produce.
3. Use Scissors or Pruners: Use scissors or pruners to cut the bean pods from the plant. This will prevent damage to the plant and make harvesting easier.
4. Enjoy Your Harvest: Enjoy your fresh, homegrown beans in salads, stir-fries, soups, or as a side dish. You can also freeze or can them for later use.
Troubleshooting: Common Issues and Solutions
Even with the best care, you might encounter some challenges along the way. Here are some common issues and how to address them:
* Yellowing Leaves: This could be a sign of overwatering, nutrient deficiency, or pest infestation. Check the soil moisture, fertilize if needed, and inspect for pests.
* Lack of Flowers: This could be due to insufficient sunlight, poor soil, or excessive nitrogen fertilizer. Ensure your plants are getting enough sunlight, amend the soil with compost, and use a fertilizer with a lower nitrogen content.
* Bean Beetles: These pests can quickly defoliate your bean plants. Handpick them off the plants or use an organic insecticide.
* Powdery Mildew: This fungal disease can cause a white, powdery coating on the leaves. Improve air circulation, avoid overhead watering, and treat with a fungicide if necessary.
Adding a Personal Touch: Making it Your Own
Now that you have the basics down, feel free to personalize your vertical bean garden!
* Paint the Buckets: Use exterior paint to decorate your buckets with fun colors or patterns.
* Add Labels: Label each bucket with the type of bean you’re growing.
* Incorporate Other Plants: Plant companion plants, such as marigolds or nasturtiums, around the base of your bean plants to attract beneficial insects and deter pests.
* Create a Theme: Design your vertical garden around a specific theme, such as a cottage garden or a Mediterranean garden.
Why This Hack Works: The Science Behind the Success
This DIY vertical bean garden hack
Conclusion
So, there you have it! This simple yet effective balcony bean growing hack is a game-changer for anyone with limited space who dreams of fresh, homegrown beans. Forget sprawling gardens and endless weeding; this method brings the joy of gardening right to your doorstep, or rather, your balcony.
Why is this a must-try? Because it’s accessible, affordable, and incredibly rewarding. Imagine stepping onto your balcony and harvesting a handful of crisp, delicious beans for your dinner. The taste of homegrown produce is simply unmatched, and knowing you nurtured those beans from seed to table adds an extra layer of satisfaction. Plus, it’s a fantastic way to connect with nature, even in the heart of the city.
But the beauty of this balcony bean growing hack lies in its adaptability. Feel free to experiment with different bean varieties. Bush beans are particularly well-suited for container gardening, but pole beans can also thrive with the right support system. Consider building a small trellis or using bamboo stakes to provide vertical support for climbing varieties. You can also try companion planting. Marigolds, for instance, are known to deter pests and attract beneficial insects, making them excellent companions for your bean plants. Basil is another great choice, as it can improve the flavor of your beans and repel certain pests.
Don’t be afraid to get creative with your container choices, too. While plastic pots are a practical option, terracotta pots can add a touch of rustic charm to your balcony garden. Just remember to ensure adequate drainage, regardless of the container you choose. You can even repurpose old buckets or containers, giving them a new lease on life as planters for your beans.
And speaking of creativity, why not try growing different colored beans? Purple, yellow, or speckled beans can add visual interest to your balcony garden and make your harvests even more exciting. You can also experiment with different growing mediums. While potting mix is a standard choice, you can also try using a soilless mix or adding compost to enrich the soil and provide your beans with essential nutrients.
The key to success with this balcony bean growing hack is consistent care. Water your beans regularly, especially during hot weather, and fertilize them every few weeks with a balanced fertilizer. Keep an eye out for pests and diseases, and take action promptly if you notice any problems. With a little attention and effort, you’ll be rewarded with a bountiful harvest of fresh, delicious beans.
We are confident that this method will transform your balcony into a thriving mini-farm. So, grab your seeds, gather your supplies, and get ready to experience the joy of growing your own beans. We encourage you to try this balcony bean growing hack and share your experiences with us! Let us know what varieties you grow, what challenges you encounter, and what successes you celebrate. Share your photos and tips in the comments below, and let’s create a community of balcony bean growers! Happy gardening!
Frequently Asked Questions (FAQ)
What kind of beans are best for growing on a balcony?
The best types of beans for balcony gardening are bush beans and pole beans. Bush beans are compact and don’t require a trellis, making them ideal for smaller spaces. Popular bush bean varieties include Blue Lake Bush, Contender, and Provider. Pole beans, on the other hand, require a trellis or other support structure to climb. They tend to produce a higher yield than bush beans but need more vertical space. Kentucky Wonder and Scarlet Runner are excellent pole bean choices. Consider the size of your balcony and the amount of sunlight it receives when choosing your bean variety.
How much sunlight do beans need?
Beans need at least 6-8 hours of direct sunlight per day to thrive. If your balcony doesn’t receive enough sunlight, you may need to supplement with grow lights. Position your bean plants in the sunniest spot on your balcony, and monitor their growth to ensure they’re getting enough light. If the leaves are pale or the plants are leggy, it’s a sign that they need more sunlight.
What kind of soil is best for growing beans in containers?
A well-draining potting mix is essential for growing beans in containers. Avoid using garden soil, as it can become compacted and prevent proper drainage. Look for a potting mix that contains a blend of peat moss, perlite, and vermiculite. You can also add compost to the potting mix to enrich the soil and provide your beans with essential nutrients. Ensure the container has drainage holes to prevent waterlogging, which can lead to root rot.
How often should I water my bean plants?
Water your bean plants regularly, especially during hot weather. The soil should be consistently moist but not waterlogged. Check the soil moisture by sticking your finger into the soil about an inch deep. If the soil feels dry, it’s time to water. Water deeply, allowing the water to drain out of the drainage holes. Avoid watering the foliage, as this can promote fungal diseases.
Do I need to fertilize my bean plants?
Yes, fertilizing your bean plants can help them grow and produce a bountiful harvest. Use a balanced fertilizer, such as a 10-10-10 or 5-10-5, every few weeks. Follow the instructions on the fertilizer package for application rates. You can also use organic fertilizers, such as compost tea or fish emulsion. Avoid over-fertilizing, as this can burn the roots of your plants.
How do I protect my bean plants from pests and diseases?
Regularly inspect your bean plants for pests and diseases. Common pests that affect beans include aphids, spider mites, and bean beetles. You can control these pests with insecticidal soap, neem oil, or by handpicking them off the plants. Diseases that can affect beans include powdery mildew, rust, and bean mosaic virus. Prevent these diseases by providing good air circulation, avoiding overhead watering, and using disease-resistant bean varieties.
When should I harvest my beans?
Harvest your beans when they are young and tender. The pods should be firm and snap easily when bent. Avoid letting the beans become too large or tough. Harvest regularly to encourage continued production. The timing of the harvest will depend on the variety of bean you are growing. Generally, bush beans are ready to harvest about 50-60 days after planting, while pole beans take about 60-75 days.
Can I grow beans in the same container year after year?
It’s generally not recommended to grow beans in the same container year after year without replenishing the soil. Over time, the soil can become depleted of nutrients and harbor pests and diseases. It’s best to replace the potting mix each year or amend it with fresh compost and fertilizer. You can also rotate your crops, planting beans in a different container each year.
What are some companion plants for beans?
Companion planting can benefit your bean plants by attracting beneficial insects, repelling pests, and improving soil health. Good companion plants for beans include marigolds, basil, rosemary, and nasturtiums. Avoid planting beans near onions or garlic, as these can inhibit their growth.
Can I grow beans indoors?
While it’s possible to grow beans indoors, it can be challenging to provide them with the amount of sunlight they need. If you want to try growing beans indoors, choose a sunny location and supplement with grow lights. Bush beans are generally better suited for indoor growing than pole beans. Be sure to provide adequate support for climbing varieties.
Leave a Comment