
Vertical watermelon growing might sound like something out of a science fiction movie, but trust me, it’s a real and increasingly popular way to cultivate these juicy giants! Forget sprawling vines taking over your entire garden; we’re going up, not out! For centuries, watermelons have been a symbol of summer, abundance, and refreshing sweetness, enjoyed in cultures around the globe. From ancient Egypt, where they were depicted in hieroglyphics, to modern-day picnics, watermelons hold a special place in our hearts (and stomachs!).
But let’s face it, traditional watermelon growing can be a space hog. That’s where this DIY trick comes in. If you’re like me, you dream of harvesting your own homegrown watermelon, but you’re limited by a small backyard, a balcony, or even just a desire to keep your garden more organized. That’s why I’m so excited to share this guide on vertical watermelon growing. It’s a game-changer for urban gardeners and anyone looking to maximize their yield without sacrificing precious space. Plus, it’s a fun and rewarding project that will impress your friends and family. Get ready to learn how to train your watermelons to climb, creating a stunning and productive vertical garden!
DIY Vertical Watermelon Growing: A Space-Saving Guide
Hey there, fellow gardening enthusiasts! Are you dreaming of juicy, homegrown watermelons but short on space? Well, I’ve got just the solution for you: vertical watermelon growing! It might sound a little crazy, but trust me, it’s totally doable and a fantastic way to maximize your yield, especially if you have a small yard, balcony, or even just a sunny patio. I’m going to walk you through everything you need to know to successfully grow watermelons vertically. Let’s get started!
Choosing the Right Watermelon Variety
Before we dive into the construction and planting, it’s crucial to pick the right watermelon variety. Not all watermelons are created equal, and some are much better suited for vertical growing than others.
* Bush or Miniature Varieties: These are your best bet. Look for varieties like ‘Sugar Baby,’ ‘Bush Sugar Baby,’ ‘Golden Midget,’ or ‘Tiger Baby.’ They produce smaller fruits (around 6-10 pounds) and have a more compact growth habit, making them easier to support.
* Grafted Watermelons: If you can find them, grafted watermelons are a great option. They are often grafted onto vigorous rootstocks that provide disease resistance and increased yields.
* Avoid Large Varieties: Steer clear of giant watermelon varieties like ‘Charleston Gray’ or ‘Crimson Sweet.’ These can weigh upwards of 20 pounds, which is simply too much for a vertical support system to handle safely.
Building Your Vertical Support System
Okay, now for the fun part: building the structure that will hold our precious watermelons! There are a few different ways you can go about this, depending on your budget, space, and DIY skills. I’ll outline a couple of options.
Option 1: Trellis with Slings
This is my preferred method because it’s relatively easy to build and provides excellent support for the growing watermelons.
Materials You’ll Need:
* Sturdy Trellis: You can buy a pre-made trellis from a garden center or build your own using wood or metal. Make sure it’s at least 6 feet tall and wide enough to accommodate the watermelon vines. A-frame trellises work well.
* Heavy-Duty Stakes or Posts: To anchor the trellis securely in the ground.
* Planting Containers: Large pots or raised beds (at least 24 inches in diameter and 12 inches deep).
* Potting Mix: A well-draining potting mix specifically formulated for vegetables.
* Fabric Scraps or Old T-Shirts: To create slings for supporting the watermelons.
* Twine or Zip Ties: For attaching the slings to the trellis.
Step-by-Step Instructions:
1. Assemble the Trellis: If you bought a pre-made trellis, simply set it up in your desired location. If you’re building your own, follow your chosen design. Make sure it’s sturdy and can withstand the weight of the watermelon vines and fruits.
2. Anchor the Trellis: Drive the stakes or posts firmly into the ground on either side of the trellis to provide extra support. This is especially important if you live in a windy area.
3. Prepare the Planting Containers: Fill your large pots or raised beds with the well-draining potting mix. Leave a few inches of space at the top.
4. Position the Containers: Place the containers at the base of the trellis, spacing them according to the recommended spacing for your chosen watermelon variety (usually around 18-24 inches apart).
5. Create the Slings: Cut your fabric scraps or old t-shirts into strips that are wide enough to cradle the watermelons. Sew or tie the ends together to form small pouches or hammocks. You can also use netting for this.
6. Attach the Slings: As the watermelons start to develop, gently place them in the slings and attach the slings to the trellis using twine or zip ties. Make sure the slings are securely fastened and can support the weight of the growing fruits. Adjust the slings as the watermelons grow larger.
Option 2: Tomato Cages with Support
This is a simpler and more budget-friendly option, especially if you already have tomato cages on hand.
Materials You’ll Need:
* Large Tomato Cages: The sturdier, the better.
* Heavy-Duty Stakes: For extra support.
* Planting Containers: Large pots or buckets (at least 18 inches in diameter and 12 inches deep).
* Potting Mix: A well-draining potting mix specifically formulated for vegetables.
* Twine or Plant Tape: For training the watermelon vines.
* Netting or Fabric: To create support slings for the watermelons.
Step-by-Step Instructions:
1. Reinforce the Tomato Cages: Drive the heavy-duty stakes into the ground around the tomato cages to provide extra support. This will help prevent the cages from collapsing under the weight of the watermelon vines and fruits.
2. Prepare the Planting Containers: Fill your large pots or buckets with the well-draining potting mix.
3. Position the Containers: Place the containers inside the tomato cages.
4. Train the Vines: As the watermelon vines grow, gently weave them through the tomato cage, using twine or plant tape to secure them in place. This will help the vines climb vertically and provide support.
5. Create the Slings: As the watermelons start to develop, create slings using netting or fabric to support the fruits.
6. Attach the Slings: Gently place the watermelons in the slings and attach the slings to the tomato cage using twine or zip ties.
Planting and Growing Your Watermelons
Now that your vertical support system is in place, it’s time to plant your watermelon seeds or seedlings!
Step-by-Step Instructions:
1. Start Seeds Indoors (Optional): To get a head start on the growing season, you can start your watermelon seeds indoors about 4-6 weeks before the last expected frost. Sow the seeds in small pots filled with seed-starting mix. Keep the soil moist and warm (around 80-85°F). Once the seedlings have developed a few true leaves, you can transplant them into your prepared containers.
2. Direct Sow Seeds (If Weather Permits): If the weather is warm and the soil temperature is consistently above 70°F, you can direct sow the watermelon seeds directly into your prepared containers. Sow the seeds about 1 inch deep and water gently.
3. Transplant Seedlings (If Starting Indoors): Gently remove the seedlings from their pots and transplant them into your prepared containers. Space the seedlings according to the recommended spacing for your chosen watermelon variety.
4. Water Regularly: Water your watermelon plants regularly, especially during hot, dry weather. Water deeply and thoroughly, making sure the soil is moist but not waterlogged.
5. Fertilize Regularly: Watermelons are heavy feeders, so it’s important to fertilize them regularly with a balanced fertilizer. Follow the instructions on the fertilizer package. I like to use a fertilizer specifically formulated for vegetables.
6. Prune the Vines (Optional): To encourage fruit production, you can prune the watermelon vines. Remove any suckers (small shoots that grow from the base of the plant) and any excess foliage that is blocking sunlight from reaching the fruits.
7. Pollinate the Flowers: Watermelons have separate male and female flowers. The female flowers have a small swelling at the base, which will eventually develop into the watermelon. If you’re not seeing any fruit development, you may need to hand-pollinate the flowers. Use a small paintbrush to transfer pollen from the male flowers to the female flowers.
8. Monitor for Pests and Diseases: Keep an eye out for common watermelon pests and diseases, such as aphids, squash bugs, and powdery mildew. Treat any infestations or infections promptly with appropriate organic or chemical controls.
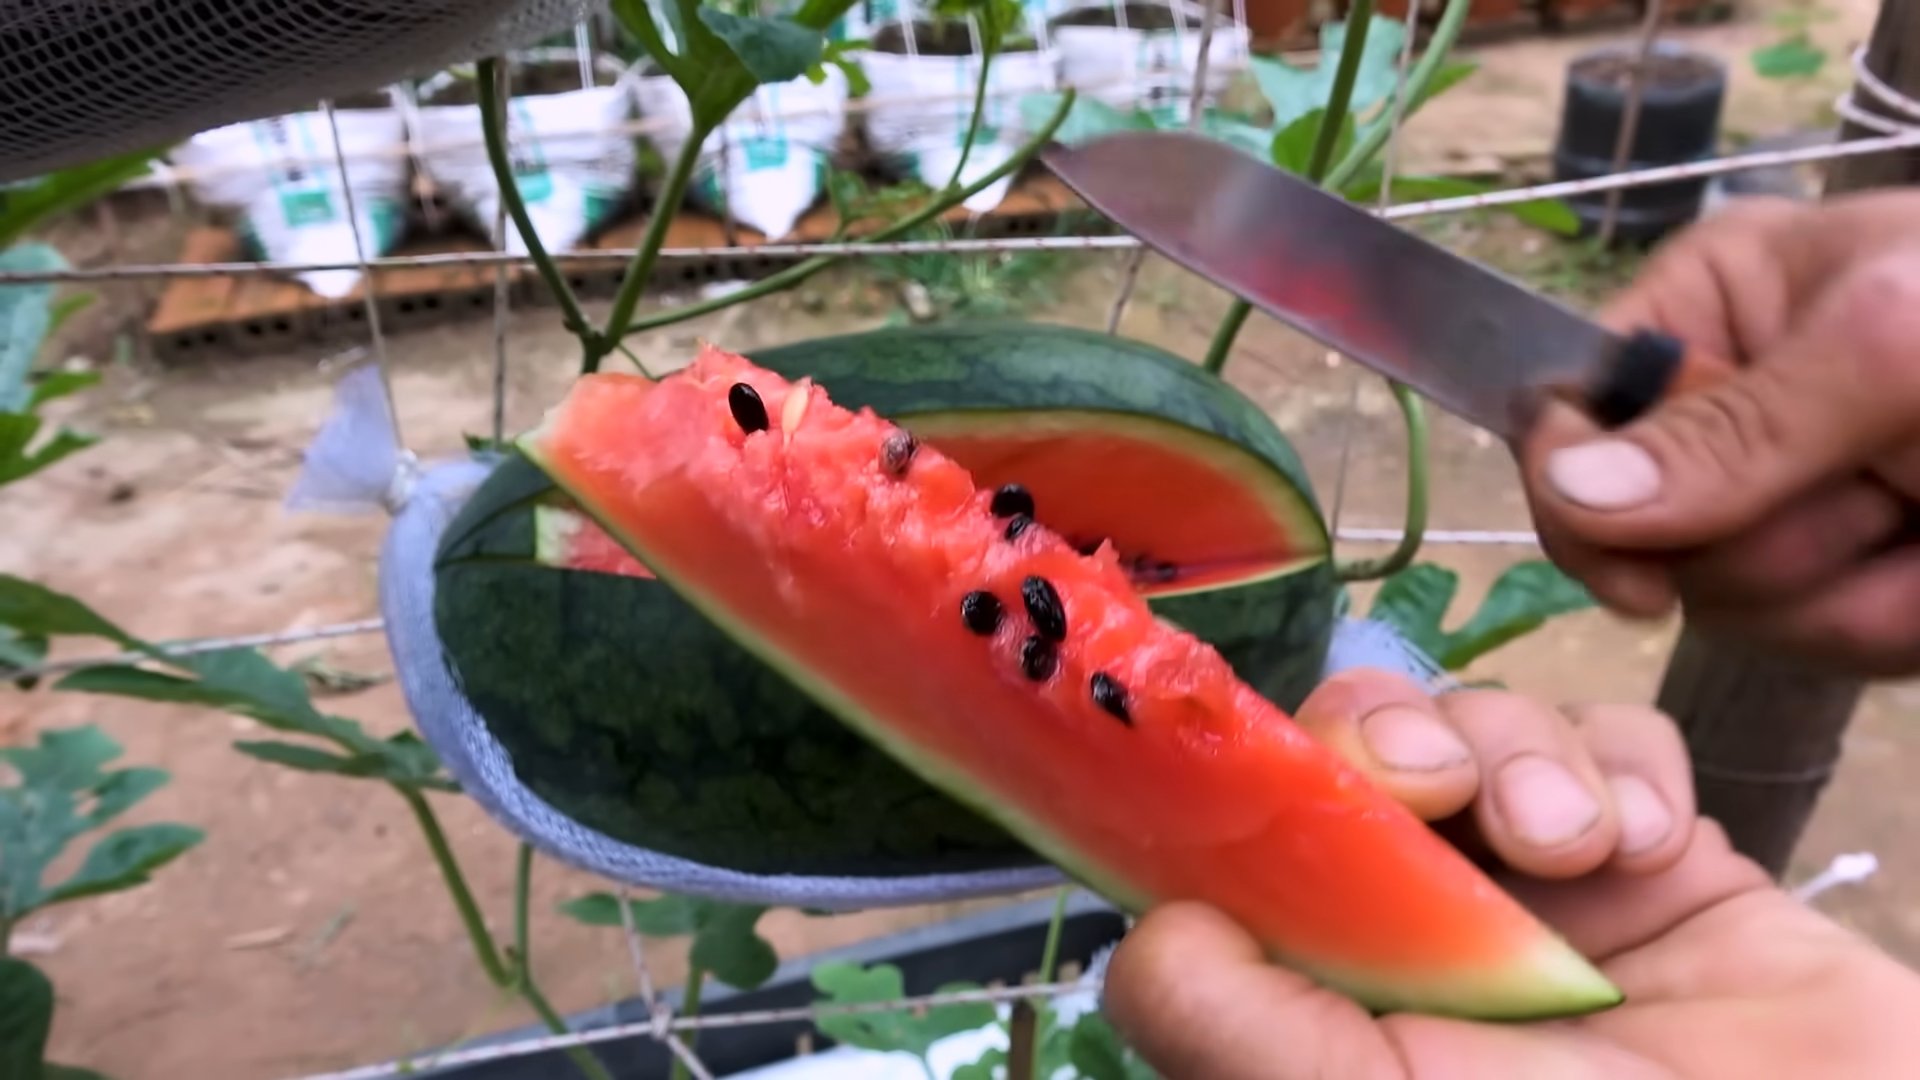
Harvesting Your Watermelons
The moment we’ve all been waiting for! Knowing when to harvest your watermelons is key to enjoying their sweet, juicy flavor.
Signs of Ripeness:
* The Tendril Closest to the Fruit Turns Brown and Dry: This is one of the most reliable indicators of ripeness.
* The Bottom of the Watermelon (Where it Rests on the Ground) Turns Yellow or Creamy: This is known as the “ground spot.”
* The Watermelon Sounds Hollow When You Tap It: This takes a little practice, but with experience, you’ll be able to tell when a watermelon is ripe by the sound it makes.
* The Skin Becomes Dull and Less Shiny: A ripe watermelon will have a slightly dull appearance.
Harvesting Instructions:
1.

Conclusion
So, there you have it! Vertical watermelon growing isn’t just a quirky gardening trend; it’s a game-changer for maximizing space, improving fruit quality, and adding a touch of whimsical charm to your garden. If you’ve been hesitant to try growing watermelons due to space constraints or concerns about pests and diseases, this method offers a compelling solution.
Think about it: no more sprawling vines taking over your entire backyard. No more watermelons rotting on the damp ground. Instead, imagine vibrant green vines climbing gracefully upwards, adorned with juicy, sun-kissed watermelons hanging like ornaments. It’s a sight to behold, and the taste of a homegrown watermelon, nurtured with your own hands, is simply unparalleled.
But the benefits extend beyond aesthetics and space-saving. Vertical growing promotes better air circulation around the plant, reducing the risk of fungal diseases. It also makes it easier to monitor for pests and apply organic pest control methods. Plus, the elevated position allows for more even sunlight exposure, resulting in sweeter, more flavorful fruit.
Don’t be afraid to experiment with different varieties of watermelons suitable for vertical growing. Smaller, bush-type watermelons are generally easier to manage, but with proper support, you can even try growing some of the larger varieties. Consider using sturdy trellises, netting, or even repurposed materials like old ladders or pallets to create your vertical growing structure.
For those in colder climates, consider starting your watermelon seeds indoors a few weeks before the last expected frost. This will give your plants a head start and ensure a longer growing season. And remember to provide adequate support for your developing watermelons. Slings made from old t-shirts or pantyhose work wonders for cradling the fruit and preventing them from breaking off the vine.
We encourage you to embrace the challenge and embark on your own vertical watermelon growing adventure. It’s a rewarding experience that will not only yield delicious fruit but also transform your garden into a unique and eye-catching oasis.
Ready to ditch the traditional ground-bound watermelon patch? Give vertical watermelon growing a try this season and experience the difference for yourself. We’re confident you’ll be amazed by the results.
And most importantly, don’t forget to share your experiences with us! We’d love to hear about your successes, your challenges, and any tips or tricks you discover along the way. Post photos of your vertical watermelon gardens on social media using #VerticalWatermelon and inspire others to join the movement. Let’s cultivate a community of vertical watermelon growers and share the joy of homegrown goodness!
Frequently Asked Questions (FAQ)
What varieties of watermelons are best suited for vertical growing?
Smaller, bush-type watermelons are generally the easiest to manage in a vertical system. Look for varieties like ‘Sugar Baby,’ ‘Bush Sugar Baby,’ ‘Golden Midget,’ or ‘Tiger Baby.’ These varieties tend to produce smaller fruits and have shorter vines, making them ideal for trellising. However, with adequate support, you can also try growing larger varieties like ‘Crimson Sweet’ or ‘Jubilee,’ but be prepared to provide extra support for the developing fruits. Consider the weight of the mature watermelon when selecting your variety and building your support structure.
What kind of support structure do I need for vertical watermelon growing?
The type of support structure you need will depend on the variety of watermelon you’re growing and the space you have available. Sturdy trellises, netting, or even repurposed materials like old ladders or pallets can be used. The key is to ensure that the structure is strong enough to support the weight of the mature watermelons. For larger varieties, you’ll also need to provide individual slings or supports for each fruit. These can be made from old t-shirts, pantyhose, or even burlap sacks. Attach the slings to the trellis to cradle the watermelon and prevent it from breaking off the vine. Make sure the support is well anchored to the ground to prevent it from tipping over, especially in windy conditions.
How do I water and fertilize watermelons grown vertically?
Watermelons grown vertically require regular watering, especially during hot, dry weather. Water deeply and consistently, ensuring that the soil around the base of the plant remains moist but not waterlogged. Consider using a soaker hose or drip irrigation system to deliver water directly to the roots. Fertilize your watermelons regularly with a balanced fertilizer, following the instructions on the package. You can also supplement with organic fertilizers like compost tea or fish emulsion. Pay close attention to the plant’s needs and adjust your watering and fertilizing schedule accordingly. Yellowing leaves can indicate a nutrient deficiency, while wilting leaves can indicate a lack of water.
How do I prevent pests and diseases in vertical watermelon growing?
Vertical growing can actually help to reduce the risk of pests and diseases by improving air circulation around the plant. However, it’s still important to monitor your watermelons regularly for any signs of trouble. Common pests that affect watermelons include aphids, squash bugs, and cucumber beetles. These can be controlled with organic insecticides like neem oil or insecticidal soap. Fungal diseases like powdery mildew and anthracnose can also be a problem. To prevent these diseases, ensure good air circulation, avoid overhead watering, and apply a fungicide if necessary. Consider companion planting with herbs like basil or marigolds, which can help to repel pests. Regularly inspect your plants and remove any diseased leaves or fruits to prevent the spread of infection.
How do I know when my watermelons are ripe?
Determining when a watermelon is ripe can be tricky, but there are a few telltale signs to look for. First, check the tendril closest to the watermelon stem. When this tendril turns brown and dries up, it’s a good indication that the watermelon is ripe. Second, look at the spot where the watermelon rests on the ground (or in its sling). This spot should turn from white to a creamy yellow color. Finally, give the watermelon a gentle thump. A ripe watermelon will sound hollow and deep. If it sounds dull or solid, it’s probably not ready yet. Practice makes perfect, so don’t be discouraged if you don’t get it right the first time. With experience, you’ll develop a knack for knowing when your watermelons are perfectly ripe.
Can I grow watermelons vertically in containers?
Yes, you can absolutely grow watermelons vertically in containers! Choose a large container, at least 20 gallons in size, to provide enough room for the roots to grow. Use a well-draining potting mix and ensure that the container has drainage holes. Provide a sturdy trellis or support structure for the vines to climb. Water and fertilize regularly, and be sure to provide adequate sunlight. Container-grown watermelons may require more frequent watering and fertilizing than those grown in the ground. Also, be mindful of the weight of the container, especially when the watermelons start to mature. Place the container in a location where it won’t be easily knocked over.
What if my watermelon isn’t setting fruit?
There are several reasons why your watermelon might not be setting fruit. One common cause is a lack of pollination. Watermelons require pollination to produce fruit, and if there aren’t enough bees or other pollinators in your area, you may need to hand-pollinate the flowers. To do this, use a small paintbrush to transfer pollen from the male flowers to the female flowers. Another possible cause is stress. Watermelons can be stressed by extreme temperatures, lack of water, or nutrient deficiencies. Ensure that your plants are getting adequate water, fertilizer, and sunlight. You can also try providing some shade during the hottest part of the day. Finally, make sure that your plants are not overcrowded. Overcrowding can reduce air circulation and increase the risk of pests and diseases, which can also affect fruit set.

Leave a Comment