
Grow Broccoli Naturally, and unlock the secrets to a thriving, organic garden right in your backyard! Have you ever dreamed of harvesting crisp, delicious broccoli heads without relying on harsh chemicals? I know I have! For centuries, broccoli has been a staple in diets around the world, tracing its roots back to ancient Roman civilization. They valued it not only for its taste but also for its incredible health benefits.
But let’s face it, store-bought broccoli can sometimes be disappointing – lacking flavor and potentially laden with pesticides. That’s where this DIY guide comes in! I’m going to share some simple yet effective tricks and hacks that will empower you to grow broccoli naturally, ensuring a bountiful harvest of healthy, flavorful florets.
Whether you’re a seasoned gardener or just starting out, these tips will help you avoid common pitfalls, combat pests naturally, and optimize your growing conditions. Imagine the satisfaction of serving your family a meal featuring broccoli you grew yourself, knowing exactly what went into it. Let’s get our hands dirty and embark on this rewarding journey together!
Growing Broccoli Like a Pro: My DIY Guide to a Bountiful Harvest
Okay, broccoli lovers, gather ’round! I’m going to share my secrets to growing fantastic broccoli right in your own backyard. Forget those bland, expensive heads from the grocery store – we’re talking vibrant, flavorful, and organically grown broccoli that will make your taste buds sing. This isn’t just about planting seeds; it’s about understanding the plant, creating the right environment, and nurturing it to its full potential. So, let’s get our hands dirty!
Choosing the Right Broccoli Variety
First things first, you need to pick the right broccoli variety for your climate and growing season. Trust me, this makes a huge difference! Some varieties are better suited for cooler weather, while others can tolerate a bit more heat. Here are a few of my favorites:
* ‘Waltham 29’: A classic, reliable variety that produces large, dark green heads. It’s great for cooler climates.
* ‘DiCicco’: This is an heirloom variety that’s known for its early maturity and delicious side shoots after you harvest the main head.
* ‘Green Magic’: If you’re in a warmer climate, ‘Green Magic’ is a good choice. It’s heat-tolerant and produces uniform, tightly packed heads.
* ‘ ক্যালব্রেস ‘: This is a popular choice for its large central head and good side shoot production.
Do a little research to see which varieties thrive in your area. Your local nursery or garden center can be a great resource for this!
Preparing the Soil: The Foundation for Success
Broccoli is a heavy feeder, meaning it needs nutrient-rich soil to thrive. Before you even think about planting, you need to get your soil in tip-top shape.
* Soil Testing: I highly recommend getting your soil tested. This will tell you the pH level and what nutrients are lacking. You can usually get a soil test done through your local agricultural extension office.
* Amendments: Broccoli prefers a slightly acidic to neutral soil pH (around 6.0 to 7.0). If your soil is too acidic, add lime. If it’s too alkaline, add sulfur.
* Compost: This is my secret weapon! Mix in plenty of compost to improve soil drainage, aeration, and fertility. I usually add a few inches of compost to the topsoil and work it in well.
* Fertilizer: Incorporate a slow-release fertilizer that’s high in nitrogen, phosphorus, and potassium (NPK). Follow the instructions on the fertilizer package. Bone meal is a great source of phosphorus, and blood meal is a good source of nitrogen.
Starting Broccoli Seeds: Indoors or Out?
You have two options for starting your broccoli: indoors or directly in the garden. I usually start my seeds indoors to get a head start on the growing season, especially if you live in an area with short summers.
Starting Seeds Indoors:
1. Timing is Key: Start your seeds about 6-8 weeks before the last expected frost in your area.
2. Seed Starting Mix: Use a seed starting mix, not regular potting soil. Seed starting mix is lighter and provides better drainage.
3. Planting the Seeds: Sow the seeds about 1/4 inch deep in small pots or seed trays.
4. Watering: Keep the soil consistently moist, but not soggy. I use a spray bottle to gently water the seedlings.
5. Light: Provide plenty of light. A sunny windowsill might work, but I prefer using grow lights for consistent results. Keep the lights on for about 14-16 hours a day.
6. Temperature: Maintain a temperature of around 65-75°F (18-24°C).
7. Hardening Off: Before transplanting your seedlings outdoors, you need to “harden them off.” This means gradually exposing them to outdoor conditions over a period of about a week. Start by placing them outside for a few hours each day, gradually increasing the amount of time they spend outdoors.
Direct Sowing:
1. Timing: Sow seeds directly in the garden 2-3 weeks before the last expected frost.
2. Soil Preparation: Make sure the soil is well-prepared and free of weeds.
3. Planting Depth: Sow the seeds about 1/2 inch deep.
4. Spacing: Space the seeds about 2-3 inches apart.
5. Watering: Keep the soil consistently moist until the seedlings emerge.
6. Thinning: Once the seedlings are a few inches tall, thin them to about 18-24 inches apart.
Transplanting Broccoli Seedlings: Giving Them Room to Grow
Once your seedlings are about 4-6 inches tall and have a few sets of true leaves, it’s time to transplant them into the garden.
1. Choose a Sunny Spot: Broccoli needs at least 6 hours of sunlight per day.
2. Spacing: Space the seedlings about 18-24 inches apart in rows that are 24-36 inches apart. This gives them plenty of room to grow and allows for good air circulation.
3. Planting Depth: Dig a hole that’s slightly larger than the root ball of the seedling. Gently remove the seedling from its pot and place it in the hole. Make sure the top of the root ball is level with the soil surface.
4. Watering: Water the seedlings thoroughly after transplanting.
5. Mulching: Apply a layer of mulch around the plants to help retain moisture, suppress weeds, and regulate soil temperature. I like to use straw or wood chips.
Caring for Your Broccoli Plants: Watering, Fertilizing, and Pest Control
Now that your broccoli plants are in the ground, it’s important to provide them with the care they need to thrive.
* Watering: Broccoli needs consistent moisture, especially during hot, dry weather. Water deeply and regularly, aiming for about 1-1.5 inches of water per week. Avoid overhead watering, as this can promote fungal diseases. Drip irrigation is a great option.
* Fertilizing: Side-dress your broccoli plants with a nitrogen-rich fertilizer about 3-4 weeks after transplanting. You can use compost tea, fish emulsion, or a commercial fertilizer.
* Weeding: Keep the area around your broccoli plants free of weeds. Weeds compete with the broccoli for nutrients and water.
* Pest Control: Broccoli is susceptible to a few common pests, including cabbage worms, aphids, and flea beetles.
* Cabbage Worms: These green caterpillars can devour your broccoli leaves. Handpicking them off the plants is effective for small infestations. You can also use Bacillus thuringiensis (Bt), a natural insecticide that’s safe for humans and pets.
* Aphids: These tiny insects suck the sap from plants. You can control aphids by spraying them with a strong stream of water or by using insecticidal soap.
* Flea Beetles: These small, jumping beetles can create tiny holes in the leaves. Cover your plants with row covers to prevent flea beetles from reaching them. You can also use diatomaceous earth, a natural insecticide.
Harvesting Your Broccoli: Timing is Everything
Knowing when to harvest your broccoli is crucial for getting the best flavor and texture.
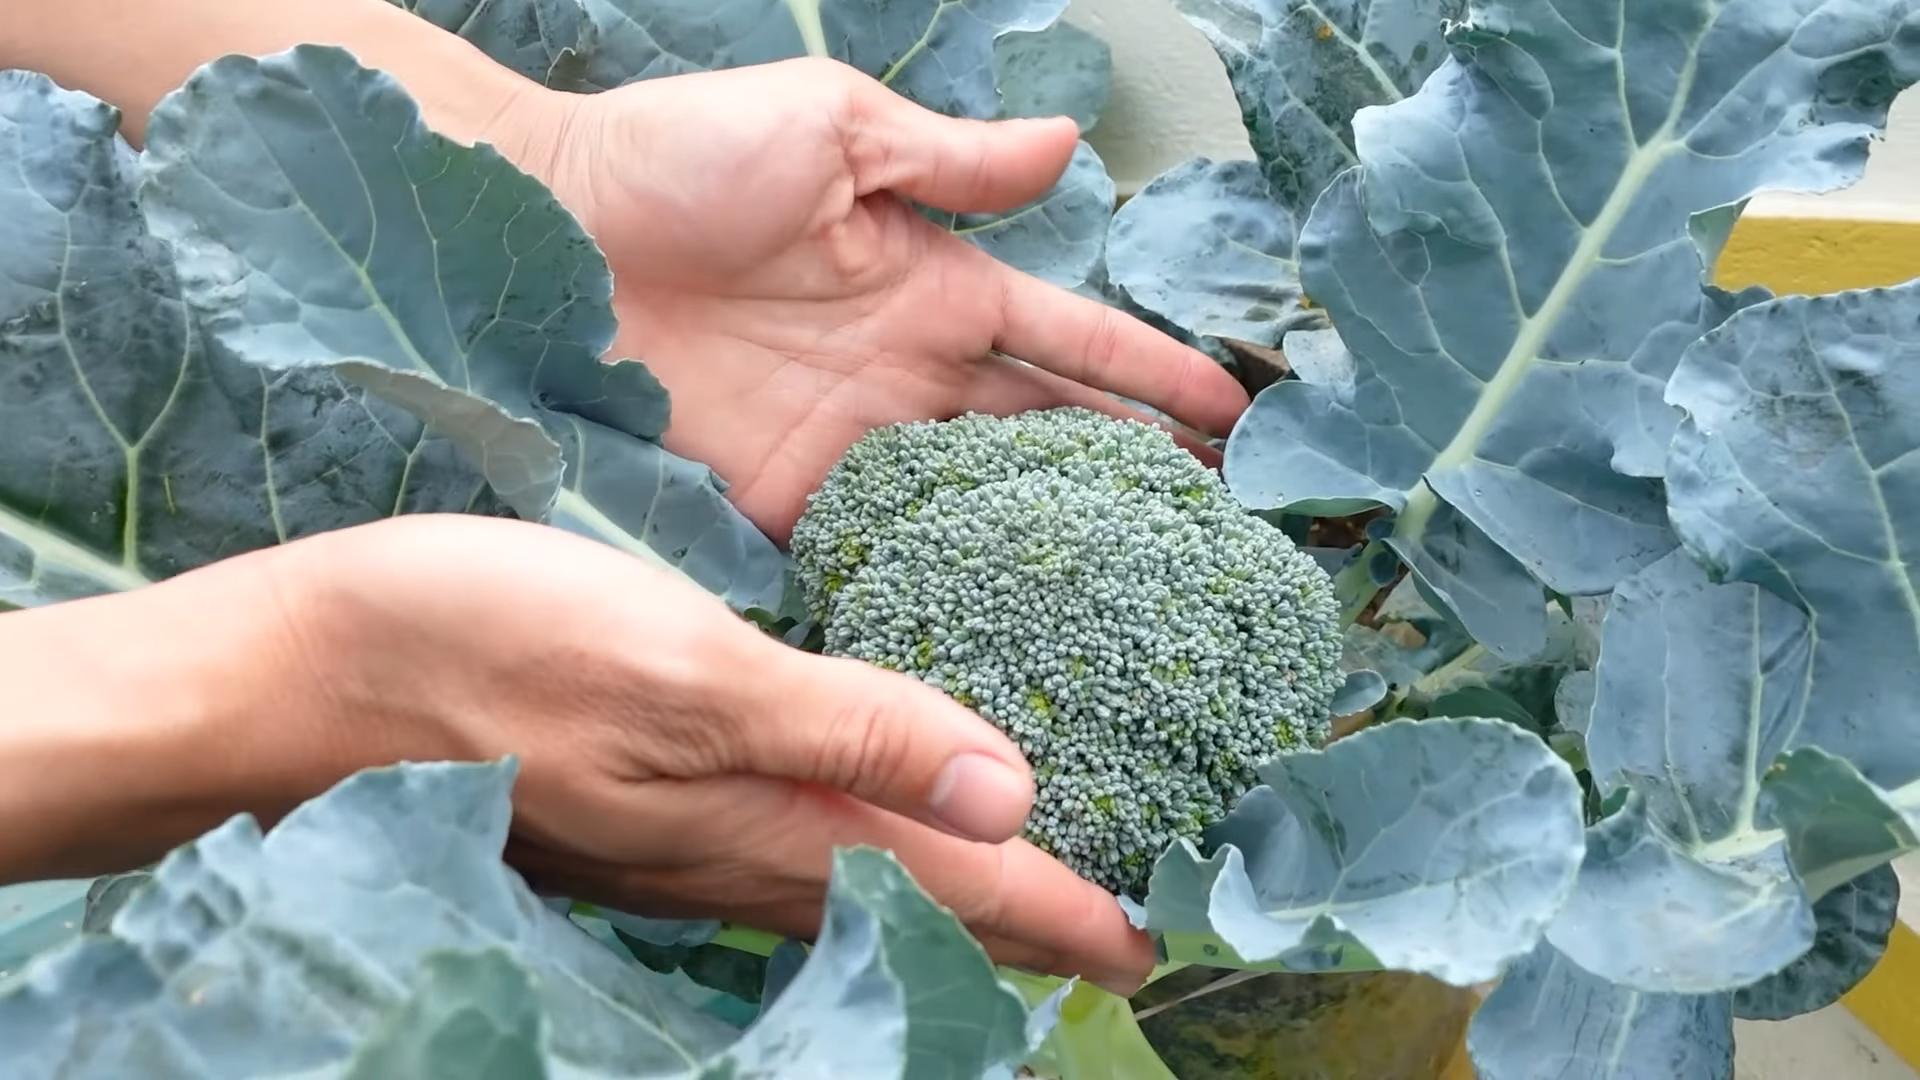
1. Timing: Harvest your broccoli when the heads are firm, tight, and a deep green color. The individual florets should be tightly closed.
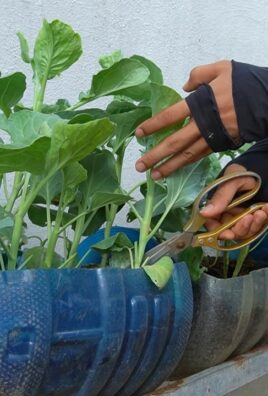
2. Cutting the Head: Use a sharp knife to cut the main head from the plant, leaving a few inches of stem.
3. Side Shoots: After you harvest the main head, the plant will produce side shoots. These smaller heads are also delicious and can be harvested as they mature.
4. Don’t Wait Too Long: If you wait too long to harvest, the florets will start to open and turn yellow. The broccoli will still be edible, but it won’t be as flavorful or tender.
Troubleshooting Common Broccoli Problems
Even with the best care, you might encounter a few problems while growing broccoli. Here are some common issues and how to address them:
* Buttoning: This is when the broccoli heads form prematurely and are very small. It’s often caused by stress, such as extreme temperatures, lack of water, or nutrient deficiencies. Make sure your plants are getting enough water and fertilizer, and protect them from extreme weather.
* Yellowing Leaves: Yellowing leaves can be a sign of nutrient deficiencies, overwatering, or disease. Check the soil drainage and adjust your watering schedule accordingly. Fertilize your plants with a balanced fertilizer.
* Clubroot: This is a fungal disease that causes the roots to swell and become distorted. It can stunt the growth of the plant and eventually kill it. To prevent clubroot, make sure your soil is well-drained
Conclusion
So, there you have it! Growing broccoli naturally, without harsh chemicals or expensive store-bought solutions, is not only achievable but also incredibly rewarding. We’ve explored a simple yet effective method that empowers you to take control of your garden and enjoy the freshest, most flavorful broccoli imaginable.
Why is this DIY approach a must-try? Because it’s about more than just saving money (though that’s certainly a perk!). It’s about cultivating a healthier ecosystem in your backyard, reducing your environmental impact, and knowing exactly what goes into the food you’re feeding yourself and your family. Imagine the satisfaction of harvesting plump, vibrant broccoli heads, knowing they were nurtured with your own hands and a little bit of natural ingenuity.
But the beauty of this method lies in its adaptability. Feel free to experiment with different types of compost or natural fertilizers to find what works best for your soil. Companion planting is another fantastic avenue to explore. Marigolds, for example, are known to deter pests, while dill can attract beneficial insects that prey on aphids. Consider interplanting your broccoli with these helpful companions to create a thriving, self-regulating garden.
Another variation to consider is succession planting. By planting broccoli seeds or seedlings every few weeks, you can ensure a continuous harvest throughout the growing season. This is especially useful if you have a large family or enjoy sharing your bounty with neighbors.
Don’t be afraid to get creative with your pest control methods, too. While the soapy water solution is effective, you can also try introducing beneficial nematodes to your soil to combat soil-borne pests. Or, if you’re dealing with cabbage worms, hand-picking them off your plants is a surprisingly effective (and therapeutic!) method.
Ultimately, the key to successful natural broccoli cultivation is observation and adaptation. Pay close attention to your plants, monitor their growth, and adjust your approach as needed. Don’t be discouraged by setbacks – every gardener faces challenges, and learning from those experiences is part of the fun.
We wholeheartedly encourage you to give this DIY trick a try. Start small, experiment with different techniques, and most importantly, enjoy the process. We’re confident that you’ll be amazed by the results.
And once you’ve harvested your first crop of naturally grown broccoli, we’d love to hear about your experience! Share your tips, tricks, and photos in the comments below. Let’s build a community of gardeners who are passionate about growing healthy, delicious food in a sustainable way. Together, we can make a difference, one broccoli plant at a time. Let us know what worked for you, what challenges you faced, and any unique variations you discovered. Your insights will help other gardeners on their journey to growing broccoli naturally.
Frequently Asked Questions (FAQ)
1. What type of soil is best for growing broccoli naturally?
Broccoli thrives in well-drained, fertile soil that is rich in organic matter. The ideal soil pH is between 6.0 and 7.0. Before planting, amend your soil with compost, aged manure, or other organic materials to improve its structure and fertility. If your soil is heavy clay, consider adding sand or perlite to improve drainage. A soil test can provide valuable insights into your soil’s nutrient levels and pH, allowing you to make targeted amendments.
2. How often should I water my broccoli plants?
Broccoli needs consistent moisture, especially during hot weather. Water deeply and regularly, aiming to keep the soil consistently moist but not waterlogged. A good rule of thumb is to water when the top inch of soil feels dry to the touch. Mulching around your plants with straw or wood chips can help retain moisture and suppress weeds. Drip irrigation is an excellent option for providing consistent and efficient watering.
3. What are some common pests that affect broccoli, and how can I control them naturally?
Common broccoli pests include cabbage worms, aphids, flea beetles, and cabbage root maggots. For cabbage worms, hand-picking them off the plants is an effective method, especially for smaller infestations. You can also use Bacillus thuringiensis (Bt), a natural bacterium that is toxic to caterpillars. Aphids can be controlled with a strong spray of water or by introducing beneficial insects like ladybugs. Flea beetles can be deterred by covering your plants with row covers. Cabbage root maggots can be prevented by using root collars or by incorporating beneficial nematodes into the soil.
4. How much sunlight does broccoli need?
Broccoli requires at least 6 hours of direct sunlight per day to thrive. Choose a planting location that receives full sun for optimal growth and head development. If you live in a particularly hot climate, some afternoon shade may be beneficial to prevent bolting (premature flowering).
5. When is the best time to plant broccoli?
The best time to plant broccoli depends on your climate. In cooler climates, you can start seeds indoors 6-8 weeks before the last expected frost and transplant them outdoors after the danger of frost has passed. In warmer climates, you can plant broccoli in the fall for a winter harvest. Check your local planting calendar for specific dates.
6. How do I know when my broccoli is ready to harvest?
Broccoli is ready to harvest when the heads are firm, tight, and a deep green color. The individual florets should be tightly closed. If the florets start to open and turn yellow, it’s a sign that the broccoli is starting to bolt and should be harvested immediately. Cut the main head with a sharp knife, leaving a few inches of stem. Side shoots will often develop after the main head is harvested, providing you with additional broccoli.
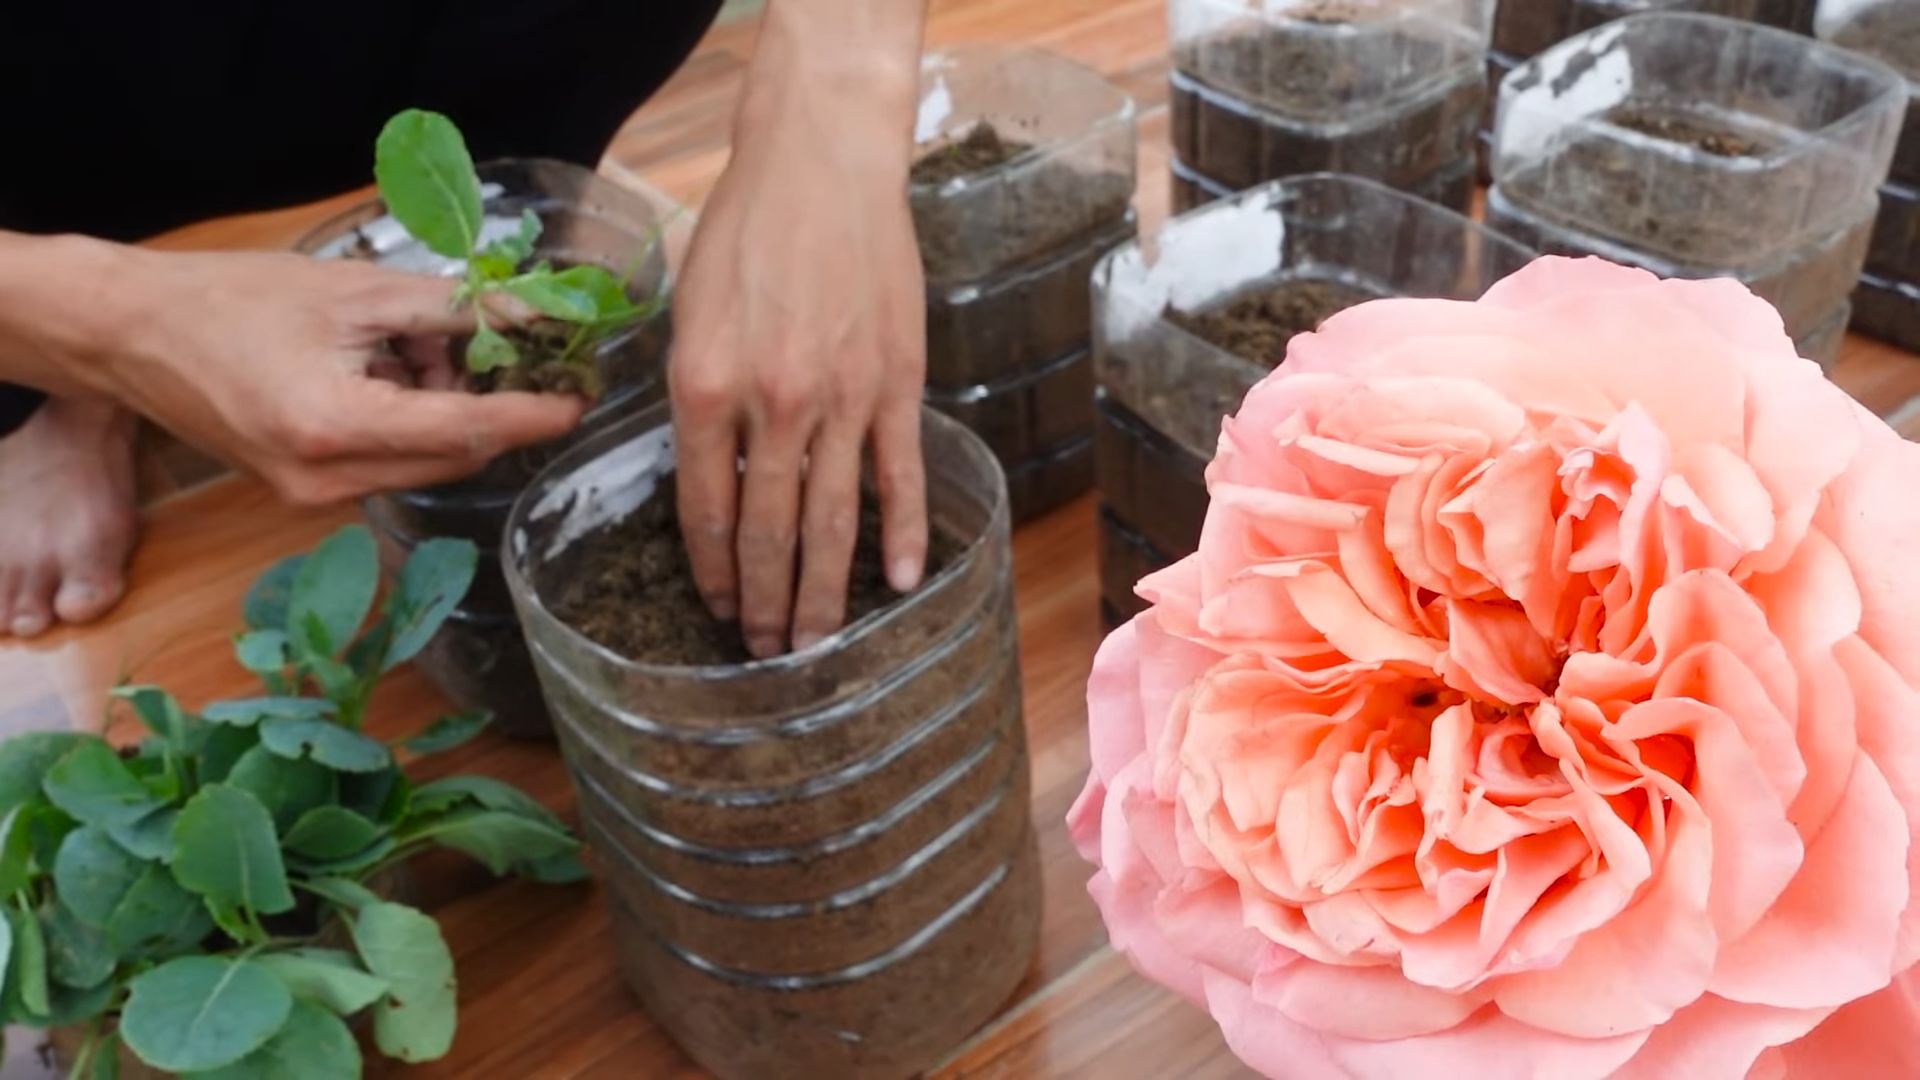
7. Can I grow broccoli in containers?
Yes, you can grow broccoli in containers, but you’ll need to choose a large container (at least 5 gallons) with good drainage. Use a high-quality potting mix and fertilize regularly. Container-grown broccoli may require more frequent watering than broccoli grown in the ground. Choose a sunny location for your container garden.
8. What are some good companion plants for broccoli?
Good companion plants for broccoli include marigolds, dill, rosemary, thyme, onions, garlic, and nasturtiums. Marigolds deter pests, dill attracts beneficial insects, and onions and garlic repel aphids. Nasturtiums act as a trap crop, attracting pests away from your broccoli plants.
9. How can I prevent broccoli from bolting?
Bolting is when broccoli prematurely flowers, resulting in a bitter taste. To prevent bolting, choose bolt-resistant varieties, plant at the appropriate time of year, provide consistent moisture, and protect your plants from extreme heat. Mulching can help keep the soil cool and moist.
10. What natural fertilizers can I use for broccoli?
There are many natural fertilizers you can use for broccoli, including compost, aged manure, fish emulsion, and seaweed extract. Compost and aged manure provide a slow-release source of nutrients, while fish emulsion and seaweed extract provide a quick boost. Apply fertilizer according to package directions. You can also use cover crops like clover or vetch to improve soil fertility.


Leave a Comment