
Growing Celery From Scraps: Imagine never having to buy celery again! Sounds too good to be true? Well, get ready to be amazed because this DIY guide will show you how to turn those leftover celery stalks into a thriving, crunchy, and delicious supply of fresh celery, right in your own home!
For centuries, resourceful gardeners have sought ways to maximize their yields and minimize waste. While the exact origins of regrowing vegetables from scraps are hard to pinpoint, the practice resonates with a long history of self-sufficiency and a deep connection to the earth. It’s a testament to human ingenuity and our desire to nurture life from even the smallest beginnings.
Let’s be honest, we’ve all tossed celery ends into the compost bin, haven’t we? But what if I told you that those seemingly useless scraps hold the key to a continuous supply of fresh celery? In today’s world, where sustainability and saving money are more important than ever, learning how to grow celery from scraps is a game-changer. Not only will you reduce food waste, but you’ll also enjoy the satisfaction of nurturing new life and having fresh, organic celery readily available for your soups, salads, and snacks. So, ditch the grocery store celery and let’s get started on this fun and rewarding DIY project!
Growing Celery From Scraps: A Beginner’s Guide
Hey there, fellow gardening enthusiasts! Have you ever tossed those celery ends into the compost bin and thought, “There has to be a better way?” Well, you’re in luck! I’m here to show you how to regrow celery from those seemingly useless scraps. It’s a super easy and rewarding project that even the most novice gardener can tackle. Plus, it’s a fantastic way to reduce food waste and enjoy fresh celery right from your own kitchen!
What You’ll Need
Before we dive in, let’s gather our supplies. This project is wonderfully low-tech, so you probably already have most of what you need:
* A celery stalk with the base intact (about 2-3 inches from the bottom). Make sure the base is firm and not mushy.
* A shallow dish or bowl.
* Water.
* A sunny windowsill or well-lit area.
* Potting soil.
* A pot or container (at least 6 inches in diameter).
* A trowel or small shovel.
* Optional: Rooting hormone (this can help speed up the process, but it’s not essential).
Phase 1: Rooting Your Celery Base
This is where the magic begins! We’re going to coax those celery cells into producing roots. Don’t worry, it’s easier than it sounds.
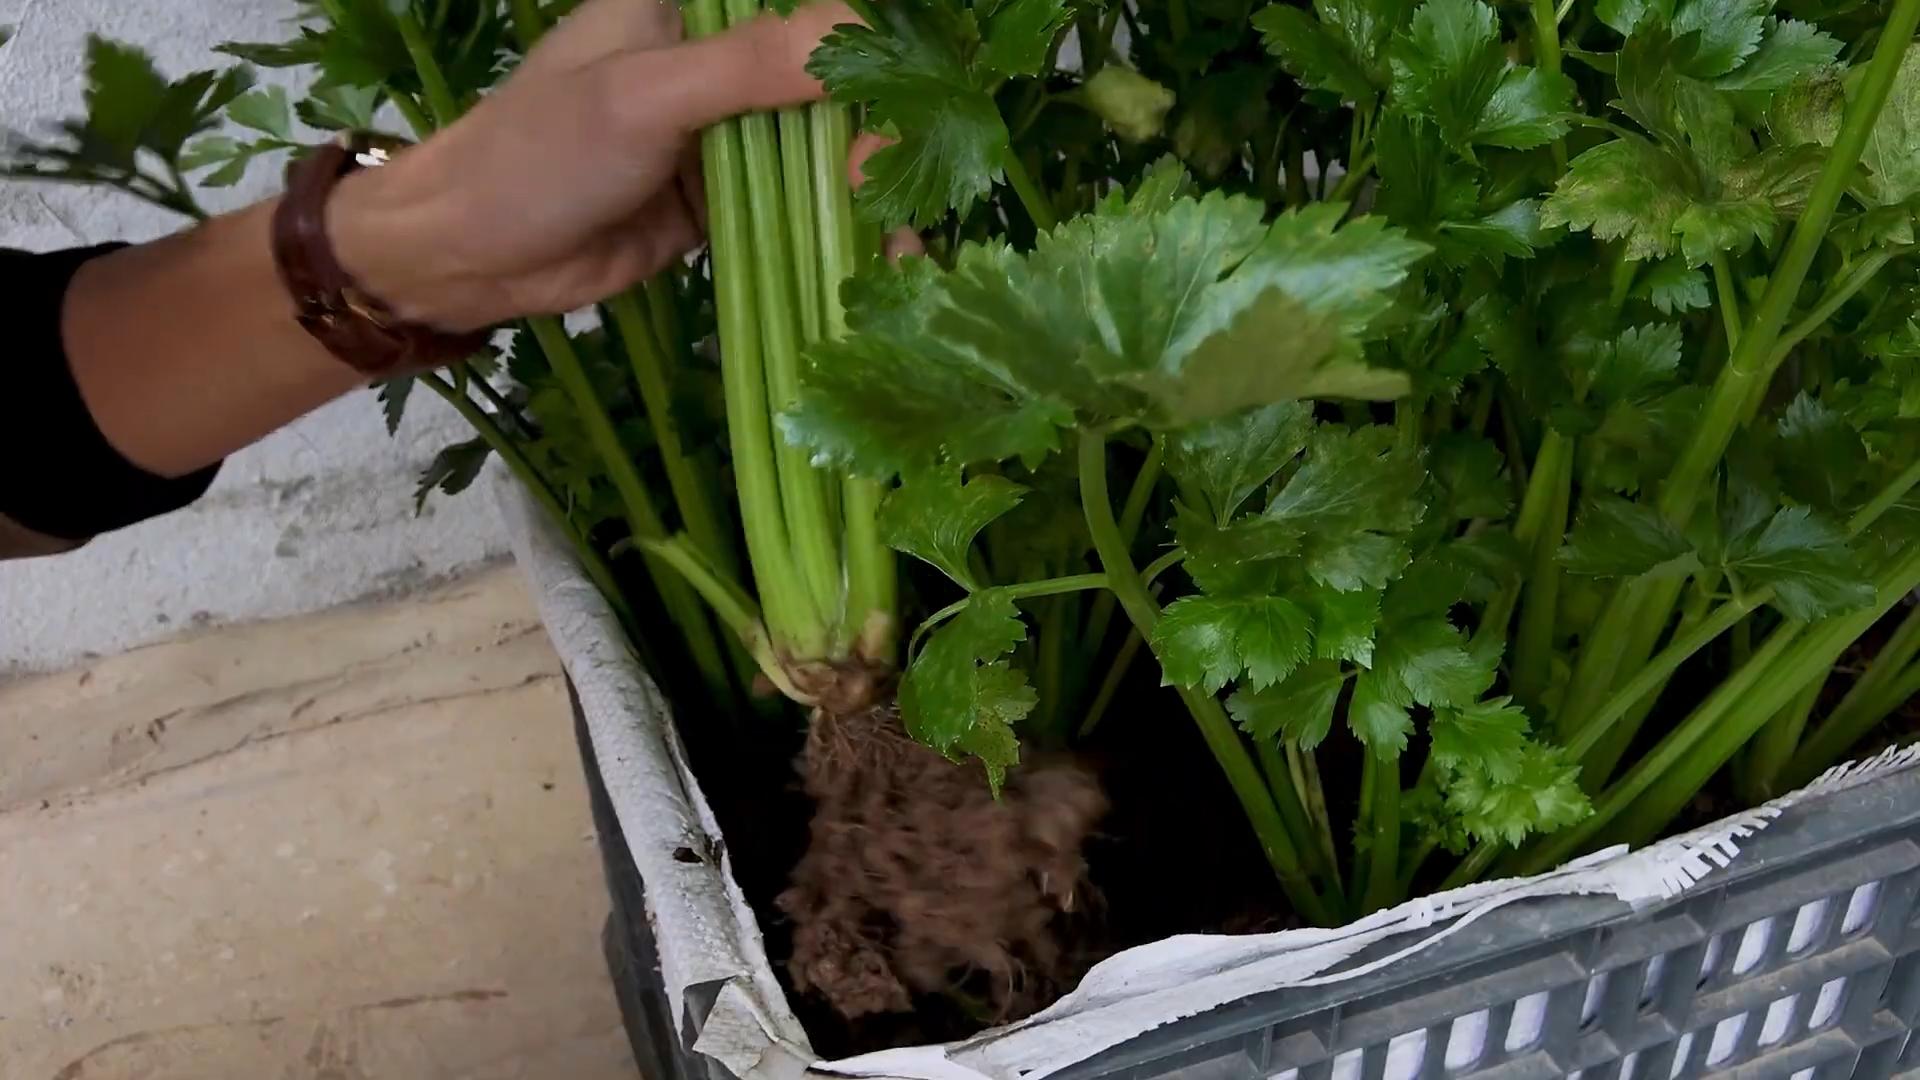
1. Prepare the Celery Base: Carefully cut off the celery stalks, leaving about 2-3 inches of the base intact. You can use the stalks for cooking or snacking – waste not, want not!
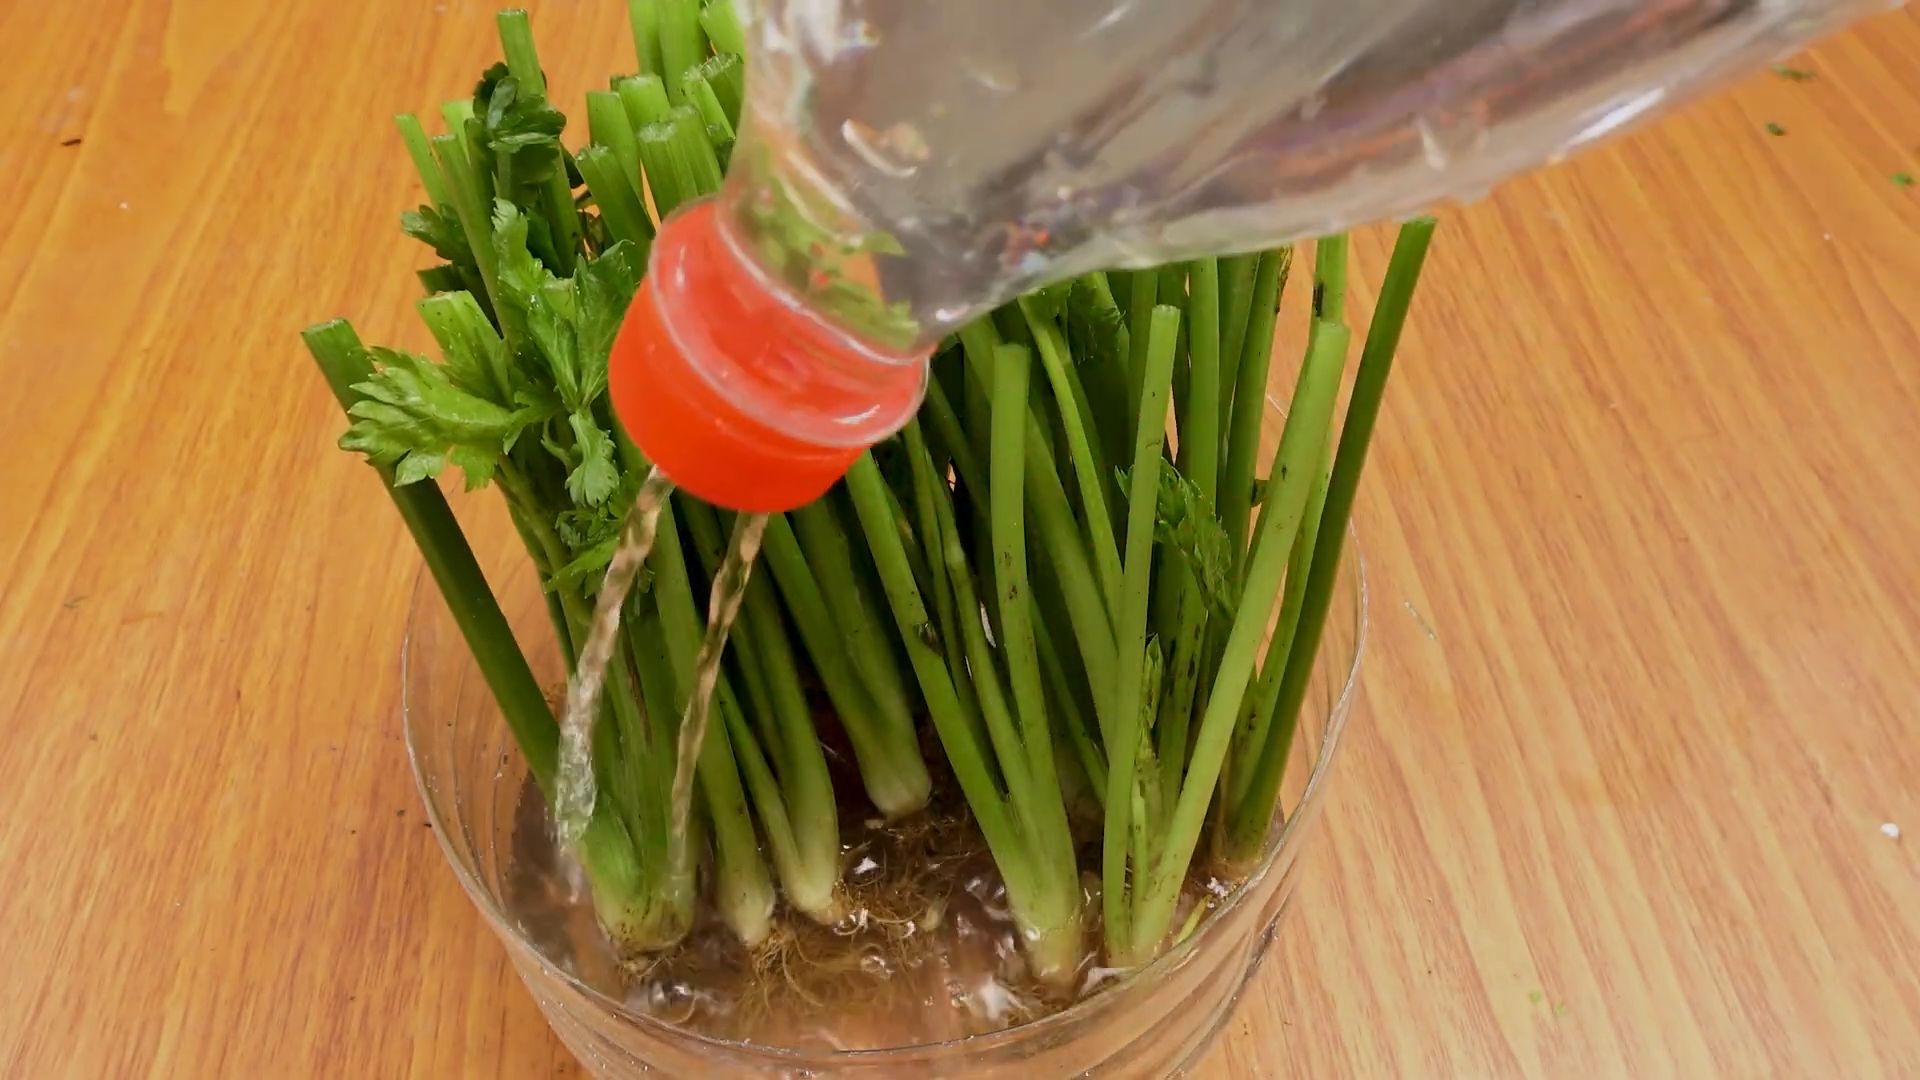
2. Place in Water: Put the celery base in your shallow dish or bowl. Add enough water to cover the bottom inch or so of the base. You don’t want to submerge the entire thing, just the bottom part where the roots will emerge.
3. Find a Sunny Spot: Place the dish with the celery base on a sunny windowsill or in a well-lit area. Celery needs plenty of light to thrive.
4. Change the Water Regularly: This is crucial! Change the water every 1-2 days to prevent bacteria growth and keep the water fresh. This will encourage healthy root development.
5. Observe and Wait: Now comes the patience part. Over the next few days, you should start to see small roots emerging from the bottom of the celery base. You might also notice new green shoots sprouting from the top. This is a great sign! It usually takes about 5-7 days for the roots to be long enough for planting.
Phase 2: Planting Your Rooted Celery
Once your celery base has developed a good network of roots (about an inch or two long), it’s time to move it to a pot with soil.
1. Prepare Your Pot: Fill your pot or container with good-quality potting soil. Make sure the pot has drainage holes to prevent waterlogging.
2. Dig a Hole: Use your trowel or small shovel to dig a hole in the center of the pot, large enough to accommodate the celery base and its roots.
3. Optional: Apply Rooting Hormone: If you’re using rooting hormone, dip the roots of the celery base into the powder or liquid according to the product instructions. This will give your celery a little extra boost.
4. Plant the Celery Base: Carefully place the celery base into the hole, making sure the roots are spread out. Gently fill the hole with potting soil, covering the base up to where the green shoots begin.
5. Water Thoroughly: Water the newly planted celery thoroughly until the water drains out of the bottom of the pot. This will help settle the soil and ensure the roots have access to moisture.
Phase 3: Caring for Your Growing Celery
Now that your celery is planted, it’s time to provide it with the care it needs to flourish.
1. Sunlight: Celery loves sunlight! Place your pot in a sunny location where it will receive at least 6 hours of direct sunlight per day. If you don’t have a sunny spot indoors, you can use a grow light.
2. Watering: Keep the soil consistently moist, but not soggy. Water when the top inch of soil feels dry to the touch. Avoid overwatering, as this can lead to root rot.
3. Fertilizing: Celery is a heavy feeder, so it benefits from regular fertilization. Use a balanced liquid fertilizer diluted to half strength every 2-3 weeks. Follow the instructions on the fertilizer packaging.
4. Pest Control: Keep an eye out for common garden pests like aphids and slugs. If you spot any pests, you can try spraying them with insecticidal soap or hand-picking them off the plants.
5. Blanching (Optional): If you prefer milder-tasting celery, you can blanch the stalks a few weeks before harvesting. To blanch, simply wrap the stalks with newspaper or cardboard, leaving the top few inches exposed to sunlight. This will block the sunlight and reduce the chlorophyll content, resulting in paler, milder stalks.
Phase 4: Harvesting Your Celery
After a few months of care, your celery should be ready to harvest!
1. Harvest Time: You can start harvesting individual stalks when they reach a size you’re happy with. Typically, this is when they are about 6-8 inches long.
2. Harvesting Method: To harvest, simply cut the outer stalks near the base of the plant with a sharp knife. Leave the inner stalks to continue growing.
3. Enjoy Your Harvest: Wash your freshly harvested celery and enjoy it in salads, soups, smoothies, or as a healthy snack!
Troubleshooting Tips
Even with the best care, you might encounter a few challenges along the way. Here are some common problems and how to fix them:
* Celery isn’t growing: Make sure your celery is getting enough sunlight, water, and fertilizer. Also, check the soil pH. Celery prefers a slightly acidic soil (pH 6.0-6.8).
* Celery stalks are bitter: This can be caused by lack of water or excessive heat. Make sure to water your celery regularly and provide shade during the hottest part of the day. Blanching can also help reduce bitterness.
* Celery is bolting (going to seed): Bolting is usually caused by stress, such as extreme temperatures or lack of water. Try to maintain consistent growing conditions to prevent bolting.
* Yellowing leaves: This could indicate a nutrient deficiency. Try fertilizing your celery with a balanced fertilizer.
* Root rot: This is caused by overwatering. Make sure your pot has drainage holes and allow the soil to dry out slightly between waterings.
Extra Tips for Success
* Choose the right celery: Select a celery stalk with a firm, healthy base. Avoid stalks that are wilted or have brown spots.
* Use good-quality potting soil: This will provide your celery with the nutrients it needs to grow.
* Be patient: Growing celery from scraps takes time and patience. Don’t get discouraged if you don’t see results immediately.
* Experiment: Try growing different varieties of celery to see which ones you like best.
* Have fun! Gardening should be enjoyable. Relax, experiment, and enjoy the process of growing your own food.
Growing celery from scraps is a fun, easy, and rewarding project that anyone can do. With a little bit of care and attention, you can enjoy fresh, homegrown celery all season long. So, go ahead and give it a try! You might be surprised at how easy it is to turn those kitchen scraps into a delicious and healthy treat. Happy gardening!
Conclusion
So, there you have it! Growing celery from scraps isn’t just a fun gardening experiment; it’s a sustainable way to reduce food waste, enjoy fresh, homegrown produce, and connect with nature, even if you only have a windowsill. It’s a surprisingly rewarding process that transforms what would otherwise be kitchen scraps into vibrant, edible stalks.
Why is this DIY trick a must-try? Because it’s incredibly easy, cost-effective, and environmentally friendly. You’re essentially getting a free celery plant from something you’d normally throw away. Plus, it’s a fantastic learning experience, especially for kids, demonstrating the magic of plant regeneration. Imagine the satisfaction of harvesting celery that you nurtured from a humble base!
Beyond the basic method, there are plenty of ways to customize your celery-growing adventure. Consider experimenting with different varieties of celery to see which thrives best in your environment. You could also try planting your regrown celery in different types of soil or containers to observe the impact on its growth. For a spicier twist, try growing celeriac from scraps, although the process might be slightly different and require more patience.
Don’t be afraid to get creative with your celery once you’ve harvested it. Use it in soups, salads, smoothies, or as a crunchy snack with your favorite dip. The possibilities are endless! You can even use the leaves, which are often discarded, to add flavor to broths and stocks.
We wholeheartedly encourage you to give this DIY trick a try. It’s a simple yet powerful way to embrace sustainable living and enjoy the fruits (or rather, vegetables) of your labor. Remember, even if your first attempt isn’t perfect, don’t give up! Gardening is all about learning and adapting.
And most importantly, we want to hear about your experience! Share your photos, tips, and stories in the comments below. Did you encounter any challenges? What did you learn? What variations did you try? Your feedback will not only help other readers but also inspire us to continue exploring innovative and sustainable gardening practices. Let’s build a community of celery-growing enthusiasts! Embrace the joy of growing celery from scraps and discover the satisfaction of turning waste into something wonderful.
Frequently Asked Questions (FAQ)
What kind of celery works best for regrowing?
Generally, any store-bought celery stalk will work for regrowing. However, organic celery might be a slightly better option as it’s less likely to have been treated with chemicals that could inhibit growth. Look for celery with a healthy-looking base that isn’t too dry or damaged. The fresher the base, the better your chances of success.
How long does it take to regrow celery from scraps?
The initial stage of regrowing, where you see new leaves sprouting from the base, usually takes about 5-7 days. After that, transplanting it to soil and growing it to a harvestable size can take anywhere from 2-3 months, depending on the growing conditions, such as sunlight, water, and soil quality. Be patient; celery growth can be slow but steady.
What kind of soil is best for growing regrown celery?
Celery thrives in rich, well-draining soil. A good mix would be equal parts of potting soil, compost, and perlite or vermiculite. The compost provides essential nutrients, while the perlite or vermiculite ensures good drainage, preventing the roots from becoming waterlogged. You can also add a slow-release fertilizer to the soil to provide a continuous supply of nutrients.
How much sunlight does regrown celery need?
Celery needs at least 6 hours of sunlight per day to thrive. A sunny windowsill or a spot in your garden that receives ample sunlight is ideal. If you don’t have enough natural light, you can supplement with a grow light. Rotate the celery plant regularly to ensure that all sides receive equal exposure to sunlight.
How often should I water my regrown celery?
Celery needs consistent moisture to grow well. Water your celery plant whenever the top inch of soil feels dry to the touch. Avoid overwatering, as this can lead to root rot. Ensure that the pot or container has drainage holes to allow excess water to escape. During hot weather, you may need to water more frequently.
Can I grow celery from scraps indoors permanently?
Yes, you can grow celery from scraps indoors permanently, but it may not reach the same size as celery grown outdoors. To successfully grow celery indoors, provide it with adequate sunlight (or a grow light), consistent moisture, and nutrient-rich soil. You may also need to repot it into a larger container as it grows.
What are some common problems when growing celery from scraps, and how can I fix them?
Some common problems include:
* **Yellowing leaves:** This could be a sign of overwatering, underwatering, or nutrient deficiency. Adjust your watering schedule and consider adding fertilizer.
* **Slow growth:** This could be due to insufficient sunlight, poor soil quality, or lack of nutrients. Ensure that your celery plant is getting enough sunlight and that the soil is rich in nutrients.
* **Pests:** Celery can be susceptible to pests like aphids and slugs. Inspect your plant regularly and treat any infestations with insecticidal soap or other organic pest control methods.
* **Root rot:** This is caused by overwatering and poor drainage. Ensure that your pot or container has drainage holes and avoid overwatering.
Can I eat the celery leaves that grow from the regrown base?
Absolutely! Celery leaves are perfectly edible and have a stronger flavor than the stalks. You can use them in soups, salads, stir-fries, or as a garnish. Don’t throw them away; they’re a valuable addition to your culinary creations.
How do I harvest my regrown celery?
Once your celery stalks have reached a desirable size (usually around 6-8 inches tall), you can harvest them by cutting them off at the base with a sharp knife. You can harvest individual stalks as needed or harvest the entire plant at once. After harvesting, the base may continue to produce new shoots, allowing you to harvest multiple times.
Is growing celery from scraps truly sustainable?
Yes, growing celery from scraps is a sustainable practice because it reduces food waste and minimizes the need to purchase new celery from the store. By regrowing celery from scraps, you’re contributing to a more circular food system and reducing your environmental impact. It’s a small but meaningful step towards a more sustainable lifestyle.


Leave a Comment