
Balcony Mint Growing Tips: Unlock the secrets to a thriving herb garden, even in the smallest of spaces! Have you ever dreamed of stepping onto your balcony and snipping fresh mint for a refreshing mojito or a fragrant cup of tea? I know I have! But the reality of limited space can often feel like a barrier to achieving that green oasis.
Mint, with its vibrant history stretching back to ancient Egypt where it was used for medicinal purposes and culinary delights, is a surprisingly resilient herb. However, growing it successfully on a balcony requires a few clever tricks and techniques. That’s where this DIY guide comes in!
Many people struggle with growing mint in containers, especially on balconies. It can quickly become leggy, succumb to pests, or simply fail to thrive due to inadequate sunlight or improper watering. But fear not! I’m here to share my tried-and-true balcony mint growing tips that will transform your small outdoor space into a fragrant and productive herb haven. This guide will provide you with the knowledge and confidence to cultivate a flourishing mint plant, regardless of your balcony’s size or your gardening experience. Get ready to enjoy the delightful aroma and fresh flavor of homegrown mint, right at your fingertips!
Growing Mint on Your Balcony: A DIY Guide to Fresh Flavor
Okay, so you want to grow mint on your balcony? Awesome! Fresh mint is a game-changer for everything from mojitos to teas to adding a vibrant kick to your cooking. And the best part? It’s surprisingly easy, even if you don’t have a green thumb. I’m going to walk you through everything you need to know to get your balcony mint garden thriving.
Choosing Your Mint Variety
First things first, let’s talk mint varieties. There’s more than just your standard spearmint out there! Each type has a slightly different flavor profile, so picking the right one is key.
* **Spearmint:** This is your classic mint, the one you probably think of first. It’s got a refreshing, slightly sweet flavor that’s perfect for teas, cocktails, and sauces.
* **Peppermint:** A bit more intense than spearmint, peppermint has a cool, almost spicy flavor. Great for candies, desserts, and adding a zing to your drinks.
* **Chocolate Mint:** Yes, you read that right! This variety has a subtle chocolatey aroma and flavor. It’s delicious in desserts, especially ice cream.
* **Apple Mint:** A milder, fruitier mint with a hint of apple. It’s lovely in salads and fruit salads.
* **Orange Mint:** As you might guess, this mint has a citrusy aroma and flavor. It’s a great addition to teas and cocktails.
I recommend starting with spearmint or peppermint, as they’re generally the easiest to grow. But don’t be afraid to experiment!
Materials You’ll Need
Before we get started, let’s gather our supplies. Here’s what you’ll need:
* **Mint Seeds or Seedlings:** You can start from seeds, but I find it much easier to buy seedlings from a local nursery or garden center.
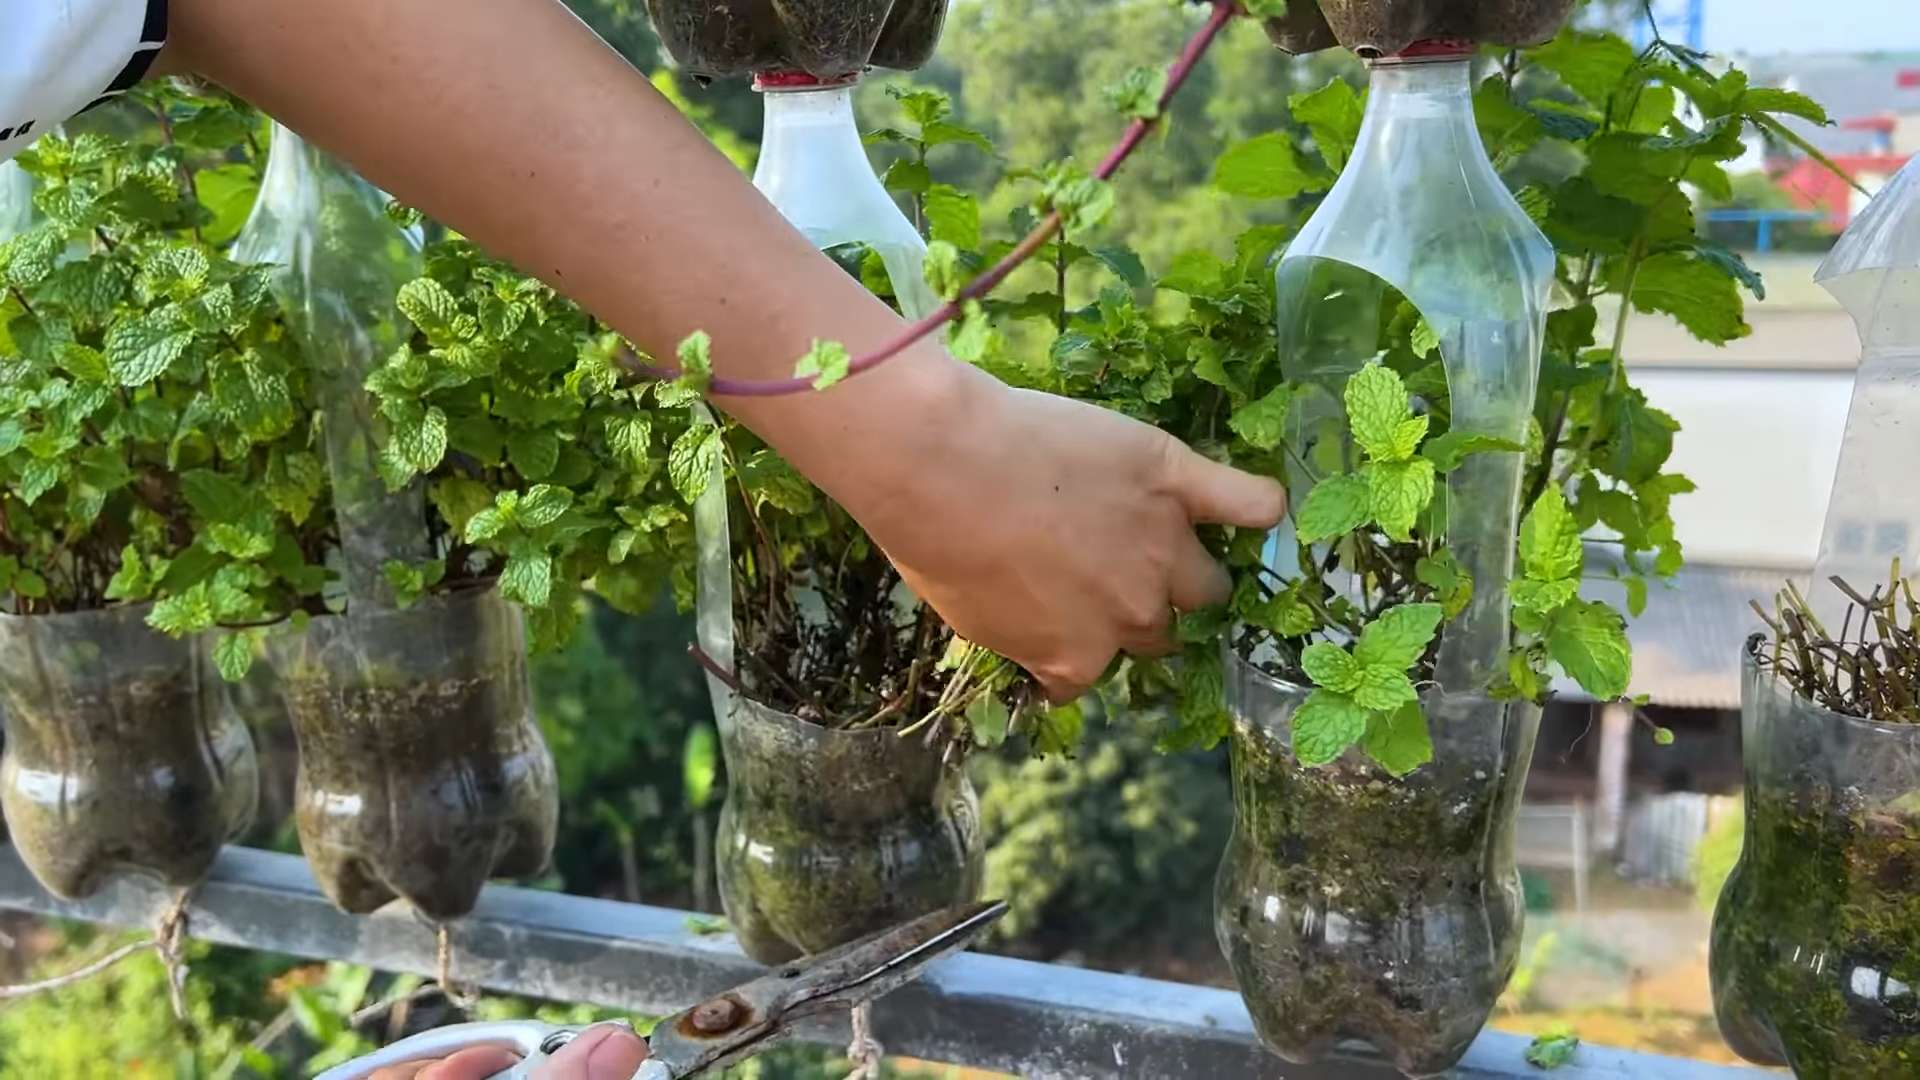
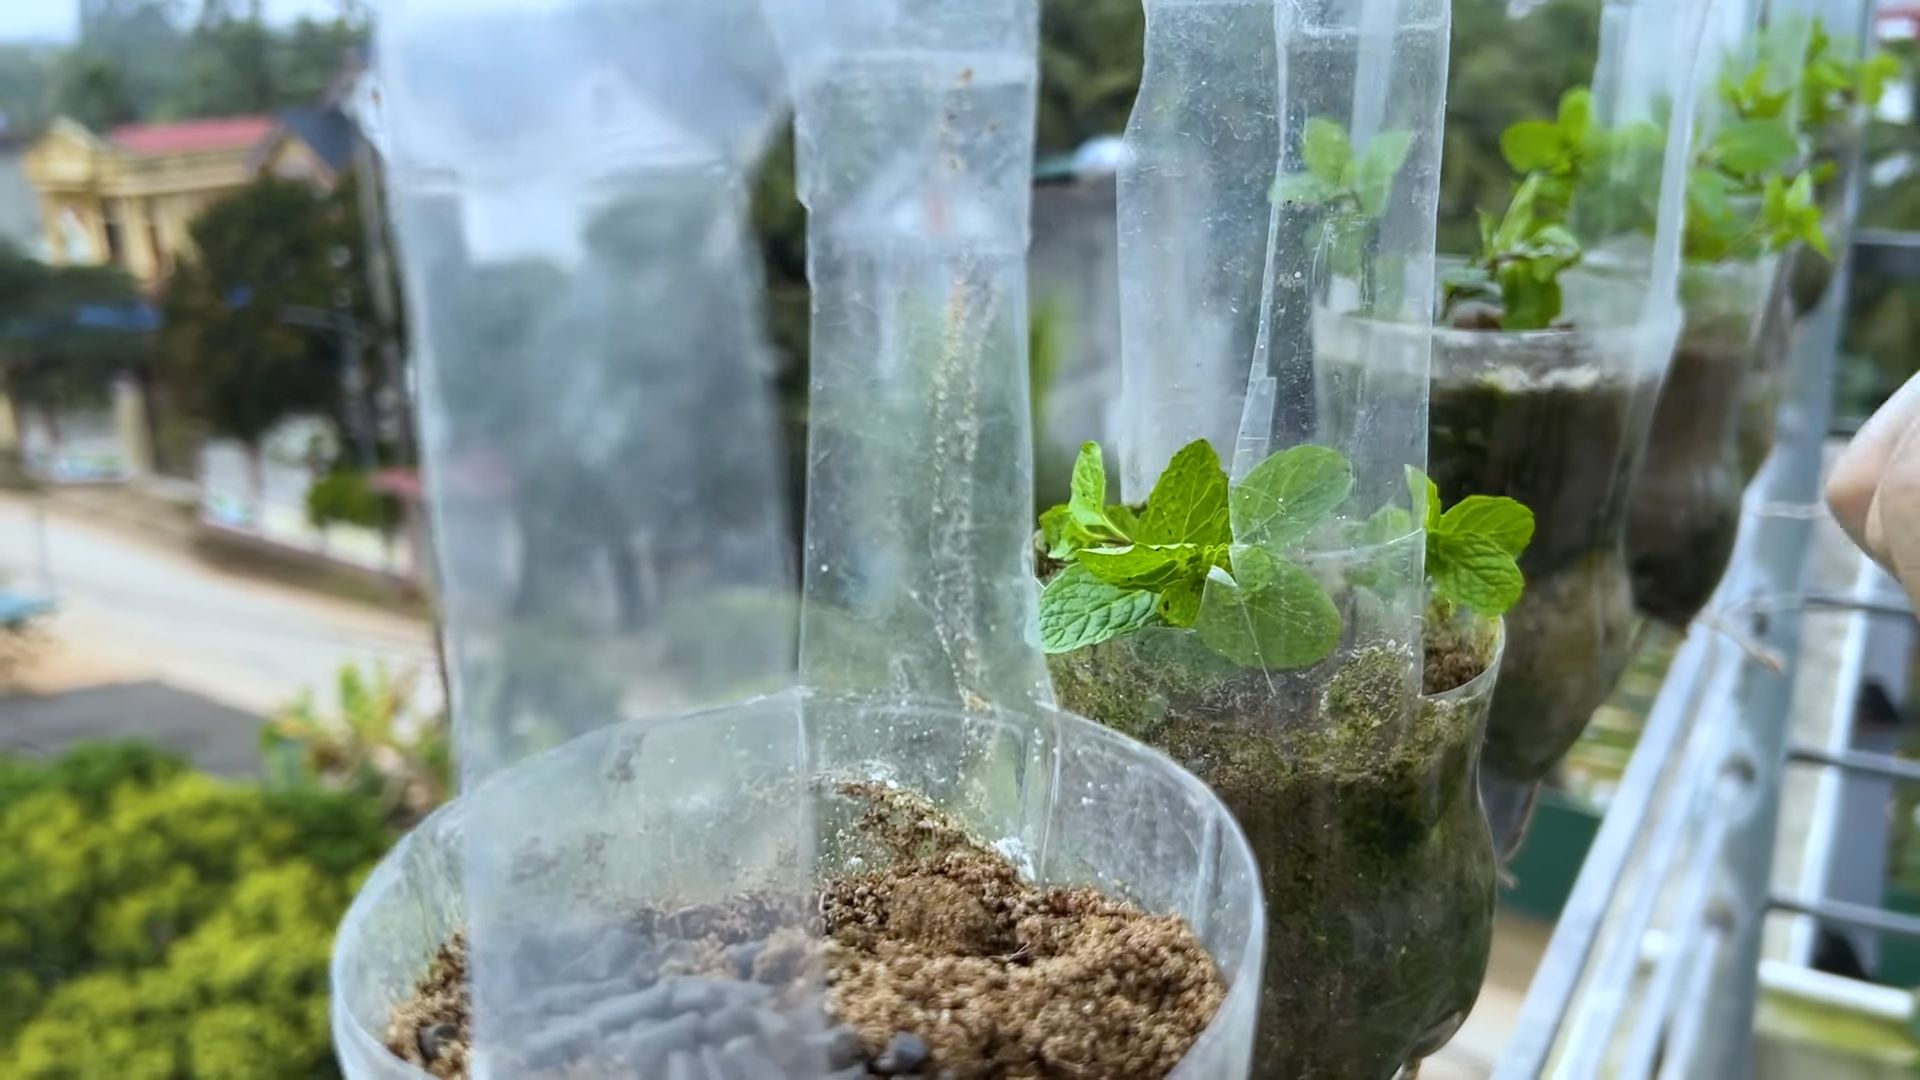
* **Pots or Containers:** Choose pots that are at least 6-8 inches in diameter. Mint spreads like crazy, so you’ll want to give it some room. Make sure the pots have drainage holes!
* **Potting Soil:** Use a good-quality potting mix that’s well-draining. Avoid using garden soil, as it can become compacted in pots.
* **Watering Can or Hose:** For watering your mint.
* **Optional: Fertilizer:** A balanced liquid fertilizer can help your mint thrive, but it’s not essential.
* **Optional: Pruning Shears or Scissors:** For trimming and harvesting your mint.
Step-by-Step Planting Guide
Alright, let’s get our hands dirty! Here’s how to plant your mint:
1. **Prepare Your Pots:** Fill your pots with potting soil, leaving about an inch of space at the top.
2. **Plant Your Mint:** If you’re using seedlings, gently remove them from their containers and loosen the roots a bit. Place each seedling in the center of a pot and cover the roots with soil. If you’re starting from seeds, sprinkle a few seeds on top of the soil and lightly cover them with more soil.
3. **Water Thoroughly:** Water your newly planted mint until the soil is evenly moist.
4. **Choose a Sunny Spot:** Mint loves sunlight, so place your pots in a spot on your balcony that gets at least 4-6 hours of direct sunlight per day.
5. **Water Regularly:** Keep the soil consistently moist, but not soggy. Water when the top inch of soil feels dry to the touch.
6. **Fertilize (Optional):** If you want to give your mint a boost, fertilize it every 2-4 weeks with a balanced liquid fertilizer. Follow the instructions on the fertilizer package.
Caring for Your Balcony Mint
Now that your mint is planted, it’s time to learn how to keep it happy and healthy.
* **Sunlight:** As I mentioned, mint loves sunlight. If your balcony doesn’t get enough direct sunlight, you can supplement with a grow light.
* **Watering:** The key is to keep the soil consistently moist. Check the soil moisture regularly and water when needed.
* **Pruning:** Pruning is essential for keeping your mint from getting leggy and overgrown. Pinch off the top leaves regularly to encourage bushier growth.
* **Pest Control:** Mint is generally pest-resistant, but it can sometimes be affected by aphids or spider mites. If you notice any pests, try spraying your mint with a mixture of water and dish soap.
* **Overwintering:** If you live in a cold climate, you’ll need to protect your mint during the winter. You can either bring your pots indoors or insulate them with burlap or bubble wrap.
Harvesting Your Mint
The best part about growing your own mint is being able to harvest it whenever you need it!
1. **When to Harvest:** You can start harvesting your mint as soon as it has a few sets of leaves.
2. **How to Harvest:** Use pruning shears or scissors to cut off stems just above a leaf node (the point where a leaf grows out of the stem).
3. **Harvesting Frequency:** Harvest your mint regularly to encourage new growth. Don’t be afraid to cut it back hard – it will grow back quickly!
4. **Preserving Your Mint:** If you have more mint than you can use fresh, you can dry it or freeze it. To dry mint, hang the stems upside down in a cool, dry place until the leaves are brittle. To freeze mint, chop the leaves and freeze them in ice cube trays with water.
Mint’s Invasive Nature: A Word of Caution
Okay, this is super important. Mint is notorious for being invasive. If you plant it directly in your garden, it will spread like wildfire and take over everything. That’s why growing it in containers on your balcony is such a great idea! It keeps the mint contained and prevents it from becoming a nuisance.
Never, ever plant mint directly in the ground unless you’re prepared for it to take over!
Troubleshooting Common Mint Problems
Even with the best care, you might encounter a few problems with your mint. Here are some common issues and how to fix them:
* **Yellowing Leaves:** This could be a sign of overwatering, underwatering, or nutrient deficiency. Check the soil moisture and adjust your watering accordingly. If the soil is consistently moist, let it dry out a bit before watering again. If the soil is dry, water thoroughly. You can also try fertilizing your mint with a balanced liquid fertilizer.
* **Leggy Growth:** This means your mint is getting too much shade or not enough pruning. Move your mint to a sunnier spot and prune it regularly.
* **Pests:** As I mentioned earlier, mint can sometimes be affected by aphids or spider mites. Spray your mint with a mixture of water and dish soap to get rid of them.
* **Powdery Mildew:** This is a fungal disease that can affect mint, especially in humid conditions. Improve air circulation around your mint by spacing the pots further apart. You can also try spraying your mint with a fungicide.
Creative Uses for Your Balcony Mint
Now for the fun part! Here are some ideas for using your fresh balcony mint:
* **Teas:** Steep fresh mint leaves in hot water for a refreshing and soothing tea.
* **Cocktails:** Mint is a key ingredient in mojitos, mint juleps, and other delicious cocktails.
* **Salads:** Add chopped mint to salads for a burst of fresh flavor.
* **Sauces:** Mint sauce is a classic accompaniment to lamb.
* **Desserts:** Mint is a delicious addition to desserts like ice cream, brownies, and cookies.
* **Garnish:** Use mint sprigs to garnish drinks, desserts, and savory dishes.
* **Infused Water:** Add mint leaves to your water for a refreshing and flavorful drink.
* **Homemade Beauty Products:** Mint can be used to make homemade face masks, scrubs, and toners.
Propagating Your Mint
Want even more mint? Propagating mint is super easy! You can do it by taking stem cuttings:
1. **Take a Cutting:** Cut a 4-6 inch stem from your mint plant, just below a leaf node.
2. **Remove Lower Leaves:** Remove the leaves from the bottom 2 inches of the stem.
3. **Root in Water:** Place the stem cutting in a glass of water, making sure the bottom 2 inches are submerged.
4. **Wait for Roots:** Place the glass in a bright, indirect light location. Change the water every few days. You should see roots start to form in a week or two.
5. **Plant in Soil:** Once the roots are about an inch long, you can plant the cutting in a pot filled with potting soil.
6. **Water Thoroughly:** Water the newly planted cutting thoroughly and keep the soil consistently moist.
And that’s it! You’ve successfully propagated your mint.
Final Thoughts
Growing mint on your balcony is a rewarding and easy way to add
Conclusion
So, there you have it! Transforming your balcony into a fragrant, thriving mint garden is not only achievable, but incredibly rewarding. We’ve explored the essential steps, from selecting the right container and soil to mastering watering and harvesting techniques. But why is this DIY balcony mint growing adventure a must-try?
Firstly, consider the sheer convenience. Imagine stepping onto your balcony and snipping fresh mint leaves for your morning tea, a refreshing mojito, or a flavorful addition to your favorite dishes. No more last-minute trips to the grocery store or settling for wilted, pre-packaged herbs. You’ll have a constant supply of vibrant, aromatic mint right at your fingertips.
Secondly, growing your own mint is significantly more cost-effective in the long run. Those small bunches of mint at the supermarket can quickly add up, especially if you’re a frequent user. With a single mint plant and a little care, you can enjoy a continuous harvest for months, even years, to come.
Thirdly, and perhaps most importantly, growing your own mint allows you to control the quality and freshness of your herbs. You’ll know exactly where your mint comes from and how it’s been grown, ensuring that it’s free from harmful pesticides and chemicals. Plus, the flavor of freshly picked mint is simply unmatched. It’s brighter, more intense, and adds a delightful zing to any recipe.
But the benefits don’t stop there. Gardening, even on a small scale, is a fantastic stress reliever. The simple act of tending to your plants, nurturing them, and watching them grow can be incredibly therapeutic. Plus, the fragrant aroma of mint is known to have calming and uplifting effects.
Ready to take your balcony mint growing to the next level? Consider experimenting with different varieties of mint. Chocolate mint adds a delightful cocoa flavor to desserts, while spearmint is perfect for classic mint sauces and teas. Peppermint, with its strong, refreshing aroma, is ideal for candies and essential oils. You can even create a multi-mint container garden, planting several different varieties together for a diverse and flavorful harvest.
Another variation to explore is companion planting. Mint is known to repel certain pests, making it a great companion for other balcony plants like tomatoes, peppers, and cabbage. Planting mint alongside these vegetables can help protect them from unwanted insects and promote healthier growth.
Don’t be afraid to get creative with your containers, too. While terracotta pots are a classic choice, you can also use recycled materials like old buckets, tin cans, or even repurposed plastic bottles. Just make sure your containers have adequate drainage to prevent waterlogging.
We’ve covered a lot of ground, but the best way to learn is by doing. So, grab a pot, some soil, and a mint plant, and get started on your balcony mint growing adventure today! We’re confident that you’ll be amazed at how easy and rewarding it is.
And now, we want to hear from you! Have you tried growing mint on your balcony before? What tips and tricks have you learned along the way? Share your experiences, successes, and challenges in the comments below. We’re eager to learn from your insights and build a community of balcony mint enthusiasts. Your feedback will not only help other readers but also inspire us to create even more helpful content in the future. Let’s cultivate a thriving community of balcony gardeners, one mint plant at a time! Remember, successful **balcony mint growing** is within your reach.
Frequently Asked Questions (FAQ)
Q: What is the best type of container for growing mint on a balcony?
A: The best type of container for growing mint on a balcony is one that is at least 6-8 inches deep and has good drainage. Terracotta pots, plastic containers, and even repurposed items like buckets or tin cans can be used, as long as they have drainage holes to prevent waterlogging. Consider the weight of the container, especially if your balcony has weight restrictions. Lighter materials like plastic might be preferable for larger containers. Also, darker colored containers will absorb more heat, which can be beneficial in cooler climates but detrimental in hotter ones.
Q: What kind of soil should I use for my balcony mint?
A: Mint thrives in well-draining, nutrient-rich soil. A good potting mix specifically formulated for herbs or vegetables is ideal. You can also create your own mix by combining equal parts of potting soil, compost, and perlite or vermiculite. The compost provides essential nutrients, while the perlite or vermiculite improves drainage and aeration. Avoid using garden soil, as it can be too heavy and compact, hindering root growth.
Q: How often should I water my balcony mint?
A: Water your balcony mint regularly, keeping the soil consistently moist but not waterlogged. The frequency of watering will depend on factors like the weather, the size of your container, and the type of soil you’re using. Check the soil moisture by sticking your finger about an inch into the soil. If it feels dry, it’s time to water. In hot, sunny weather, you may need to water daily, while in cooler, cloudier weather, you can water less frequently. Be careful not to overwater, as this can lead to root rot.
Q: How much sunlight does balcony mint need?
A: Mint prefers partial shade, especially during the hottest part of the day. While it can tolerate full sun, too much direct sunlight can scorch the leaves. Aim for at least 4-6 hours of sunlight per day. If your balcony is very sunny, consider providing some shade during the afternoon hours, either with a shade cloth or by moving the container to a shadier spot.
Q: How do I harvest mint from my balcony garden?
A: Harvest mint by snipping off stems just above a leaf node. This encourages the plant to branch out and produce more leaves. You can harvest mint throughout the growing season, as needed. For the best flavor, harvest mint in the morning, after the dew has dried. Avoid harvesting more than one-third of the plant at a time, as this can stress the plant.
Q: How do I prevent my mint from spreading too much?
A: Mint is known for its aggressive growth habit and can quickly spread if left unchecked. To prevent it from taking over your balcony garden, grow it in a container rather than directly in the ground. You can also prune the plant regularly to keep it under control. If you notice any runners (stems that grow horizontally along the surface of the soil), trim them back to prevent them from rooting.
Q: What are some common pests and diseases that affect balcony mint?
A: Mint is generally a hardy plant, but it can be susceptible to certain pests and diseases. Common pests include aphids, spider mites, and whiteflies. These can be controlled with insecticidal soap or neem oil. Common diseases include powdery mildew and rust. These can be prevented by providing good air circulation and avoiding overwatering. If you notice any signs of pests or diseases, treat them promptly to prevent them from spreading.
Q: Can I grow different varieties of mint together in the same container?
A: While it’s possible to grow different varieties of mint together in the same container, it’s generally not recommended. Mint varieties can cross-pollinate, which can result in offspring with unpredictable flavors and characteristics. Additionally, some varieties may be more aggressive than others and outcompete the weaker ones. If you do choose to grow multiple varieties together, be sure to select varieties with similar growth habits and provide them with plenty of space.
Q: How do I overwinter my balcony mint?
A: In colder climates, mint can be overwintered indoors. Before the first frost, cut back the plant to a few inches above the soil line and move the container to a cool, bright location indoors. Water sparingly, allowing the soil to dry out slightly between waterings. In the spring, after the last frost, you can move the plant back outdoors. Alternatively, you can take cuttings from your mint plant in the fall and root them indoors to create new plants for the following spring.
Q: Can I dry my balcony mint for later use?
A: Yes, drying mint is a great way to preserve its flavor for later use. To dry mint, harvest the stems and tie them together in small bundles. Hang the bundles upside down in a cool, dry, well-ventilated place, away from direct sunlight. Once the leaves are completely dry and brittle, crumble them and store them in an airtight container. You can also dry mint in a dehydrator or oven, using a low temperature setting.

Leave a Comment