
Grow potatoes at home, even if you think you don’t have the space! Imagine harvesting your own creamy, flavorful potatoes right from your backyard (or even your balcony!). It’s easier than you think, and I’m here to show you how with some simple, yet effective DIY tricks.
For centuries, potatoes have been a staple food, nourishing communities across the globe. Originating in the Andes Mountains, these humble tubers have become a symbol of resilience and sustenance. From traditional Irish potato cakes to crispy French fries, potatoes have woven their way into countless culinary traditions. But did you know that you don’t need acres of farmland to enjoy the taste of freshly grown potatoes?
In today’s busy world, finding time for gardening can feel like a luxury. But what if I told you that you could enjoy the satisfaction of growing your own food without spending hours toiling in the garden? That’s where these DIY potato-growing hacks come in! Whether you’re a seasoned gardener or a complete beginner, these tips will help you grow potatoes at home successfully, saving you money at the grocery store and providing you with delicious, homegrown produce. Plus, there’s nothing quite like the feeling of digging up your own potatoes – it’s a truly rewarding experience!
Grow Your Own Spuds: A Beginner’s Guide to Homegrown Potatoes
Okay, potato lovers, let’s get down to earth (literally!) and talk about growing your own potatoes. It’s surprisingly easy, incredibly rewarding, and there’s nothing quite like digging up your own fresh, homegrown spuds. I’m going to walk you through everything you need to know, from choosing the right potatoes to harvesting your bounty. Get ready to get your hands dirty!
Choosing Your Seed Potatoes
First things first, you can’t just plant any old potato from the grocery store. Those are often treated to prevent sprouting. You need “seed potatoes.” These are potatoes specifically grown for planting, and they’re available at garden centers, nurseries, and online retailers.
* What are Seed Potatoes?: Seed potatoes are simply potatoes that have “eyes” (those little bumps) that will sprout into new potato plants.
* Variety is the Spice of Life (and Potatoes!): Consider what kind of potatoes you like to eat. Do you prefer Yukon Golds for their creamy texture? Russets for baking? Reds for potato salad? Choose varieties that suit your taste.
* Size Matters (Sort Of): Smaller seed potatoes can be planted whole. Larger ones (about the size of a chicken egg or bigger) should be cut into pieces, ensuring each piece has at least 2-3 “eyes.”
* Certified Disease-Free: Always buy certified disease-free seed potatoes. This will help prevent introducing diseases to your garden.
Preparing Your Seed Potatoes: “Chitting” or Sprouting
This step is optional, but I highly recommend it. “Chitting” (also known as pre-sprouting) gives your potatoes a head start and can result in an earlier harvest.
* What is Chitting?: Chitting involves encouraging your seed potatoes to sprout before planting.
* How to Chit:
* Place your seed potatoes in a cool, bright, frost-free location. An egg carton or a shallow tray works perfectly.
* Allow them to sit for 2-4 weeks, until the “eyes” develop short, green sprouts.
* Turn the potatoes occasionally to ensure even sprouting.
* Why Chit?: Chitting helps the potatoes develop strong sprouts, giving them a jumpstart when planted. It also allows you to discard any potatoes that don’t sprout, saving you time and space in your garden.
Preparing Your Planting Area
Potatoes need plenty of sunshine and well-drained soil. Choose a location that gets at least 6-8 hours of sunlight per day.
* Soil is Key: Potatoes prefer slightly acidic soil with a pH between 6.0 and 6.8. Amend your soil with compost or well-rotted manure to improve drainage and fertility.
* Loose and Well-Drained: Potatoes need loose soil to develop properly. If your soil is heavy clay, consider adding sand or other amendments to improve drainage.
* Clear the Area: Remove any rocks, weeds, or debris from the planting area.
* Consider Raised Beds: If you have poor soil or drainage, raised beds are an excellent option for growing potatoes.
Planting Your Potatoes
Now for the fun part! It’s time to get those potatoes in the ground.
1. Timing is Everything: Plant your potatoes in early spring, about 2-4 weeks before the last expected frost. The soil temperature should be at least 45°F (7°C).
2. Cutting Seed Potatoes (If Necessary): If you’re using large seed potatoes, cut them into pieces, ensuring each piece has at least 2-3 “eyes.” Allow the cut surfaces to dry and callous over for a day or two before planting. This helps prevent rot.
3. Digging the Trenches: Dig trenches that are about 6-8 inches deep and 2-3 feet apart.
4. Planting the Potatoes: Place the seed potato pieces (or whole small potatoes) in the trenches, with the “eyes” facing up. Space them about 12 inches apart.
5. Covering the Potatoes: Cover the potatoes with soil, leaving about 2-3 inches of space at the top of the trench.
6. Watering: Water the newly planted potatoes thoroughly.
“Hilling” Your Potatoes
This is a crucial step for maximizing your potato harvest. “Hilling” involves gradually covering the potato plants with soil as they grow.
* What is Hilling?: Hilling encourages the potato plants to produce more tubers (potatoes) along their stems.
* When to Hill: When the potato plants are about 6-8 inches tall, use a hoe or shovel to pull soil from the sides of the trench and mound it around the base of the plants, leaving only the top few leaves exposed.
* Repeat the Process: Repeat this process every 2-3 weeks as the plants grow, gradually building up the soil around the stems. You can also use straw or mulch to hill your potatoes.
* Why Hill?: Hilling provides more space for the potatoes to develop, protects the developing tubers from sunlight (which can cause them to turn green and produce solanine, a toxic compound), and helps to keep the soil cool and moist.
Watering and Fertilizing
Potatoes need consistent moisture, especially during tuber development.
* Watering: Water deeply and regularly, especially during dry periods. Aim for about 1-2 inches of water per week.
* Fertilizing: Fertilize your potato plants with a balanced fertilizer (e.g., 10-10-10) about 4-6 weeks after planting. You can also side-dress with compost or well-rotted manure.
* Avoid Over-Fertilizing: Too much nitrogen can result in lush foliage but fewer potatoes.
Dealing with Pests and Diseases
Potatoes are susceptible to a few pests and diseases. Here’s what to watch out for:
* Colorado Potato Beetles: These beetles can defoliate your potato plants. Handpick them off the plants or use an organic insecticide like neem oil or spinosad.
* Flea Beetles: These tiny beetles can create small holes in the leaves. Cover your plants with row covers to prevent infestation.
* Potato Blight: This fungal disease can cause the leaves and stems to turn brown and rot. Choose disease-resistant varieties and practice good sanitation (remove infected plants promptly).
* Scab: This disease causes rough, scabby patches on the potatoes. Avoid planting potatoes in alkaline soil and rotate your crops.
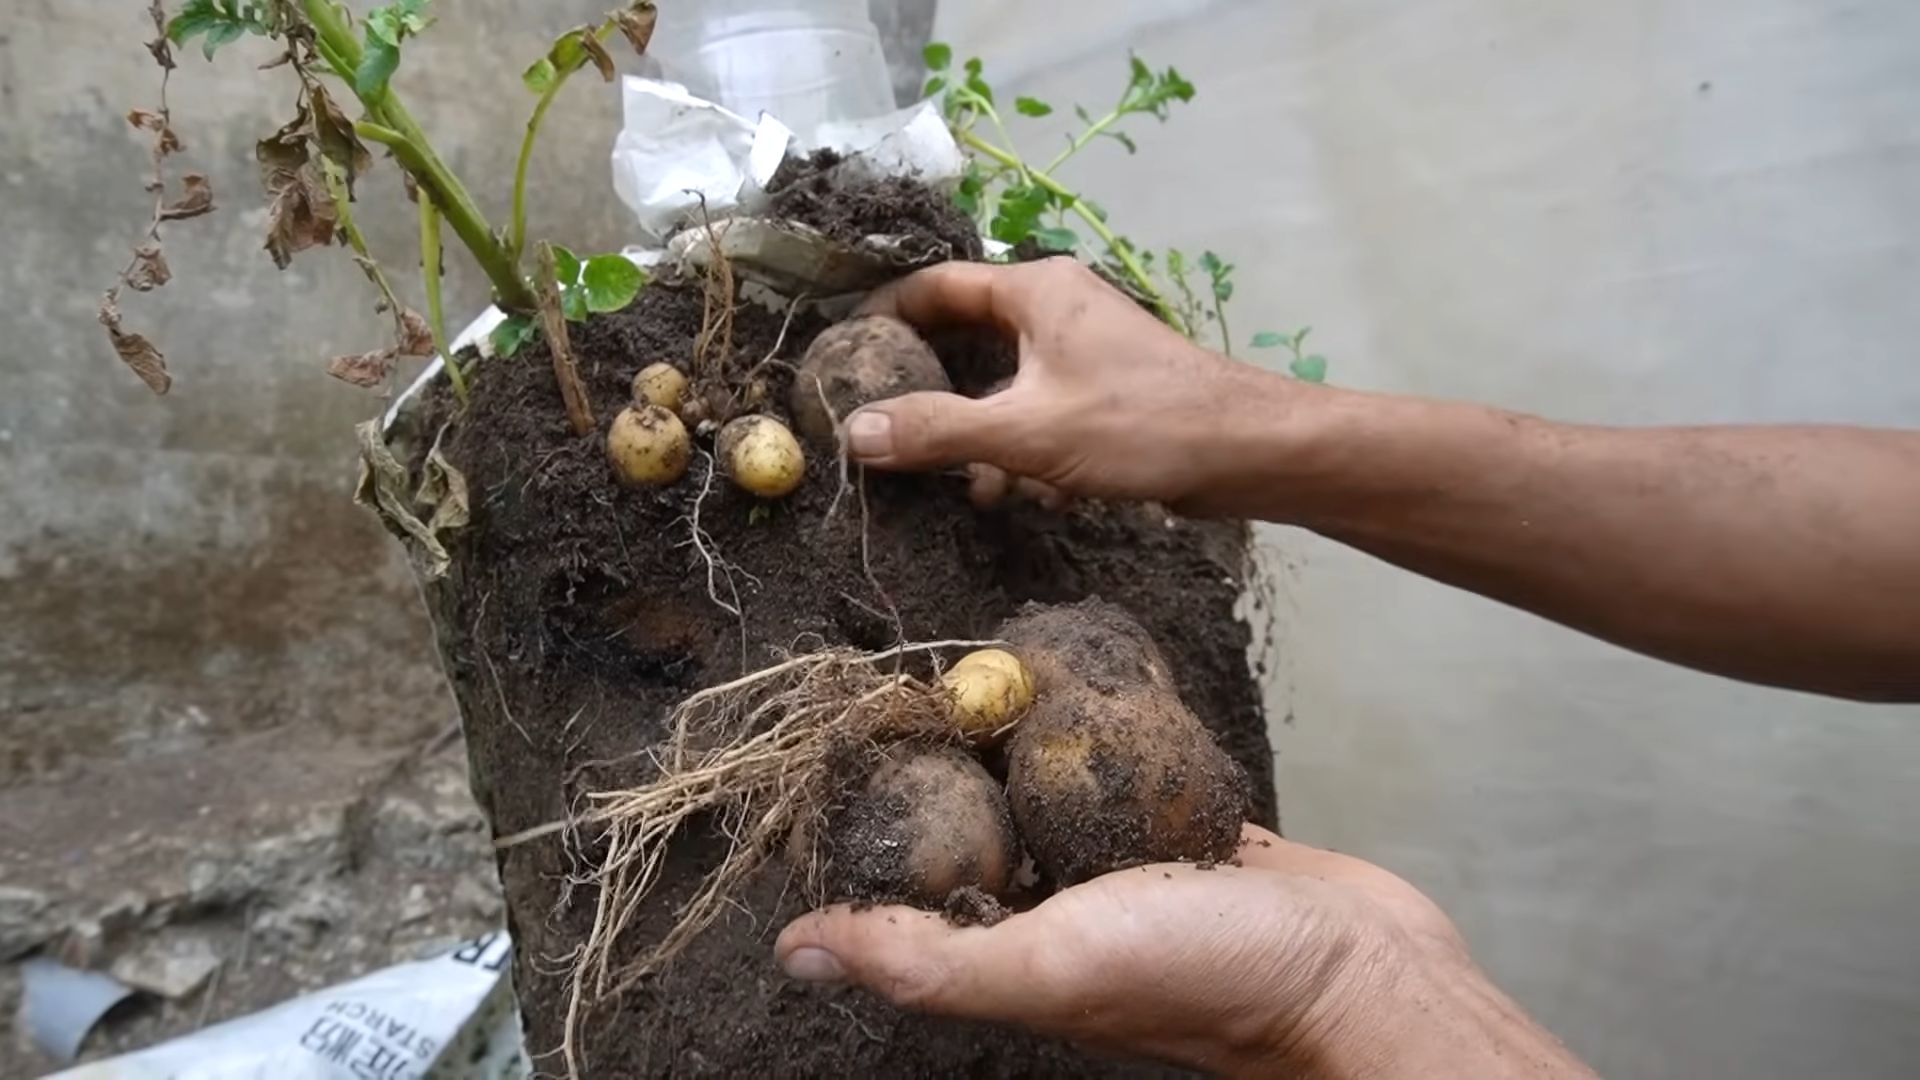
Harvesting Your Potatoes
The moment you’ve been waiting for! Harvesting your homegrown potatoes is a truly rewarding experience.
1. When to Harvest: You can harvest “new potatoes” (small, tender potatoes) about 2-3 weeks after the plants flower. For mature potatoes, wait until the foliage starts to turn yellow and die back. This usually takes about 80-100 days after planting.
2. Test Dig: Before harvesting the entire crop, dig up a few plants to check the size and maturity of the potatoes.
3. Digging Up the Potatoes: Use a garden fork or shovel to carefully dig up the potatoes, being careful not to damage them. Start digging a foot or so away from the plant to avoid spearing the tubers.
4. Handling with Care: Gently brush off any excess soil from the potatoes.
5. Curing (Optional): If you plan to store your potatoes for an extended period, cure them for about 1-2 weeks in a cool, dark, well-ventilated place. This helps to toughen the skins and prevent rot.
Storing Your Potatoes
Proper storage is essential for keeping your potatoes fresh and delicious.
* Cool, Dark, and Dry: Store your potatoes in a cool, dark, and dry place, such as a root cellar or a cool basement. The ideal temperature is between 40-50°F (4-10°C).
* Avoid Sunlight: Exposure to sunlight can cause potatoes to turn green and produce solanine.
* Don’t Wash Before Storing: Washing potatoes before storing them can encourage rot.
* Check Regularly: Check your stored potatoes regularly and remove any that are showing signs of rot.
* Storage Life: Properly stored potatoes can last for several months.
Troubleshooting
Even with the best planning, things can sometimes go wrong. Here are a few common problems and how to address them:
* No Sprouts: If your seed potatoes don’t sprout, they may be old or damaged. Try using fresh seed potatoes from a reputable source.
* Poor Growth: Poor growth can be caused by a variety of factors, including poor soil, lack of sunlight, or insufficient watering. Amend your soil, ensure adequate sunlight, and water regularly.
* Green Potatoes: Green potatoes contain solanine and should
Conclusion
So, there you have it! Growing potatoes at home isn’t just a fun gardening project; it’s a rewarding experience that connects you to your food in a profound way. From the satisfaction of nurturing a tiny seed potato to the joy of harvesting a bounty of fresh, flavorful spuds, this DIY trick is a must-try for anyone with a patch of earth, a container on a balcony, or even just a yearning for homegrown goodness.
Why is this method so compelling? Because it puts you in control. You choose the variety, ensuring you’re growing potatoes that perfectly suit your taste and culinary needs. You control the growing environment, minimizing exposure to harmful chemicals and maximizing the nutritional value of your harvest. And you control the harvest itself, digging up only what you need, when you need it, guaranteeing the freshest possible potatoes for your table.
But the benefits extend beyond just fresh produce. Growing your own potatoes is a fantastic way to reduce your carbon footprint, supporting sustainable practices and minimizing your reliance on industrial agriculture. It’s also a fantastic educational opportunity, especially for children, teaching them about the life cycle of plants and the importance of healthy eating.
Don’t be afraid to experiment! Try different potato varieties to discover your favorites. Russets are excellent for baking and frying, Yukon Golds are creamy and versatile, and fingerling potatoes are perfect for roasting or adding to salads. You can also explore different growing methods. While we’ve focused on container gardening, you can also grow potatoes in raised beds, traditional garden rows, or even in potato towers for maximum yield in a small space.
Consider adding companion plants to your potato patch. Marigolds can help deter pests, while basil can improve the flavor of your potatoes. Experiment with different combinations to find what works best for you.
And remember, growing potatoes at home is a journey, not a destination. There will be challenges along the way, but the rewards are well worth the effort. So, grab some seed potatoes, get your hands dirty, and embark on this exciting adventure.
We encourage you to try this DIY trick and share your experience with us! Post photos of your potato plants, share your tips and tricks, and let us know what varieties you’re growing. Let’s create a community of home gardeners who are passionate about growing their own food and sharing their knowledge with others. Your insights could inspire someone else to take the plunge and discover the joys of homegrown potatoes.
This method of growing potatoes at home is truly a game-changer for anyone looking to enjoy fresh, flavorful, and sustainable produce. So, what are you waiting for? Get started today and experience the satisfaction of harvesting your own homegrown potatoes!
Frequently Asked Questions (FAQ)
What are seed potatoes, and where can I get them?
Seed potatoes are potatoes specifically grown to be planted and produce new potato plants. They are different from potatoes you buy at the grocery store, which may have been treated to prevent sprouting. Seed potatoes are certified disease-free and are available from garden centers, nurseries, and online seed suppliers. Look for varieties that are well-suited to your climate and growing conditions. It’s crucial to source certified seed potatoes to avoid introducing diseases to your garden.
How do I prepare seed potatoes for planting?
Chitting, or pre-sprouting, seed potatoes can give them a head start. About 4-6 weeks before planting, place the seed potatoes in a cool, bright location (but not in direct sunlight) to encourage them to sprout. The sprouts should be short and sturdy. If the seed potatoes are large, you can cut them into pieces, ensuring that each piece has at least one or two “eyes” (sprouts). Allow the cut pieces to dry for a day or two to form a callus, which will help prevent rotting.
What kind of soil is best for growing potatoes?
Potatoes prefer well-drained, slightly acidic soil with a pH between 6.0 and 6.5. Amend your soil with compost or other organic matter to improve drainage and fertility. Avoid heavy clay soils, as they can become waterlogged and lead to potato rot. If you’re growing potatoes in containers, use a high-quality potting mix specifically formulated for vegetables.
How often should I water my potato plants?
Water your potato plants regularly, especially during dry periods. Keep the soil consistently moist, but avoid overwatering, which can lead to root rot. Water deeply when you do water, ensuring that the water reaches the roots. A good rule of thumb is to water when the top inch of soil feels dry to the touch.
How much sunlight do potato plants need?
Potato plants need at least six hours of sunlight per day to thrive. Choose a location that receives full sun for best results. If you’re growing potatoes in containers, you can move them around to ensure they get enough sunlight.
When is the best time to plant potatoes?
The best time to plant potatoes is in early spring, about two to four weeks before the last expected frost. The soil temperature should be at least 45°F (7°C). In warmer climates, you can plant potatoes in the fall for a winter harvest.
How do I “hill” my potato plants?
Hilling is the process of mounding soil around the stems of potato plants as they grow. This encourages the plants to produce more potatoes along the buried stems. As the plants grow, add more soil around the stems, leaving only the top few leaves exposed. Repeat this process every few weeks until the container or row is filled.
What are common potato pests and diseases, and how can I control them?
Common potato pests include potato beetles, aphids, and flea beetles. Diseases include early blight, late blight, and potato scab. To control pests, you can use organic insecticides, such as neem oil or insecticidal soap. To prevent diseases, choose disease-resistant varieties, practice crop rotation, and avoid overwatering. Inspect your plants regularly for signs of pests or diseases and take action promptly.
How do I know when my potatoes are ready to harvest?
You can harvest “new potatoes” (small, tender potatoes) about 7-8 weeks after planting. For mature potatoes, wait until the plants have flowered and the foliage begins to die back. This usually takes about 10-12 weeks. To harvest, carefully dig around the plants with a garden fork, being careful not to damage the potatoes.
How do I store my harvested potatoes?
Store your harvested potatoes in a cool, dark, and well-ventilated place. The ideal temperature is between 40°F (4°C) and 50°F (10°C). Avoid storing potatoes near apples or onions, as they can release gases that cause potatoes to sprout or rot. Properly stored potatoes can last for several months.
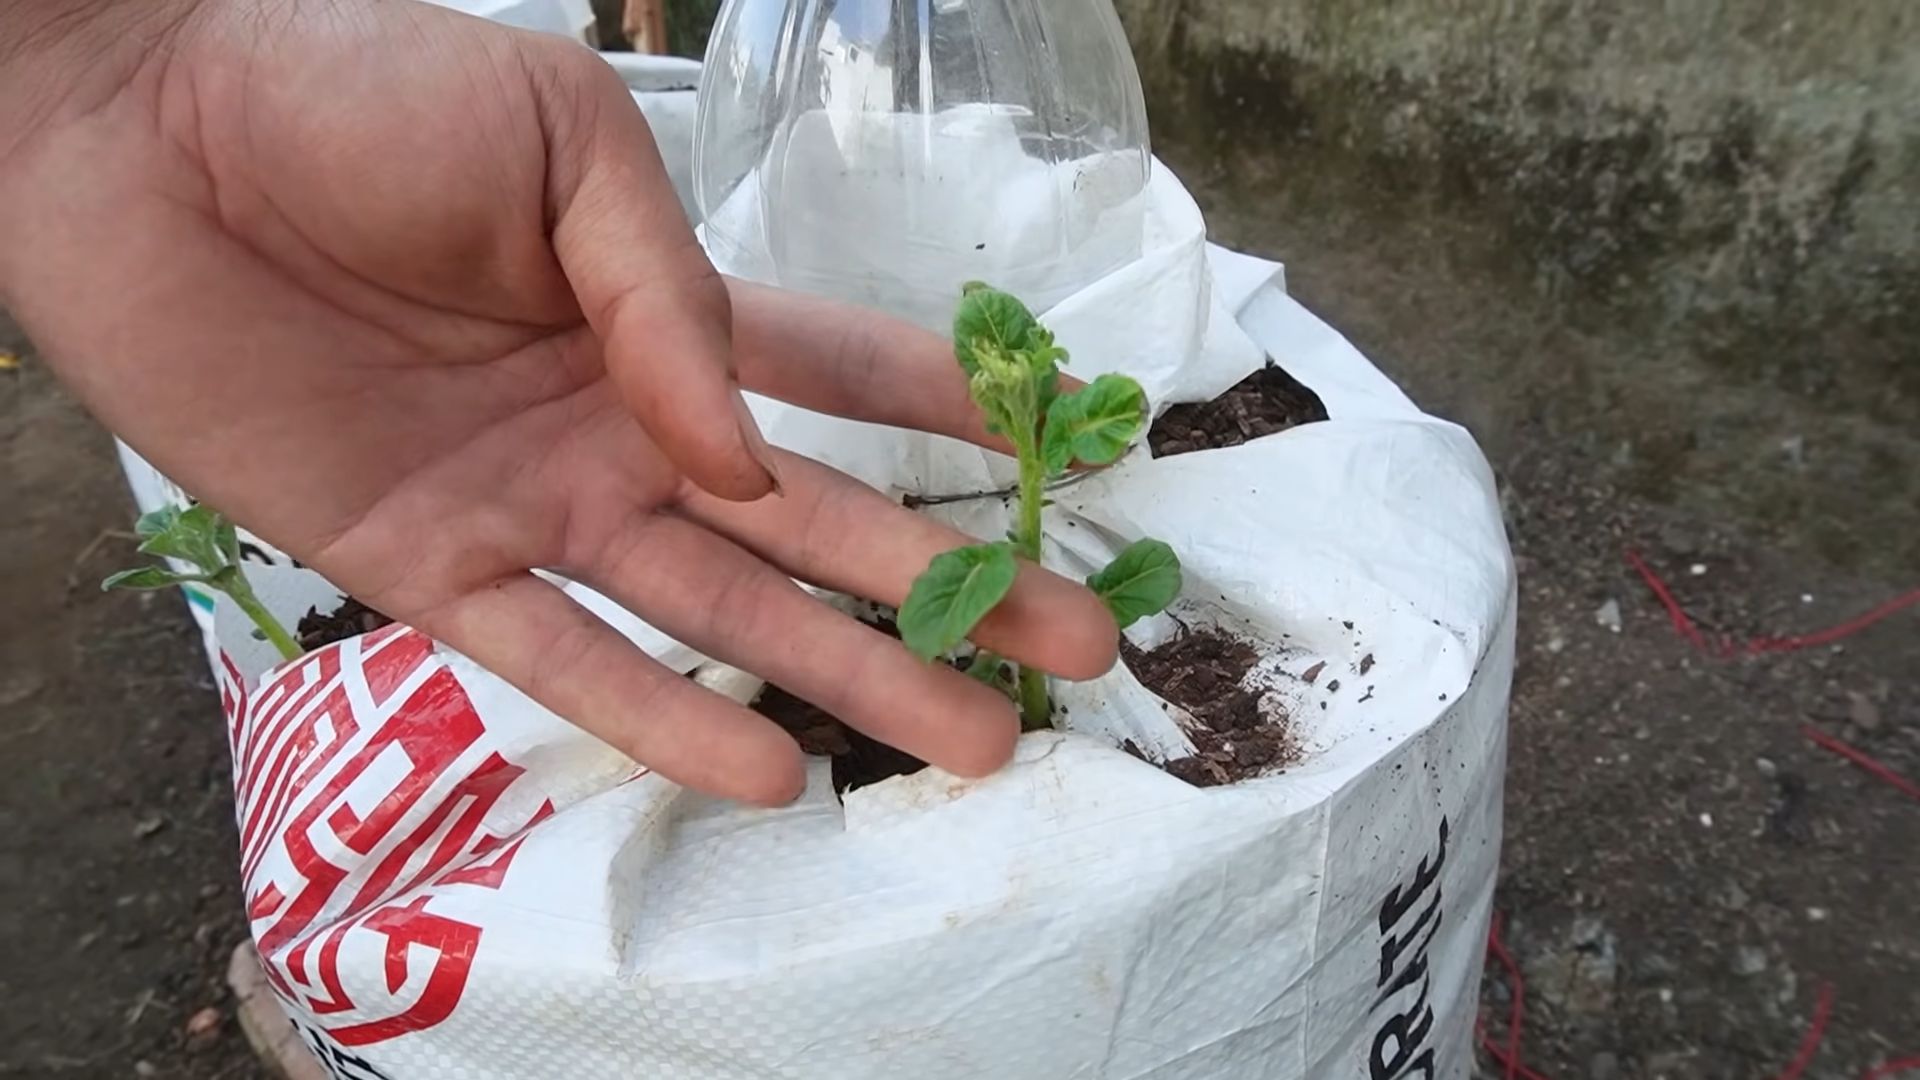
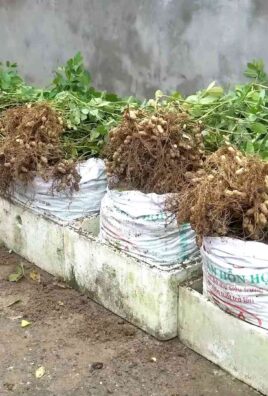
Can I grow potatoes in a bag?
Yes, growing potatoes in a bag is a popular and effective method, especially for those with limited space. Use a large, sturdy bag (such as a burlap sack or a grow bag) and follow the same planting and hilling instructions as for container gardening. The bag allows for good drainage and aeration, which are essential for healthy potato growth.
What are some good potato varieties to grow at home?
There are many excellent potato varieties to choose from, depending on your taste and growing conditions. Some popular choices include:
* **Russet Burbank:** A classic baking potato with a fluffy texture.
* **Yukon Gold:** A creamy and versatile potato with a buttery flavor.
* **Red Pontiac:** A red-skinned potato that is good for boiling and salads.
* **Fingerling Potatoes:** Small, elongated potatoes with a unique flavor and texture.
* **Purple Majesty:** A purple-fleshed potato that is rich in antioxidants.
Can I grow potatoes from store-bought potatoes?
While it’s possible to grow potatoes from store-bought potatoes, it’s not recommended. Store-bought potatoes may have been treated to prevent sprouting, and they may also carry diseases. It’s always best to use certified seed potatoes to ensure a healthy and productive crop.
What if my potato plants don’t flower?
Some potato varieties don’t flower, and that’s perfectly normal. The absence of flowers doesn’t necessarily mean that your plants aren’t producing potatoes. Focus on the overall health of the plants and the development of the foliage. You can still harvest your potatoes when the foliage begins to die back.
Leave a Comment