
Juicy Tomato Growing Tips are the secret weapon every home gardener needs! Imagine biting into a sun-warmed, bursting-with-flavor tomato, grown right in your own backyard. Sounds like a dream, right? Well, it doesn’t have to be! For centuries, tomatoes have been a symbol of summer abundance, gracing tables from the Mediterranean to the Americas. In Italy, they’re practically a national treasure, celebrated in sauces, salads, and even festivals. But let’s be honest, achieving that perfect, juicy tomato can sometimes feel like an uphill battle.
We’ve all been there: tiny, bland fruits, blossom end rot, or even worse, a complete crop failure. That’s why I’m so excited to share these game-changing juicy tomato growing tips with you. This isn’t just about planting a seed and hoping for the best; it’s about understanding the science and art of tomato cultivation. Whether you’re a seasoned gardener or just starting out, these DIY tricks and hacks will empower you to grow the most delicious, mouthwatering tomatoes you’ve ever tasted. Get ready to transform your garden and impress your friends and family with your tomato-growing prowess!
Unlock a Bumper Crop: My Secrets to Growing the Juiciest Tomatoes Ever!
Okay, tomato lovers, gather ’round! I’m about to spill all my secrets for growing the most ridiculously delicious, juicy tomatoes you’ve ever tasted. Forget those bland, watery grocery store imposters – we’re talking homegrown perfection! This isn’t just about throwing some seeds in the ground; it’s about creating the ideal environment for your tomato plants to thrive. So, grab your gardening gloves, and let’s get started!
Choosing the Right Tomato Variety
First things first, you need to pick the right tomato variety for your climate and your taste buds. There are literally hundreds of options, so don’t get overwhelmed! Here’s a quick rundown to help you narrow it down:
* Determinate vs. Indeterminate: This is crucial! Determinate tomatoes grow to a certain size and then produce all their fruit at once, making them great for canning. Indeterminate tomatoes keep growing and producing fruit throughout the season. I personally prefer indeterminate because I love having fresh tomatoes all summer long.
* Heirloom vs. Hybrid: Heirloom tomatoes are open-pollinated varieties that have been passed down for generations. They often have unique flavors and colors, but they can be a bit more finicky to grow. Hybrid tomatoes are bred for specific traits like disease resistance and higher yields. They’re generally easier for beginners.
* Consider Your Climate: If you live in a short-season area, choose early-maturing varieties. If you have long, hot summers, you can go for later-maturing varieties.
* Think About Your Use: Do you want slicing tomatoes for sandwiches? Cherry tomatoes for salads? Paste tomatoes for sauce? Choose varieties that suit your culinary needs.
Some of my personal favorites include:
* ‘Brandywine’ (Heirloom, Indeterminate): Huge, beefsteak tomatoes with incredible flavor.
* ‘San Marzano’ (Heirloom, Determinate): Perfect for making tomato sauce.
* ‘Sungold’ (Hybrid, Indeterminate): Super sweet and addictive cherry tomatoes.
* ‘Early Girl’ (Hybrid, Determinate): A reliable early-season producer.
Preparing the Soil: The Foundation for Success
Tomatoes are heavy feeders, meaning they need a lot of nutrients to produce all those delicious fruits. So, preparing the soil is absolutely essential.
* Sunlight: Tomatoes need at least 6-8 hours of direct sunlight per day. Choose a location that gets plenty of sun.
* Soil Type: Tomatoes prefer well-drained soil that is rich in organic matter. If your soil is heavy clay or sandy, you’ll need to amend it.
* Soil Testing: Ideally, you should test your soil to determine its pH and nutrient levels. You can buy a soil testing kit at your local garden center or send a sample to your local agricultural extension office. Tomatoes prefer a soil pH of 6.0 to 6.8.
Here’s how I prepare my soil:
1. Clear the Area: Remove any weeds, grass, or debris from the planting area.
2. Amend the Soil: This is the most important step! I like to add a generous amount of compost, aged manure, and peat moss to my soil. This will improve drainage, add nutrients, and help retain moisture.
3. Till or Dig: Use a tiller or shovel to work the amendments into the soil. Aim for a depth of at least 12 inches.
4. Add Fertilizer: I also like to add a slow-release fertilizer specifically formulated for tomatoes. Follow the instructions on the package.
5. Create Raised Beds (Optional): If your soil is poorly drained, consider creating raised beds. This will improve drainage and warm the soil up faster in the spring.
Starting Your Tomato Plants: Seedlings vs. Transplants
You have two options for starting your tomato plants: you can start them from seed indoors, or you can buy transplants from a garden center.
* Starting from Seed: This gives you more control over the varieties you grow, and it’s generally cheaper. However, it requires more time and effort. I usually start my seeds indoors about 6-8 weeks before the last expected frost.
* Buying Transplants: This is the easier option, especially for beginners. Just make sure to choose healthy-looking plants with sturdy stems and no signs of disease.
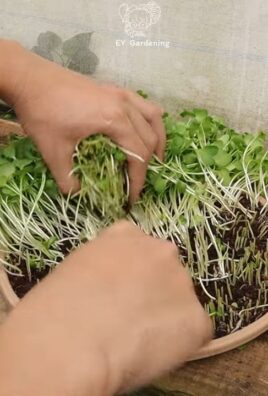
If you’re starting from seed, here’s what I do:
1. Use Seed Starting Mix: Don’t use regular potting soil for starting seeds. Use a seed starting mix, which is lighter and more sterile.
2. Sow the Seeds: Sow the seeds about 1/4 inch deep in small pots or seed trays.
3. Keep Them Warm and Moist: Keep the soil moist but not soggy. Use a heat mat to keep the soil warm, which will help the seeds germinate faster.
4. Provide Light: Once the seeds germinate, provide them with plenty of light. You can use a grow light or place them in a sunny window.
5. Harden Off the Seedlings: Before transplanting the seedlings outdoors, you need to harden them off. This means gradually exposing them to outdoor conditions over a period of about a week. Start by placing them outdoors for a few hours each day, gradually increasing the amount of time they spend outside.
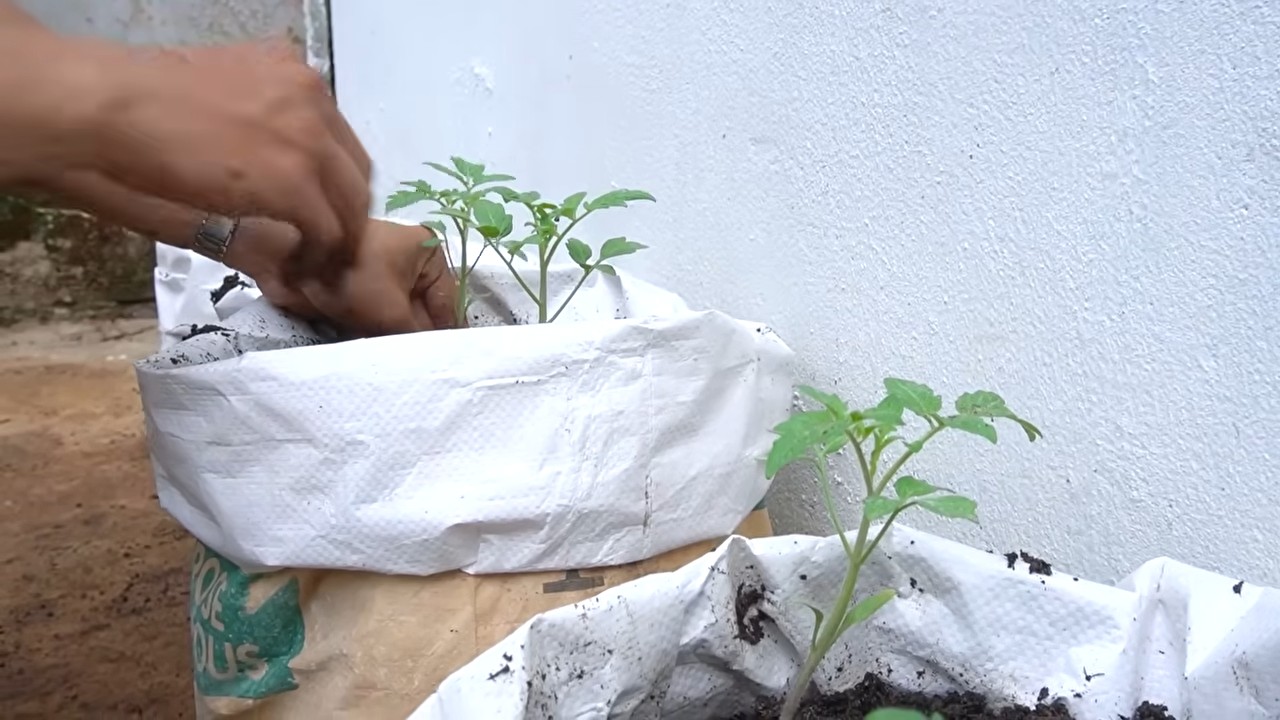
Transplanting Your Tomato Plants: Getting Them in the Ground
Once your tomato plants are ready to be transplanted, it’s time to get them in the ground!
1. Wait for Warm Weather: Don’t transplant your tomato plants until the danger of frost has passed and the soil has warmed up.
2. Dig a Hole: Dig a hole that is deep enough to bury the bottom third of the plant’s stem. This will encourage the plant to develop more roots.
3. Add Fertilizer: I like to add a handful of bone meal to the hole before planting. Bone meal is a good source of phosphorus, which is essential for root development.
4. Plant the Tomato: Gently remove the tomato plant from its pot and place it in the hole.
5. Bury the Stem: Bury the bottom third of the stem with soil.
6. Water Thoroughly: Water the plant thoroughly after planting.
7. Add Support: Tomato plants need support to keep them from falling over. You can use stakes, cages, or trellises. I prefer using cages because they provide good support and allow the plants to grow naturally.
Caring for Your Tomato Plants: Watering, Fertilizing, and Pruning
Once your tomato plants are in the ground, it’s important to provide them with proper care.
* Watering: Water your tomato plants deeply and regularly, especially during hot, dry weather. Aim to water at the base of the plant to avoid wetting the foliage, which can lead to disease.
* Fertilizing: Fertilize your tomato plants every 2-3 weeks with a balanced fertilizer. You can also use a liquid fertilizer, such as fish emulsion or seaweed extract.
* Pruning: Pruning is important for indeterminate tomato varieties. Remove the suckers that grow between the main stem and the branches. This will help the plant focus its energy on producing fruit. For determinate varieties, pruning is not necessary.
Dealing with Pests and Diseases: Keeping Your Plants Healthy
Tomato plants are susceptible to a variety of pests and diseases. Here are some common problems and how to deal with them:
* Aphids: These tiny insects suck the sap from plants. You can control them with insecticidal soap or by spraying them with a strong stream of water.
* Tomato Hornworms: These large caterpillars can quickly defoliate a tomato plant. Handpick them off the plants and drop them in a bucket of soapy water.
* Blossom End Rot: This is caused by a calcium deficiency. Make sure your soil has enough calcium, and water your plants regularly.
* Early Blight: This fungal disease causes dark spots on the leaves. Remove infected leaves and spray the plants with a fungicide.
* Late Blight: This is a more serious fungal disease that can quickly kill tomato plants. Remove infected plants and spray the remaining plants with a fungicide.
I also like to use companion planting to help deter pests and diseases. Some good companion plants for tomatoes include basil, marigolds, and garlic.
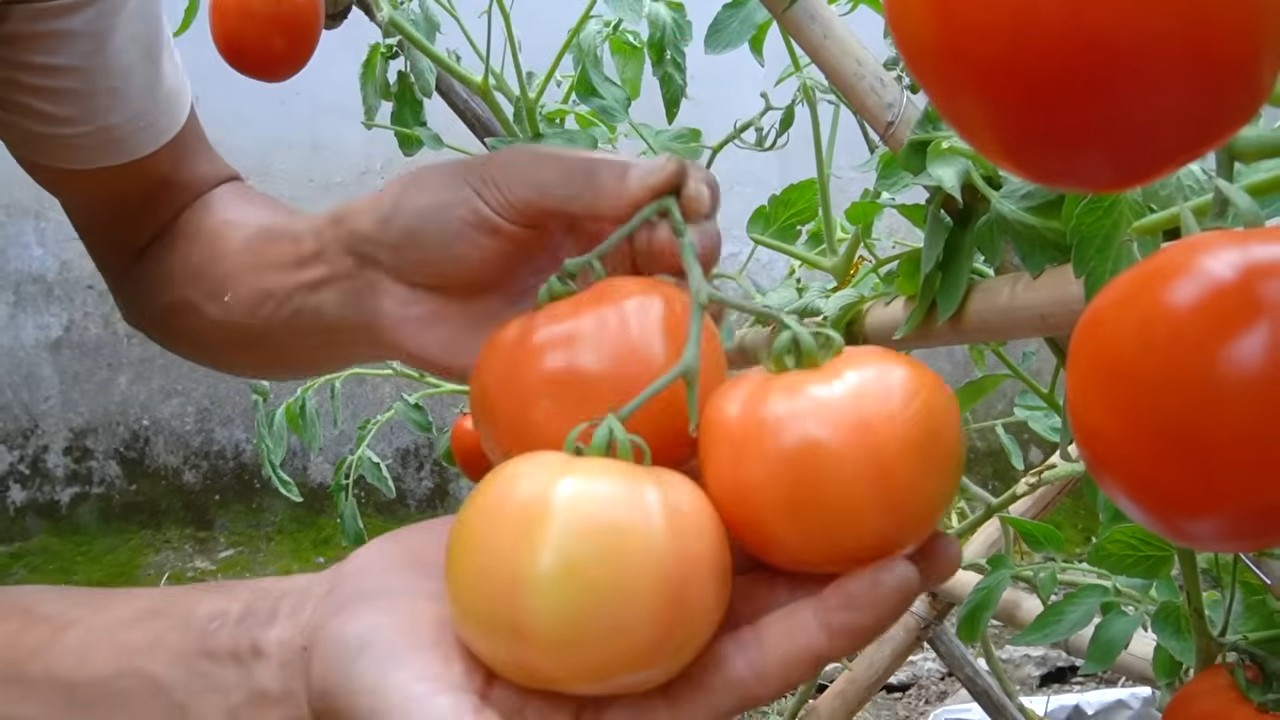
Harvesting Your Tomatoes: The Sweet Reward
Finally, the moment you’ve been waiting for – harvesting your tomatoes!
* Wait for Full Color: Wait until the tomatoes are fully colored and slightly soft to the touch before harvesting them.
* Gently Twist: Gently twist the tomato off the vine.
* Store Properly: Store your tomatoes at room temperature, away from direct sunlight. Don’t refrigerate them, as this will affect their flavor.
And that’s it! With a little bit of effort and these tips, you’ll
Conclusion
So, there you have it! Mastering these simple yet effective DIY tricks for nurturing your tomato plants is a game-changer. Forget bland, store-bought tomatoes that lack that sun-ripened burst of flavor. With a little extra care and attention, you can cultivate a thriving tomato garden brimming with juicy, flavorful fruits that will elevate your salads, sauces, and sandwiches to a whole new level.
Why is this a must-try? Because it’s about more than just growing tomatoes; it’s about connecting with nature, understanding the needs of your plants, and reaping the rewards of your hard work. It’s about tasting the difference between a commercially grown tomato and one nurtured with love and these simple DIY techniques. It’s about experiencing the satisfaction of serving your family and friends the freshest, most delicious tomatoes imaginable, knowing you grew them yourself.
Consider these variations to personalize your tomato-growing journey:
* **Experiment with different soil amendments:** While we’ve highlighted the benefits of compost and Epsom salts, explore other options like bone meal for phosphorus or coffee grounds for nitrogen. Observe how your plants respond and adjust accordingly.
* **Try companion planting:** Basil, marigolds, and garlic are known to deter pests and improve the flavor of tomatoes. Plant them strategically around your tomato plants to create a symbiotic relationship.
* **Explore different tomato varieties:** From the classic beefsteak to the sweet cherry tomato, there’s a variety to suit every taste. Experiment with different types to discover your favorites and tailor your garden to your culinary preferences.
* **DIY Tomato Cage Alternatives:** If you’re looking for a budget-friendly option, consider using sturdy branches or repurposed materials like old ladders or pallets to create unique and supportive structures for your growing tomato plants.
Ultimately, the best way to learn is by doing. Don’t be afraid to experiment, make mistakes, and learn from your experiences. Remember, every garden is unique, and what works for one person may not work for another. The key is to be observant, adaptable, and patient.
We are confident that by implementing these **juicy tomato growing tips**, you’ll be well on your way to harvesting a bumper crop of delicious tomatoes. We encourage you to give these DIY tricks a try and share your experiences with us! Post photos of your thriving tomato plants, share your favorite tomato recipes, and let us know what worked best for you in the comments below. Your insights and experiences will help other gardeners learn and grow, creating a community of passionate tomato enthusiasts. Happy gardening!
Frequently Asked Questions (FAQ)
Why is Epsom salt beneficial for tomato plants?
Epsom salt (magnesium sulfate) provides magnesium, a crucial nutrient for tomato plants. Magnesium aids in chlorophyll production, which is essential for photosynthesis. A magnesium deficiency can lead to yellowing leaves and stunted growth. The Epsom salt helps the plant absorb other nutrients more efficiently, leading to healthier, more productive plants and, ultimately, juicier tomatoes. It also helps prevent blossom-end rot, a common problem in tomatoes caused by calcium deficiency, as magnesium aids in calcium uptake.
How often should I water my tomato plants?
The frequency of watering depends on several factors, including the weather, soil type, and the size of your plants. Generally, tomato plants need about 1-2 inches of water per week. During hot, dry periods, you may need to water more frequently. The best way to determine if your plants need water is to check the soil moisture. Stick your finger about an inch or two into the soil. If it feels dry, it’s time to water. Water deeply and thoroughly, allowing the water to soak into the soil and reach the roots. Avoid frequent, shallow watering, as this can lead to shallow root growth and make your plants more susceptible to drought stress.
What are the signs of overwatering tomato plants?
Overwatering can be just as detrimental as underwatering. Signs of overwatering include yellowing leaves (especially lower leaves), wilting even when the soil is moist, and the development of root rot. The soil may also feel soggy and have a foul odor. If you suspect overwatering, reduce the frequency of watering and ensure that your plants have adequate drainage. You might also consider amending the soil with organic matter to improve drainage.
How do I prevent pests from attacking my tomato plants?
There are several ways to prevent pests from attacking your tomato plants. Companion planting, as mentioned earlier, can be an effective deterrent. For example, basil repels tomato hornworms and whiteflies, while marigolds deter nematodes. You can also use row covers to protect your plants from pests early in the season. Regularly inspect your plants for signs of pests, such as aphids, spider mites, or tomato hornworms. If you find pests, you can handpick them off the plants or use organic pest control methods, such as insecticidal soap or neem oil. Maintaining healthy soil and providing adequate water and nutrients will also help your plants resist pests.
What is blossom-end rot, and how can I prevent it?
Blossom-end rot is a condition that causes a dark, leathery spot to appear on the bottom of the tomato fruit. It’s caused by a calcium deficiency, which can be due to insufficient calcium in the soil or the plant’s inability to absorb calcium properly. To prevent blossom-end rot, ensure that your soil has adequate calcium levels. You can amend the soil with lime or bone meal before planting. Maintain consistent watering to help the plant absorb calcium. Avoid over-fertilizing with nitrogen, as this can interfere with calcium uptake. As mentioned earlier, Epsom salt can also help prevent blossom-end rot by improving calcium absorption.
When is the best time to harvest tomatoes?
The best time to harvest tomatoes is when they are fully colored and slightly soft to the touch. The color will vary depending on the variety of tomato. Gently twist the tomato from the vine, leaving the stem attached. Tomatoes will continue to ripen after they are picked, so you can harvest them slightly underripe if necessary. Store ripe tomatoes at room temperature for the best flavor. Avoid refrigerating them, as this can affect their texture and taste.
How can I improve the flavor of my tomatoes?
Several factors can influence the flavor of your tomatoes. Sunlight is essential for developing sugars, so ensure that your plants receive at least 6-8 hours of sunlight per day. Proper watering and fertilization are also crucial. Avoid overwatering, as this can dilute the flavor. Use a balanced fertilizer that is specifically formulated for tomatoes. Allowing the tomatoes to ripen fully on the vine will also enhance their flavor. Finally, consider the variety of tomato you are growing. Some varieties are naturally sweeter and more flavorful than others.
What are some common mistakes to avoid when growing tomatoes?
Some common mistakes to avoid when growing tomatoes include:
* **Planting too early:** Wait until the danger of frost has passed before planting your tomato plants.
* **Planting too close together:** Give your plants enough space to grow and allow for good air circulation.
* **Not providing support:** Tomato plants need support to prevent them from falling over and to keep the fruit off the ground.
* **Overwatering or underwatering:** Maintain consistent soil moisture, but avoid overwatering.
* **Not pruning:** Pruning tomato plants can improve air circulation and encourage fruit production.
* **Not fertilizing:** Tomato plants need regular fertilization to thrive.
* **Ignoring pests and diseases:** Regularly inspect your plants for signs of pests and diseases and take action promptly.
By avoiding these common mistakes and following the **juicy tomato growing tips** outlined above, you’ll be well on your way to harvesting a bountiful crop of delicious, homegrown tomatoes.
Leave a Comment