
Bucket Peanut Growing: Ever dreamt of harvesting your own crunchy, delicious peanuts right from your backyard, even if you don’t have a sprawling farm? Well, dream no more! This DIY guide unlocks the surprisingly simple secret to growing peanuts in buckets, bringing the joy of fresh, homegrown snacks to even the smallest spaces.
Peanuts, believe it or not, have a fascinating history, dating back thousands of years to South America. They weren’t just a tasty treat; they were a vital source of protein and oil for ancient civilizations. Now, you can tap into that rich heritage and cultivate your own peanut bounty, no matter where you live!
Why should you try bucket peanut growing? Because it’s incredibly rewarding! Imagine the satisfaction of nurturing a tiny seed into a plant that yields a harvest of flavorful peanuts. Plus, it’s a fantastic way to connect with nature, learn about plant life cycles, and enjoy a healthy, homegrown snack. Many people are intimidated by the thought of growing their own food, but this method is so accessible and manageable, even for beginners. I’m excited to share these simple steps with you, so you can experience the joy of fresh, homegrown peanuts. Let’s get started!
Growing Peanuts in Buckets: A Fun and Easy DIY Project!
Hey there, fellow gardening enthusiasts! Ever thought about growing your own peanuts? It’s surprisingly easy, even if you don’t have a sprawling garden. I’m going to walk you through how to grow peanuts in buckets – a perfect project for small spaces, balconies, or patios. Get ready for some homegrown goodness!
What You’ll Need
Before we dive in, let’s gather our supplies. Here’s a checklist of everything you’ll need to successfully grow peanuts in buckets:
* Peanut Seeds (Raw, Unsalted): This is the most crucial ingredient! Make sure you get raw, unsalted peanuts. Roasted or salted peanuts won’t sprout. You can usually find these at health food stores or online.
* Buckets (5-Gallon or Larger): The bigger, the better! Five-gallon buckets are a good starting point, but larger ones will give your peanut plants more room to spread their roots. Make sure they have drainage holes.
* Potting Mix: Use a high-quality potting mix that drains well. Avoid using garden soil, as it can become compacted in containers.
* Drill (Optional): If your buckets don’t already have drainage holes, you’ll need a drill to create them.
* Watering Can or Hose: For watering your peanut plants.
* Fertilizer (Optional): A balanced fertilizer can help boost peanut production. Look for one that’s specifically formulated for vegetables or legumes.
* Mulch (Optional): Mulch helps retain moisture and suppress weeds. Straw, wood chips, or shredded leaves work well.
* Trowel or Small Shovel: For planting the peanut seeds.
* Gloves (Optional): To keep your hands clean.
Preparing Your Buckets
This is a crucial step to ensure your peanuts have a healthy environment to grow in.
1. Drill Drainage Holes: If your buckets don’t already have them, drill several drainage holes in the bottom. This is essential to prevent waterlogging, which can rot the peanut roots. Aim for at least four to five holes, about 1/2 inch in diameter.
2. Add Potting Mix: Fill the buckets with potting mix, leaving about 2-3 inches of space at the top. This space will prevent the soil from overflowing when you water.
3. Water the Soil: Thoroughly water the potting mix until it’s evenly moist. This will help settle the soil and prepare it for planting.
Planting Your Peanut Seeds
Now for the fun part – planting those peanut seeds!
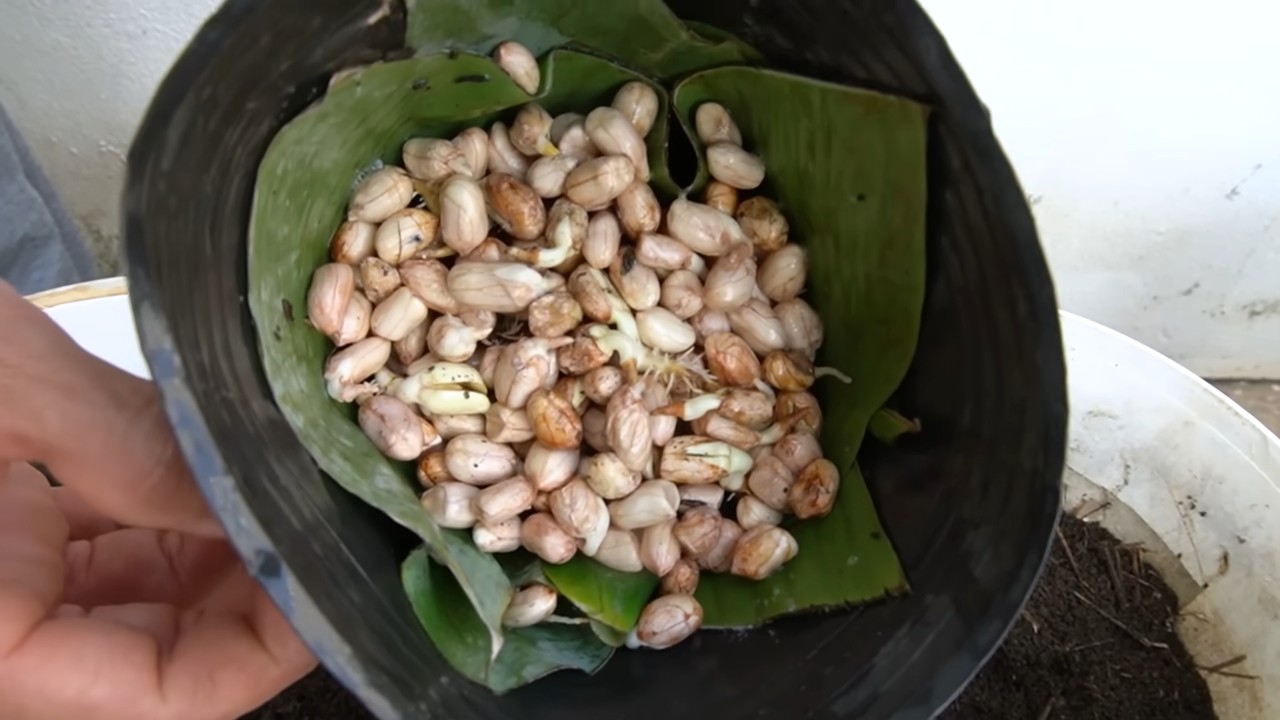
1. Shell the Peanuts (Optional): While you can plant peanuts in their shells, shelling them can speed up germination. Gently crack open the shells and remove the peanuts. Be careful not to damage the peanuts themselves.
2. Plant the Seeds: Make small holes in the soil, about 1-2 inches deep and 4-6 inches apart. Place one peanut seed in each hole and cover it with soil. If you’re using a larger bucket, you can plant more seeds, spacing them evenly.
3. Water Gently: Water the soil gently after planting to avoid disturbing the seeds.
4. Add Mulch (Optional): If you’re using mulch, spread a thin layer around the base of the plants. This will help retain moisture and suppress weeds.
Caring for Your Peanut Plants
Once your peanut seeds are planted, it’s time to nurture them and watch them grow!
1. Watering: Peanuts need consistent moisture, especially during flowering and pod development. Water deeply whenever the top inch of soil feels dry to the touch. Avoid overwatering, as this can lead to root rot.
2. Sunlight: Peanuts need at least 6-8 hours of sunlight per day. Place your buckets in a sunny location where they’ll receive plenty of direct sunlight.
3. Fertilizing (Optional): If you choose to fertilize, do so every 2-3 weeks with a balanced fertilizer. Follow the instructions on the fertilizer package.
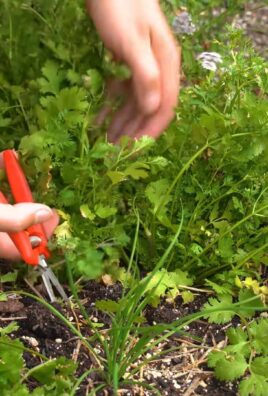
4. Weeding: Keep the buckets free of weeds, as they can compete with the peanut plants for nutrients and water. Gently pull out any weeds that appear.
5. Hilling: As the peanut plants grow, they’ll produce small yellow flowers. After the flowers fade, the plant will send down “pegs” into the soil. These pegs are what will eventually develop into peanuts. To encourage pod development, you can “hill” the soil around the base of the plants, covering the pegs with soil. This provides a dark, moist environment for the peanuts to grow.
Harvesting Your Peanuts
The moment we’ve all been waiting for! Harvesting your homegrown peanuts is a rewarding experience.
1. Timing: Peanuts typically take about 120-150 days to mature. You’ll know they’re ready to harvest when the leaves start to turn yellow and the plant begins to die back.
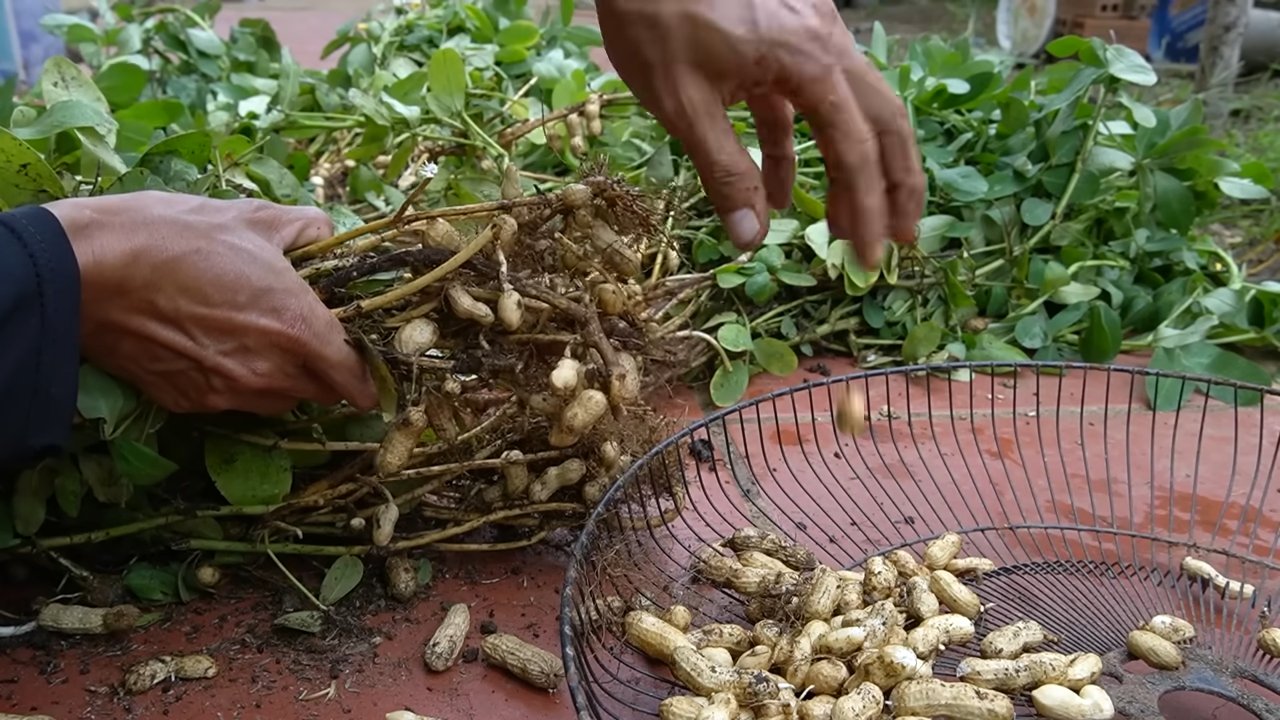
2. Digging: Gently dig up the entire plant, being careful not to damage the peanuts. You can use a trowel or small shovel to loosen the soil around the plant.
3. Cleaning: Shake off any excess soil from the peanuts.
4. Curing: The peanuts need to be cured before they can be stored. Hang the entire plant upside down in a warm, dry, well-ventilated place for 2-3 weeks. This will allow the peanuts to dry and develop their flavor.
5. Storage: Once the peanuts are cured, you can remove them from the plant and store them in a cool, dry place. They can be stored in their shells or shelled and stored in an airtight container.
Troubleshooting
Even with the best care, you might encounter some challenges along the way. Here are a few common problems and how to address them:
* Poor Germination: If your peanut seeds don’t sprout, it could be due to several factors, such as old seeds, poor soil, or improper watering. Make sure you’re using fresh, raw, unsalted peanuts and that the soil is moist but not waterlogged.
* Yellowing Leaves: Yellowing leaves can be a sign of nutrient deficiency or overwatering. If the leaves are yellowing, try fertilizing with a balanced fertilizer or adjusting your watering schedule.
* Pests: Peanuts can be susceptible to pests such as aphids and spider mites. If you notice pests on your plants, you can try spraying them with insecticidal soap or neem oil.
* Root Rot: Root rot is a fungal disease that can occur if the soil is too wet. To prevent root rot, make sure your buckets have good drainage and avoid overwatering.
Extra Tips for Peanut Growing Success
Here are a few extra tips to help you get the most out of your peanut-growing adventure:
* Choose the Right Variety: There are several different varieties of peanuts, each with its own characteristics. Some varieties are better suited for container growing than others. Look for varieties that are compact and early-maturing.
* Rotate Your Crops: If you’re growing peanuts in the same buckets year after year, it’s a good idea to rotate your crops. This will help prevent the buildup of pests and diseases in the soil.
* Experiment with Different Fertilizers: Different fertilizers can have different effects on peanut production. Experiment with different fertilizers to see which one works best for you.
* Have Fun! Growing peanuts is a fun and rewarding experience. Don’t be afraid to experiment and try new things.
Enjoy Your Homegrown Peanuts!
Congratulations! You’ve successfully grown peanuts in buckets. Now it’s time to enjoy the fruits (or rather, nuts) of your labor. You can roast them, boil them, or eat them raw. They’re also great in salads, stir-fries, and desserts.
Growing peanuts in buckets is a great way to enjoy fresh, homegrown peanuts, even if you don’t have a lot of space. With a little bit of care and attention, you can have a bountiful harvest of delicious peanuts. Happy gardening!
Conclusion
So, there you have it! Growing peanuts in a bucket is not just a quirky gardening experiment; it’s a surprisingly rewarding and accessible way to enjoy fresh, homegrown peanuts, even if you’re short on space. We’ve walked you through the entire process, from selecting the right bucket and soil to nurturing your peanut plants and harvesting your bounty. But why is this DIY trick a must-try?
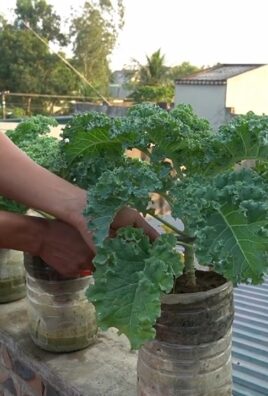
Firstly, it’s incredibly space-efficient. Forget needing a sprawling garden; a sunny balcony, patio, or even a well-lit indoor space can become your peanut farm. This makes it perfect for apartment dwellers, urban gardeners, or anyone looking to maximize their gardening yield in a limited area.
Secondly, it’s a fantastic learning experience. Watching the entire peanut life cycle unfold before your eyes, from planting the seed to harvesting the mature pods, is both educational and deeply satisfying. It’s a great way to connect with nature and understand where your food comes from. Plus, it’s a fun project to involve kids in, teaching them about plant growth and responsibility.
Thirdly, the taste! Freshly harvested, homegrown peanuts have a flavor that simply can’t be matched by store-bought varieties. The difference is truly remarkable. Imagine roasting your own peanuts, making homemade peanut butter, or simply enjoying them straight from the shell. The possibilities are endless!
But the fun doesn’t stop there. Feel free to experiment with different peanut varieties. Virginia peanuts are known for their large size and are great for roasting, while Spanish peanuts are smaller and sweeter, perfect for peanut butter. You can also try adding companion plants to your bucket, such as marigolds, which can help deter pests. Consider adding a small trellis or support structure as your peanut plants grow to help keep them upright and maximize sunlight exposure.
Don’t be afraid to get creative with your soil mix. While the recommended mix of potting soil, compost, and sand works well, you can adjust the ratios to suit your specific environment and peanut variety. Just remember to ensure good drainage to prevent root rot.
We strongly encourage you to give this DIY bucket peanut growing method a try. It’s a simple, affordable, and incredibly rewarding way to enjoy fresh, homegrown peanuts. And most importantly, it’s a fantastic way to learn more about gardening and connect with nature.
Once you’ve harvested your first batch of homegrown peanuts, we’d love to hear about your experience! Share your photos, tips, and tricks in the comments below. Let’s build a community of bucket peanut growers and learn from each other. What worked well for you? What challenges did you face? What peanut variety did you grow? Your insights will help other aspiring peanut farmers succeed. So, grab a bucket, some soil, and some peanut seeds, and get growing! You’ll be amazed at what you can achieve. Remember, the key to successful **bucket peanut growing** is patience, observation, and a little bit of love. Happy gardening!
Frequently Asked Questions (FAQ)
1. What kind of bucket should I use for growing peanuts?
The ideal bucket size is at least 5 gallons, but a 10-gallon bucket is even better as it provides more room for the roots to develop. Ensure the bucket has drainage holes at the bottom to prevent waterlogging, which can lead to root rot. You can drill these holes yourself if the bucket doesn’t already have them. The material of the bucket isn’t as crucial, but food-grade plastic is generally recommended. Avoid using buckets that previously contained harsh chemicals.
2. What type of soil is best for growing peanuts in a bucket?
Peanuts thrive in well-draining, sandy loam soil. A good mix consists of equal parts potting soil, compost, and sand. The potting soil provides essential nutrients, the compost enriches the soil and improves drainage, and the sand ensures the soil doesn’t become compacted. Avoid using heavy clay soil, as it can hinder peanut pod development. You can also add a small amount of perlite or vermiculite to further improve drainage and aeration.
3. How often should I water my peanut plants in a bucket?
Water your peanut plants regularly, especially during hot and dry periods. The soil should be consistently moist but not waterlogged. Check the soil moisture by sticking your finger about an inch deep into the soil. If it feels dry, it’s time to water. Water deeply, allowing the water to drain out of the bottom of the bucket. Reduce watering frequency during cooler or rainy weather. Overwatering can lead to fungal diseases and root rot.
4. How much sunlight do peanut plants need?
Peanut plants require at least 6-8 hours of direct sunlight per day to thrive. Choose a sunny location for your bucket, such as a south-facing balcony or patio. If you’re growing peanuts indoors, supplement with grow lights if necessary. Insufficient sunlight can result in stunted growth and reduced peanut production. Rotate the bucket periodically to ensure all sides of the plant receive adequate sunlight.
5. When is the best time to plant peanuts in a bucket?
The best time to plant peanuts is after the last frost, when the soil temperature has warmed to at least 65°F (18°C). In most regions, this is typically in late spring or early summer. You can start peanut seeds indoors 4-6 weeks before the last frost to get a head start. Transplant the seedlings into the bucket once the weather has warmed up.
6. How long does it take for peanuts to grow in a bucket?
Peanuts typically take 120-150 days to mature from planting to harvest. The exact time will depend on the peanut variety, climate, and growing conditions. You’ll know the peanuts are ready to harvest when the leaves start to turn yellow and the plant begins to die back.
7. How do I harvest peanuts from a bucket?
To harvest peanuts, carefully dig up the entire plant from the bucket. Gently shake off the excess soil and then hang the plant upside down in a dry, well-ventilated area for 2-3 weeks to cure. This allows the peanuts to dry and develop their full flavor. Once the peanuts are dry, you can remove them from the plant and store them in an airtight container.
8. What are some common problems when growing peanuts in a bucket?
Some common problems include pests, diseases, and nutrient deficiencies. Pests such as aphids and spider mites can be controlled with insecticidal soap or neem oil. Fungal diseases can be prevented by ensuring good drainage and avoiding overwatering. Nutrient deficiencies can be addressed by adding a balanced fertilizer to the soil. Regularly inspect your plants for any signs of problems and take action promptly.
9. Can I grow different varieties of peanuts in a bucket?
Yes, you can grow different varieties of peanuts in a bucket. Virginia peanuts, Spanish peanuts, and Runner peanuts are all suitable for bucket growing. Consider the size and growth habit of each variety when choosing which one to grow. Some varieties may be more compact and better suited for smaller buckets.
10. How do I store harvested peanuts?
Store harvested peanuts in an airtight container in a cool, dry place. Shelled peanuts can be stored in the refrigerator for several months or in the freezer for up to a year. Unshelled peanuts can be stored in a cool, dry place for several weeks. Roasting the peanuts before storing them can help to extend their shelf life.
Leave a Comment