
Fast Growing Kailan: Imagine stepping into your backyard and harvesting fresh, vibrant Kailan just weeks after planting! Sounds like a dream, right? Well, it doesn’t have to be! This DIY guide is packed with simple yet effective tricks to help you cultivate a thriving Kailan patch, even if you’re a complete beginner.
Kailan, also known as Chinese kale, has been a staple in Asian cuisine for centuries. Its robust flavor and nutritional benefits have made it a beloved vegetable across cultures. But you don’t need to be a seasoned gardener to enjoy the taste of homegrown Kailan.
Let’s face it, store-bought vegetables can be expensive and sometimes lack that fresh, vibrant taste. Plus, knowing exactly where your food comes from and how it’s grown is incredibly rewarding. That’s where these DIY tricks come in. I’m going to show you how to achieve fast growing Kailan at home, saving you money and providing you with delicious, healthy greens for your family. We’ll cover everything from soil preparation to pest control, ensuring you have all the knowledge you need to succeed. Get ready to roll up your sleeves and transform your garden into a Kailan paradise!
How to Grow Kailan Faster: My DIY Secrets
Okay, so you want to grow kailan, and you want it *fast*? I get it! I love kailan, and waiting for it to grow can feel like forever. I’ve experimented with a bunch of different techniques over the years, and I’ve finally nailed down a system that gets me a harvest much quicker than just planting and hoping for the best. This guide is all about sharing those secrets with you. Let’s get started!
Choosing the Right Variety and Starting Seeds
First things first, not all kailan is created equal. Some varieties are naturally faster growers than others. And starting with healthy seedlings gives you a huge head start.
* Variety Selection: Look for varieties specifically labeled as “early maturing” or “fast growing.” Some names to keep an eye out for are ‘Green Lance’ or ‘Chinese Kale’. These are often bred for quicker harvests. Check your local nursery or seed supplier for recommendations suited to your climate.
* Seed Starting Medium: Don’t just use any old soil! Use a seed starting mix. These mixes are light, airy, and sterile, which prevents damping-off disease (a common killer of seedlings). I like to use a mix of peat moss, vermiculite, and perlite.
* Seed Starting Containers: You can use seed trays, peat pots, or even recycled egg cartons. Just make sure they have drainage holes!
* Timing is Key: Start your seeds indoors about 4-6 weeks before the last expected frost in your area. This gives them a head start before transplanting them outdoors.
Step-by-Step Seed Starting:
1. Moisten the Seed Starting Mix: Before filling your containers, thoroughly moisten the seed starting mix. It should be damp but not soggy. I usually do this in a large bucket, mixing the water in with my hands.
2. Fill the Containers: Fill your seed starting containers with the moistened mix, leaving about half an inch of space at the top. Gently press down to compact the soil slightly.
3. Sow the Seeds: Sow 2-3 kailan seeds per container, about ¼ inch deep. I use my finger to make a small indentation, drop in the seeds, and then gently cover them with the mix.
4. Water Gently: Water the seeds gently using a spray bottle or a watering can with a fine rose. You don’t want to dislodge the seeds.
5. Provide Warmth and Light: Kailan seeds need warmth to germinate. A heat mat is ideal, but you can also place the containers in a warm spot in your house. Once the seeds germinate, they need plenty of light. A grow light is best, but a sunny windowsill can also work. Just make sure the seedlings get at least 6 hours of direct sunlight per day.
6. Thin the Seedlings: Once the seedlings have their first true leaves (the second set of leaves that appear after the initial seed leaves), thin them to one seedling per container. Choose the strongest, healthiest-looking seedling and snip off the others at the soil line with scissors. Don’t pull them out, as this can disturb the roots of the remaining seedling.
7. Harden Off the Seedlings: About a week before you plan to transplant the seedlings outdoors, you need to “harden them off.” This means gradually exposing them to outdoor conditions. Start by placing them outside for an hour or two each day, gradually increasing the amount of time they spend outdoors. This will help them adjust to the sun, wind, and temperature changes.
Preparing the Garden Bed for Rapid Growth
Kailan needs rich soil and plenty of sunlight to thrive. Proper soil preparation is crucial for fast growth.
* Sunlight: Choose a location that gets at least 6 hours of direct sunlight per day.
* Soil: Kailan prefers well-drained soil that is rich in organic matter.
* Soil Amendments: Amend the soil with compost, aged manure, or other organic matter. This will improve drainage, fertility, and water retention.
* pH Level: Kailan prefers a soil pH of 6.0 to 7.5. You can test your soil pH with a soil testing kit and amend it accordingly.
Step-by-Step Garden Bed Preparation:
1. Clear the Area: Remove any weeds, rocks, or debris from the planting area.
2. Loosen the Soil: Use a garden fork or tiller to loosen the soil to a depth of at least 12 inches. This will improve drainage and allow the roots to penetrate the soil more easily.
3. Amend the Soil: Spread a 2-3 inch layer of compost, aged manure, or other organic matter over the soil surface.
4. Incorporate the Amendments: Use a garden fork or tiller to incorporate the amendments into the soil to a depth of at least 6 inches.
5. Smooth the Surface: Rake the soil surface smooth and level.
Transplanting and Ongoing Care for Speedy Results
Getting your seedlings into the ground correctly and providing the right care will make all the difference.
* Transplanting Time: Transplant your kailan seedlings outdoors after the last expected frost.
* Spacing: Space the seedlings 12-18 inches apart in rows that are 24-36 inches apart.
* Watering: Water the seedlings thoroughly after transplanting.
* Fertilizing: Fertilize the kailan plants every 2-3 weeks with a balanced fertilizer.
* Pest Control: Monitor the plants for pests and diseases and take action as needed.
* Weed Control: Keep the area around the plants free of weeds.
Step-by-Step Transplanting and Care:
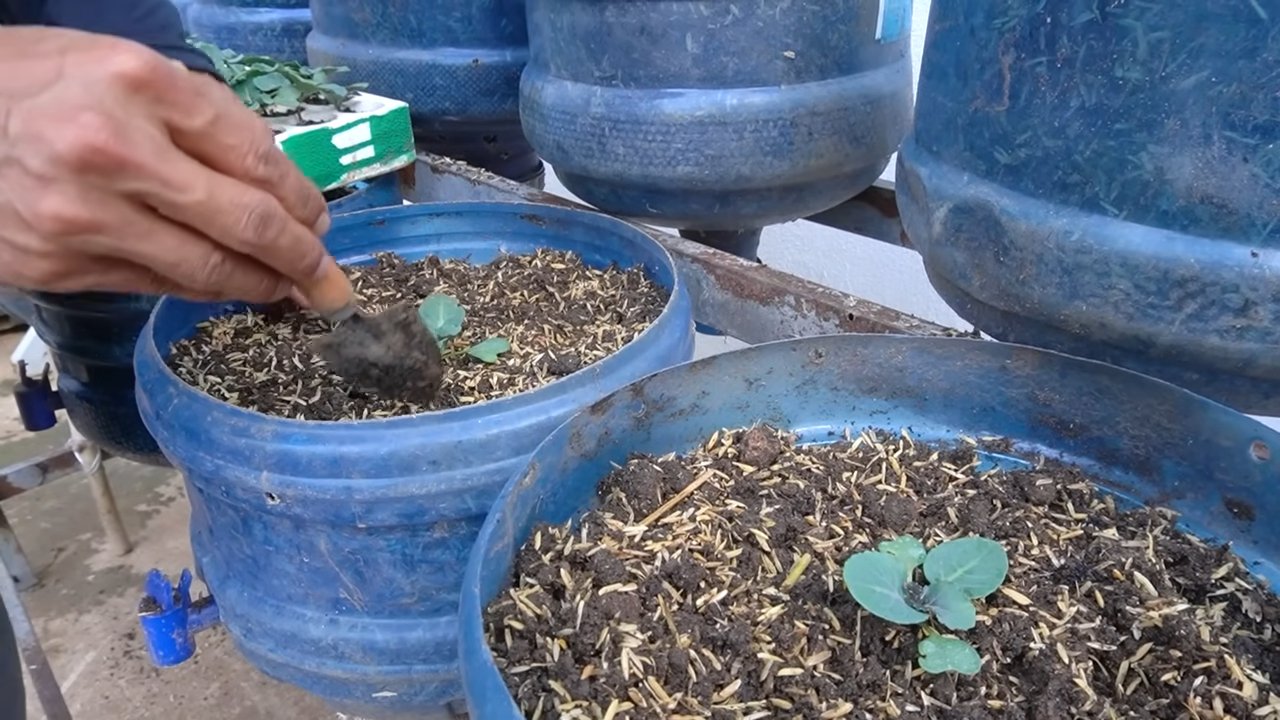
1. Dig the Holes: Dig holes in the prepared garden bed that are slightly larger than the root balls of the seedlings.
2. Remove the Seedlings: Gently remove the seedlings from their containers. If they are in peat pots, you can plant the entire pot. Otherwise, carefully loosen the roots and remove the seedling.
3. Plant the Seedlings: Place the seedlings in the holes and backfill with soil. Make sure the top of the root ball is level with the soil surface.
4. Water Thoroughly: Water the seedlings thoroughly after planting.
5. Fertilize Regularly: Use a balanced fertilizer, following the instructions on the package. I like to use a liquid fertilizer diluted in water, applying it every 2-3 weeks. Fish emulsion is also a great organic option.
6. Water Consistently: Kailan needs consistent moisture to grow quickly. Water deeply whenever the top inch of soil feels dry. Avoid overhead watering, as this can promote fungal diseases. Soaker hoses or drip irrigation are ideal.
7. Mulch: Apply a layer of mulch around the plants to help retain moisture, suppress weeds, and regulate soil temperature. Straw, wood chips, or shredded leaves are all good options.
8. Pest and Disease Control: Keep an eye out for common kailan pests like aphids, cabbage worms, and flea beetles. Handpicking pests, using insecticidal soap, or covering the plants with row covers can help control them. Ensure good air circulation to prevent fungal diseases. If you spot any signs of disease, remove the affected leaves immediately.
Boosting Growth with Specific Techniques
These are some of my favorite tricks for really pushing kailan growth.
* Foliar Feeding: Foliar feeding involves spraying diluted fertilizer directly onto the leaves of the plants. This allows the plants to absorb nutrients more quickly than through the roots. I like to use a seaweed extract or fish emulsion diluted in water.
* Epsom Salts: Epsom salts (magnesium sulfate) can help improve plant growth and nutrient uptake. Dissolve 1 tablespoon of Epsom salts in 1 gallon of water and spray it on the leaves every 2-3 weeks.
* Compost Tea: Compost tea is a liquid fertilizer made by steeping compost in water. It’s rich in nutrients and beneficial microbes. You can make your own compost tea by steeping a bag of compost in a bucket of water for 24-48 hours. Dilute the tea before using it to water your plants.
* Pruning: Regularly pruning the lower leaves of the kailan plants can encourage new growth. Remove any yellowing or damaged leaves.
Step-by-Step Application:
1. Foliar Feeding: Mix your chosen foliar feed according to the product instructions. Use a spray bottle to thoroughly coat the leaves, both top and bottom, in the early morning or late evening to avoid burning the leaves in direct sunlight.
2. Epsom Salts: Dissolve Epsom salts in water as directed above. Spray onto the leaves, again avoiding direct sunlight.
3. Compost Tea: Dilute your compost tea to a light brown color. Water your kailan plants at the base, avoiding
Conclusion
So, there you have it! Mastering the art of cultivating fast growing Kailan at home is not only achievable but also incredibly rewarding. We’ve walked through a simple yet effective method that bypasses common gardening pitfalls and sets you up for a bountiful harvest of this nutritious and delicious leafy green.
Why is this DIY trick a must-try? Because it puts you in control. You know exactly what goes into your Kailan – no mystery pesticides or questionable fertilizers. You get the freshest, most vibrant greens imaginable, packed with flavor and nutrients, ready to elevate your meals. Plus, there’s an undeniable satisfaction that comes from nurturing something from seed to table. It’s a connection to nature, a sustainable practice, and a way to ensure you always have access to this fantastic vegetable.
But the beauty of gardening lies in its adaptability. Feel free to experiment! Try different soil mixes to see what works best in your specific climate. Consider adding companion plants like marigolds to deter pests naturally. You can even explore different varieties of Kailan – some are sweeter, some are more robust, and some are even purple! The possibilities are endless.
Don’t be afraid to tweak the watering schedule based on your local weather conditions. If you live in a particularly dry area, you might need to water more frequently. Conversely, if you’re in a humid region, be mindful of overwatering, which can lead to root rot. Observe your plants closely and adjust your approach accordingly.
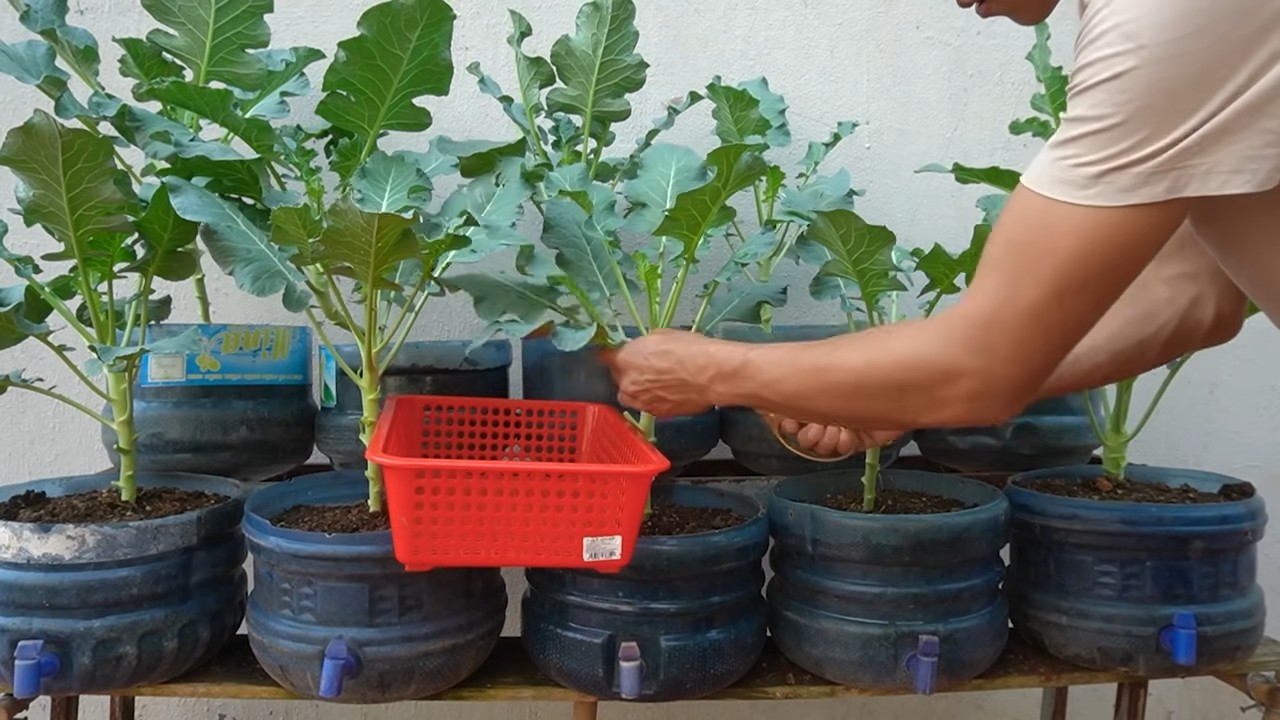
And speaking of adjustments, consider the container size. While we’ve suggested a specific size, you can adapt it based on the space you have available. Just remember that Kailan needs room to grow, so don’t cram too many plants into a small container.
The key takeaway is that this method provides a solid foundation for success. It’s a starting point, not a rigid set of rules. Embrace the learning process, be patient, and don’t be discouraged by occasional setbacks. Gardening is a journey, and every mistake is an opportunity to learn and improve.
We wholeheartedly encourage you to give this DIY trick a try. It’s easier than you might think, and the rewards are well worth the effort. Imagine stepping out into your garden and harvesting fresh, vibrant Kailan for your next stir-fry, soup, or salad. It’s a truly satisfying experience.
Once you’ve tried it, we’d love to hear about your experience! Share your tips, tricks, and successes (and even your challenges) in the comments below. Let’s build a community of Kailan enthusiasts and learn from each other. Together, we can unlock the secrets to growing the best possible Kailan at home. So, grab your seeds, get your hands dirty, and let’s get growing! We are confident that you will be amazed at how easy it is to achieve fast growing Kailan with this method.
Frequently Asked Questions (FAQ)
What is the best time of year to plant Kailan?
The best time to plant Kailan depends on your climate. In general, Kailan thrives in cooler weather. For most regions, the ideal planting times are early spring or late summer/early fall. This allows the plants to mature before the extreme heat of summer or the freezing temperatures of winter. If you live in a region with mild winters, you may be able to grow Kailan year-round. Check your local climate data to determine the best planting window for your area.
How much sunlight does Kailan need?
Kailan requires at least 6 hours of direct sunlight per day to thrive. If you’re growing Kailan indoors, supplement with grow lights to ensure adequate light exposure. Insufficient sunlight can result in leggy growth and reduced yields.
What kind of soil is best for growing Kailan?
Kailan prefers well-draining soil that is rich in organic matter. A good soil mix would include compost, peat moss, and perlite or vermiculite. The soil pH should be slightly acidic to neutral, around 6.0 to 7.0. You can amend your soil with lime to raise the pH or sulfur to lower it.
How often should I water my Kailan plants?
Water your Kailan plants regularly, keeping the soil consistently moist but not waterlogged. The frequency of watering will depend on the weather conditions and the type of soil you’re using. Check the soil moisture level regularly by sticking your finger into the soil. If the top inch feels dry, it’s time to water. Avoid overhead watering, as this can promote fungal diseases.
What are some common pests and diseases that affect Kailan?
Common pests that affect Kailan include aphids, cabbage worms, and flea beetles. You can control these pests with organic insecticides like neem oil or insecticidal soap. Common diseases include clubroot and downy mildew. Prevent these diseases by ensuring good air circulation, avoiding overhead watering, and practicing crop rotation.
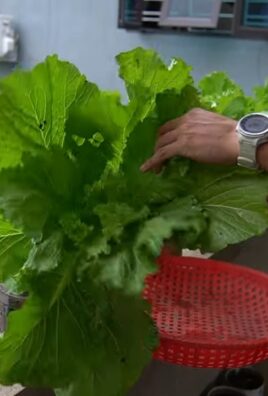
How do I harvest Kailan?
You can begin harvesting Kailan leaves when they are about 6-8 inches long. Harvest the outer leaves first, leaving the inner leaves to continue growing. This will allow you to harvest Kailan continuously over a period of several weeks. Use a sharp knife or scissors to cut the leaves cleanly from the stem.
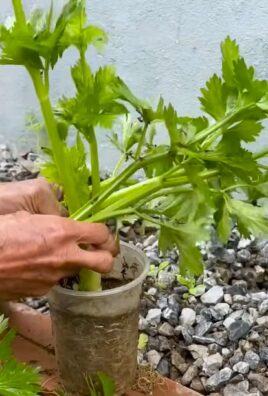
Can I grow Kailan in containers?
Yes, Kailan grows well in containers. Choose a container that is at least 12 inches deep and wide to allow the roots to develop properly. Make sure the container has drainage holes to prevent waterlogging. Use a high-quality potting mix that is rich in organic matter.
How do I fertilize my Kailan plants?
Fertilize your Kailan plants every 2-3 weeks with a balanced fertilizer. You can use a liquid fertilizer or a slow-release granular fertilizer. Follow the instructions on the fertilizer package for application rates. Avoid over-fertilizing, as this can lead to excessive vegetative growth and reduced yields.
What are some good companion plants for Kailan?
Good companion plants for Kailan include marigolds, nasturtiums, and herbs like rosemary and thyme. These plants can help deter pests and attract beneficial insects. Avoid planting Kailan near other members of the brassica family, such as broccoli, cabbage, and cauliflower, as they can attract the same pests and diseases.
How can I prevent my Kailan from bolting (going to seed)?
Bolting is a common problem with Kailan, especially in hot weather. To prevent bolting, choose bolt-resistant varieties, provide shade during the hottest part of the day, and water regularly to keep the soil cool and moist. You can also mulch around the plants to help retain moisture and regulate soil temperature. If your Kailan does bolt, you can still harvest the leaves, but they may become bitter.

Leave a Comment