
Grow Winged Beans Easily and unlock a world of culinary possibilities right in your own backyard! Have you ever dreamt of harvesting vibrant, nutritious beans that not only taste amazing but also add a touch of exotic beauty to your garden? Well, dream no more! This DIY guide is your passport to cultivating these fascinating legumes with ease.
Winged beans, also known as Goa beans or asparagus peas, boast a rich history, particularly in Southeast Asia and Papua New Guinea, where they’ve been a staple food source for centuries. Their resilience and nutritional value have made them a vital crop in these regions. But you don’t need to live in the tropics to enjoy these wonders!
Why should you embark on this gardening adventure? Because grow winged beans easily offers a multitude of benefits! Not only are they packed with protein, vitamins, and minerals, making them a healthy addition to your diet, but they’re also incredibly versatile in the kitchen. From stir-fries to salads, the entire plant – pods, leaves, flowers, and even the roots – is edible! Plus, their stunning purple flowers and climbing vines will transform your garden into a lush, eye-catching oasis. I’m excited to share my tried-and-true tips and tricks that will help you successfully cultivate these amazing plants, even if you’re a beginner gardener. Let’s get started!
Grow Winged Beans Like a Pro: A DIY Guide
Hey there, fellow gardening enthusiasts! I’m super excited to share my tried-and-true method for growing winged beans. These amazing plants, also known as asparagus peas or goa beans, are not only beautiful climbers but also incredibly nutritious. Every part of the plant is edible – the pods, leaves, flowers, roots, and even the seeds! So, let’s dive into how you can cultivate these fantastic beans in your own backyard.
What You’ll Need
Before we get started, let’s gather all the necessary materials. Trust me, having everything ready beforehand will make the whole process much smoother.
* Winged Bean Seeds: You can find these online or at specialty garden centers.
* Seed Starting Trays or Small Pots: For starting seeds indoors (optional).
* Potting Mix: A well-draining mix is crucial for healthy seedlings.
* Garden Soil: Amend your garden soil with compost or well-rotted manure.
* Trellis or Support Structure: Winged beans are climbers, so they need something to climb on.
* Gardening Gloves: To keep your hands clean and protected.
* Watering Can or Hose: For regular watering.
* Compost or Organic Fertilizer: To nourish your plants.
* Measuring Tape or Ruler: To space your plants correctly.
* Optional: Row covers to protect young plants from pests.
Understanding Winged Beans
Winged beans are tropical legumes that thrive in warm climates. They need plenty of sunlight and well-drained soil to flourish. Here’s a quick rundown of what makes them special:
* Climbing Habit: They can grow quite tall, so a sturdy trellis is essential.
* Nitrogen Fixers: Like other legumes, they enrich the soil by fixing nitrogen.
* Edible Parts: Every part of the plant is edible, making it a versatile addition to your garden.
* Heat Lovers: They prefer warm temperatures and are sensitive to frost.
Starting Winged Bean Seeds
You have two options here: direct sowing or starting seeds indoors. I usually prefer starting them indoors, especially if I want a head start on the growing season.
Starting Seeds Indoors (Optional)
1. Prepare the Seed Starting Trays: Fill your seed starting trays or small pots with a good quality potting mix. Moisten the soil gently.
2. Sow the Seeds: Plant the winged bean seeds about 1 inch deep in the soil. I usually plant 2-3 seeds per cell to increase the chances of germination.
3. Water Gently: Water the soil gently to avoid disturbing the seeds.
4. Provide Warmth: Winged beans need warmth to germinate. Place the trays in a warm location, like a sunny windowsill or on a heat mat.
5. Keep the Soil Moist: Keep the soil consistently moist, but not waterlogged.
6. Wait for Germination: Germination usually takes about 7-14 days.
7. Thin Seedlings (If Necessary): Once the seedlings emerge, thin them to one plant per cell if you planted multiple seeds.
8. Harden Off Seedlings: Before transplanting, gradually acclimate the seedlings to outdoor conditions by exposing them to increasing amounts of sunlight and fresh air over a week.
Direct Sowing
1. Prepare the Soil: Choose a sunny location with well-drained soil. Amend the soil with compost or well-rotted manure to improve fertility and drainage.
2. Sow the Seeds: Plant the winged bean seeds directly into the soil about 1 inch deep. Space the seeds about 6-8 inches apart.
3. Water Gently: Water the soil gently to avoid washing away the seeds.
4. Keep the Soil Moist: Keep the soil consistently moist until the seedlings emerge.
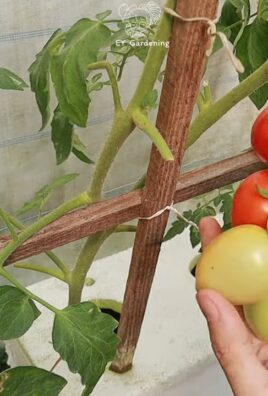
5. Provide Support: Install a trellis or support structure near the planting area to provide support for the climbing vines.
Transplanting Winged Bean Seedlings
Once your seedlings have developed a few sets of true leaves and the weather is warm enough (no danger of frost), it’s time to transplant them into the garden.
1. Prepare the Planting Area: Choose a sunny location with well-drained soil. Amend the soil with compost or well-rotted manure to improve fertility and drainage.
2. Dig Holes: Dig holes that are slightly larger than the root balls of the seedlings. Space the holes about 6-8 inches apart.
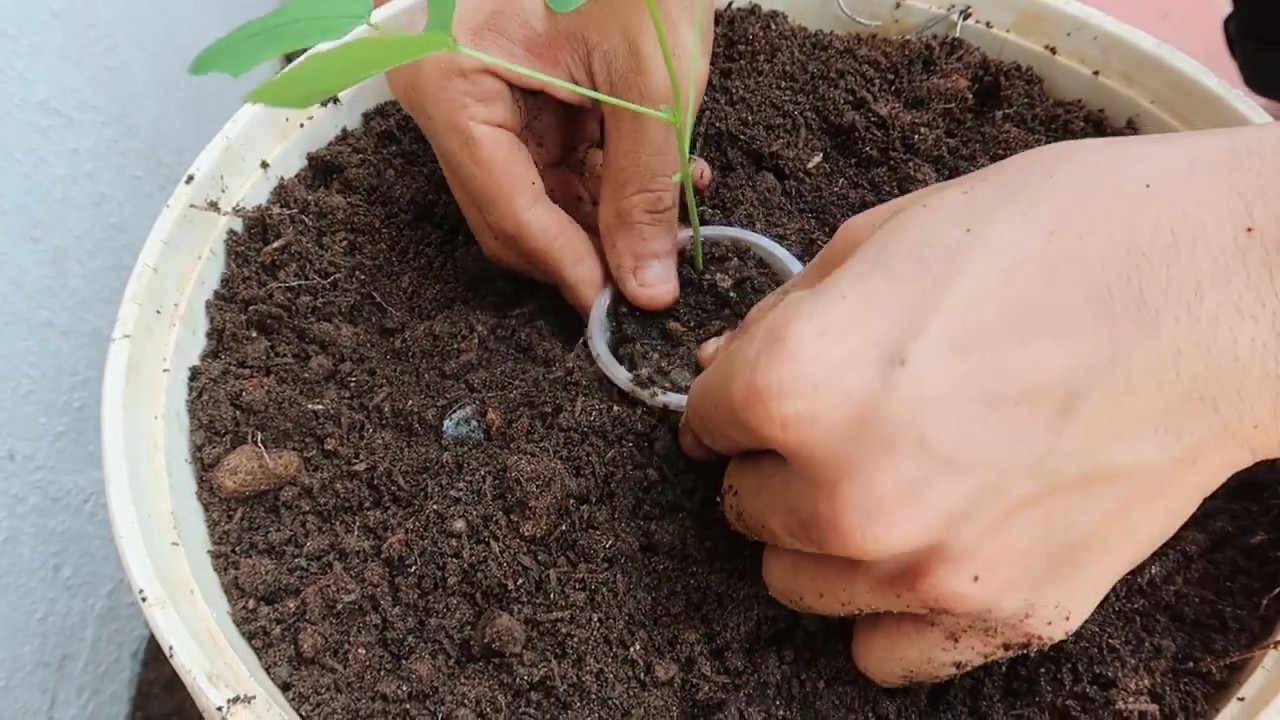
3. Carefully Remove Seedlings: Gently remove the seedlings from the seed starting trays or pots, being careful not to damage the roots.
4. Plant the Seedlings: Place the seedlings in the holes and backfill with soil. Gently firm the soil around the base of the plants.
5. Water Thoroughly: Water the seedlings thoroughly after planting.
6. Provide Support: Make sure the seedlings have access to the trellis or support structure. You may need to gently guide the vines towards the support.
Caring for Winged Bean Plants
Once your winged bean plants are established, they’re relatively easy to care for. Here are some tips to keep them thriving:
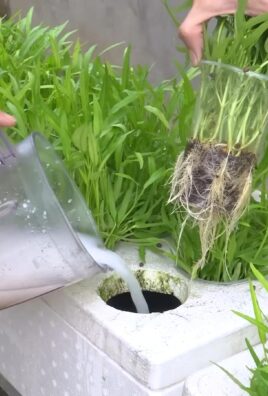
1. Watering: Water regularly, especially during dry periods. Winged beans need consistent moisture to produce healthy pods.
2. Fertilizing: Fertilize with a balanced organic fertilizer every few weeks to provide essential nutrients.
3. Weeding: Keep the area around the plants free of weeds to prevent competition for nutrients and water.
4. Pruning: Prune the vines as needed to encourage branching and pod production. You can also prune to control the size of the plants.
5. Pest Control: Monitor the plants for pests such as aphids, spider mites, and bean beetles. Use organic pest control methods, such as insecticidal soap or neem oil, to control infestations.
6. Support: Ensure that the plants have adequate support to climb on. Adjust the vines as needed to keep them growing in the right direction.
Harvesting Winged Beans
Harvesting winged beans is one of the most rewarding parts of growing them. You can harvest the pods, leaves, flowers, and roots at different stages of growth.
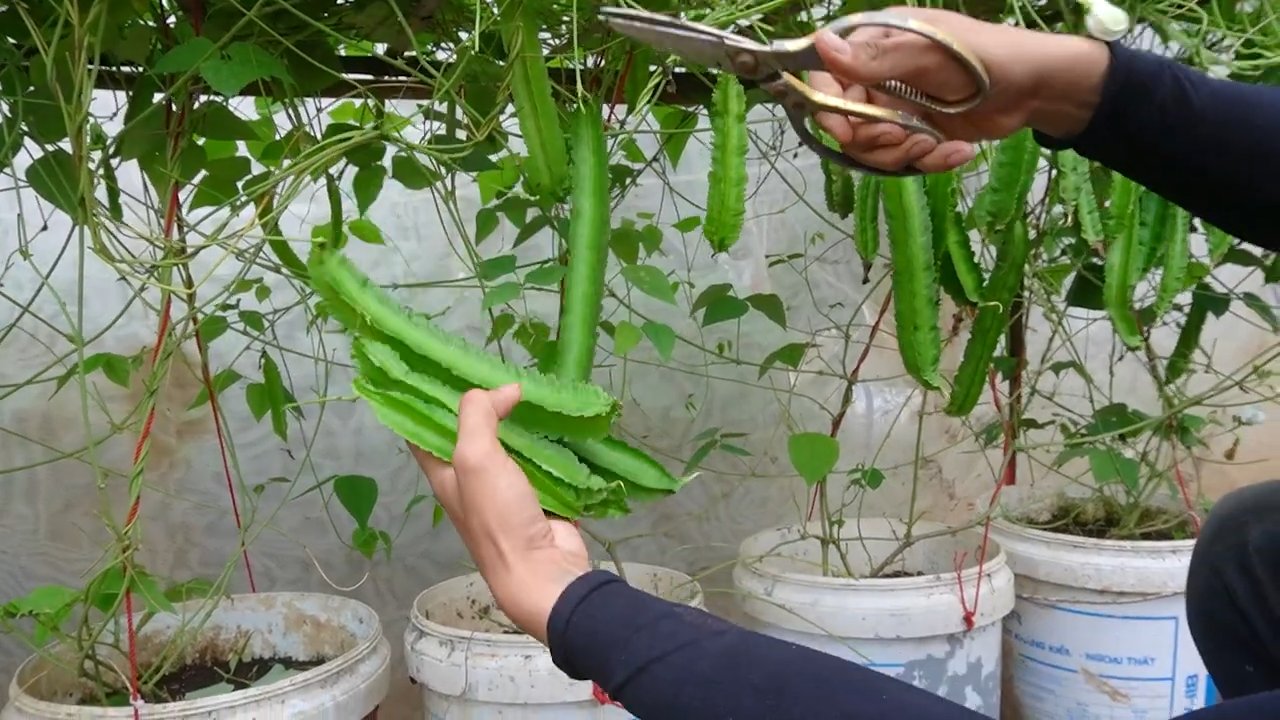
1. Harvesting Pods: Harvest the pods when they are young and tender, usually about 6-8 inches long. The pods should be firm and snap easily. Regular harvesting encourages continued pod production.
2. Harvesting Leaves: Harvest the leaves when they are young and tender. They can be used in salads or cooked like spinach.
3. Harvesting Flowers: Harvest the flowers when they are fully open. They can be used in salads or as a garnish.
4. Harvesting Roots: Harvest the roots after the plant has finished producing pods. The roots can be cooked like potatoes.
5. Harvesting Seeds: Allow some pods to mature and dry on the vine to collect seeds for future planting.
Troubleshooting
Even with the best care, you might encounter some challenges while growing winged beans. Here are some common problems and how to address them:
* Poor Germination: If your seeds aren’t germinating, make sure the soil is warm enough and consistently moist. You can also try scarifying the seeds (gently scratching the surface) before planting to improve germination rates.
* Yellowing Leaves: Yellowing leaves can indicate a nutrient deficiency. Fertilize with a balanced organic fertilizer to provide essential nutrients.
* Pest Infestations: Monitor the plants for pests and take action promptly. Use organic pest control methods to control infestations.
* Lack of Pod Production: Lack of pod production can be caused by insufficient sunlight, poor soil fertility, or inadequate watering. Make sure the plants are getting enough sunlight, fertilize regularly, and water consistently.
Winged Bean Recipes
Now that you’ve harvested your winged beans, it’s time to enjoy them! Here are a few simple recipes to get you started:
* Winged Bean Stir-Fry: Sauté sliced winged bean pods with garlic, ginger, and your favorite vegetables. Add soy sauce or tamari for flavor.
* Winged Bean Salad: Blanch the winged bean pods and toss them with a vinaigrette dressing. Add cherry tomatoes, cucumbers, and feta cheese for a refreshing salad.
* Winged Bean Curry: Cook the winged bean pods in a coconut milk-based curry with spices like turmeric, cumin, and coriander.
* Winged Bean Soup: Add diced winged bean pods to your favorite vegetable soup recipe.
Tips for Success
Here are a few extra tips to help you succeed with growing winged beans:
* Choose the Right Variety: Select a variety that is well-suited to your climate and growing conditions.
* Provide Adequate Support: Winged beans are vigorous climbers, so make sure they have a sturdy trellis or support structure.
* Water Regularly: Winged
Conclusion
So, there you have it! Growing winged beans doesn’t have to be an intimidating or expensive endeavor. By embracing this simple DIY trick, you can unlock the potential of your garden and enjoy a bountiful harvest of these nutritious and versatile legumes. We’ve shown you how to create a thriving environment for your winged beans, maximizing their growth and ensuring a delicious yield.
Why is this DIY approach a must-try? Because it’s cost-effective, environmentally friendly, and empowers you to take control of your food source. Forget relying solely on store-bought options; with a little ingenuity and effort, you can cultivate your own supply of fresh, organic winged beans right in your backyard. This method is particularly beneficial for those with limited space, as the vertical growing structure we discussed allows you to maximize your garden’s potential. Plus, the satisfaction of harvesting your own home-grown produce is simply unparalleled.
But don’t stop there! Feel free to experiment with variations to suit your specific needs and preferences. Consider using different types of climbing structures, such as trellises made from bamboo or repurposed materials. You can also explore companion planting to further enhance the growth of your winged beans. Marigolds, for instance, can help deter pests, while basil can improve the overall flavor of the beans. Another variation is to try different soil amendments to optimize the soil’s nutrient content. Adding compost or well-rotted manure can provide your winged beans with the essential nutrients they need to thrive.
Remember, the key to success lies in consistent care and attention. Regularly monitor your plants for any signs of pests or diseases, and provide them with adequate water and sunlight. With a little patience and dedication, you’ll be rewarded with a plentiful harvest of delicious and nutritious winged beans.
We are confident that this DIY trick will transform your gardening experience and allow you to enjoy the many benefits of growing your own winged beans. Don’t hesitate to give it a try! We encourage you to share your experiences with us and the wider gardening community. Let us know what worked well for you, what challenges you encountered, and any tips or tricks you discovered along the way. Your feedback will help us refine this method and make it even more accessible to others.
So, grab your gardening gloves, gather your supplies, and get ready to embark on a rewarding journey of growing your own winged beans. We can’t wait to hear about your success! Happy gardening!
Frequently Asked Questions (FAQ)
What exactly are winged beans, and why should I grow them?
Winged beans (Psophocarpus tetragonolobus) are a legume native to Southeast Asia. They are incredibly versatile, with almost every part of the plant being edible, including the pods, beans, leaves, flowers, and tubers. They are also highly nutritious, packed with protein, vitamins, and minerals. Growing your own winged beans ensures a fresh, organic supply of this superfood, and it’s a rewarding gardening experience. Plus, the plant itself is quite beautiful, adding an aesthetic appeal to your garden with its vibrant flowers and climbing vines.
How much sunlight do winged beans need?
Winged beans thrive in full sun, requiring at least 6-8 hours of direct sunlight per day. Insufficient sunlight can lead to stunted growth and reduced pod production. Choose a location in your garden that receives ample sunlight throughout the day. If you live in a particularly hot climate, providing some afternoon shade can help prevent the plants from overheating.
What type of soil is best for growing winged beans?
Winged beans prefer well-draining soil that is rich in organic matter. Amend your soil with compost or well-rotted manure before planting to improve its fertility and drainage. A slightly acidic to neutral soil pH (around 6.0 to 7.0) is ideal. Avoid heavy clay soils, as they can become waterlogged and hinder root development. If you have clay soil, consider growing your winged beans in raised beds or containers with a well-draining potting mix.
How often should I water my winged beans?
Water your winged beans regularly, especially during hot and dry periods. Keep the soil consistently moist, but avoid overwatering, which can lead to root rot. Water deeply at the base of the plant, rather than overhead, to prevent fungal diseases. Mulching around the base of the plants can help retain moisture and suppress weeds.
What kind of support structure do winged beans need?
Winged beans are climbing plants and require a sturdy support structure to grow properly. A trellis, fence, or even a sturdy bamboo pole will work well. The support structure should be at least 6-8 feet tall to accommodate the plant’s vigorous growth. Ensure the structure is strong enough to support the weight of the mature plant and its pods.
When is the best time to plant winged beans?
Winged beans are warm-season crops and should be planted after the last frost. The ideal soil temperature for germination is between 70°F and 85°F (21°C and 29°C). In cooler climates, you can start seeds indoors 4-6 weeks before the last frost and transplant them outdoors once the weather warms up.
How long does it take for winged beans to mature?
Winged beans typically take 120-150 days to mature, depending on the variety and growing conditions. You can start harvesting the pods when they are young and tender, usually around 6-8 inches long. Regular harvesting encourages the plant to produce more pods.
Are there any common pests or diseases that affect winged beans?
Winged beans are generally resistant to pests and diseases, but they can be susceptible to aphids, spider mites, and fungal diseases like powdery mildew. Regularly inspect your plants for any signs of infestation or disease. Treat any problems promptly with organic pest control methods or fungicides. Good air circulation and proper watering practices can help prevent fungal diseases.
Can I grow winged beans in containers?
Yes, you can grow winged beans in containers, but you’ll need a large container (at least 15-20 gallons) with good drainage. Use a well-draining potting mix and provide a sturdy support structure for the plant to climb. Container-grown winged beans may require more frequent watering and fertilization than those grown in the ground.
How do I harvest and store winged beans?
Harvest the pods when they are young and tender, before the beans inside become too large. You can also harvest the leaves, flowers, and tubers for consumption. Store the pods in the refrigerator for up to a week. For longer storage, you can blanch and freeze the pods. The dried beans can be stored in an airtight container in a cool, dry place.
Can I save seeds from my winged bean plants?
Yes, you can save seeds from your winged bean plants for future planting. Allow some of the pods to mature fully and dry on the plant. Once the pods are dry and brittle, harvest them and extract the seeds. Store the seeds in an airtight container in a cool, dry place. Remember that saved seeds may not always produce plants that are identical to the parent plant, especially if the plants were cross-pollinated.
What are some ways to cook with winged beans?
Winged beans are incredibly versatile and can be used in a variety of dishes. The young pods can be eaten raw in salads or stir-fried, steamed, or boiled. The mature beans can be cooked like other beans and used in soups, stews, and curries. The leaves can be eaten raw or cooked like spinach. The flowers can be added to salads or used as a garnish. The tubers can be boiled, baked, or fried like potatoes. Experiment with different recipes and find your favorite ways to enjoy this nutritious and delicious legume.

Leave a Comment